Friday, December 28, 2012

A Birthday Card


I apologize….this was supposed to be posted a few days ago.


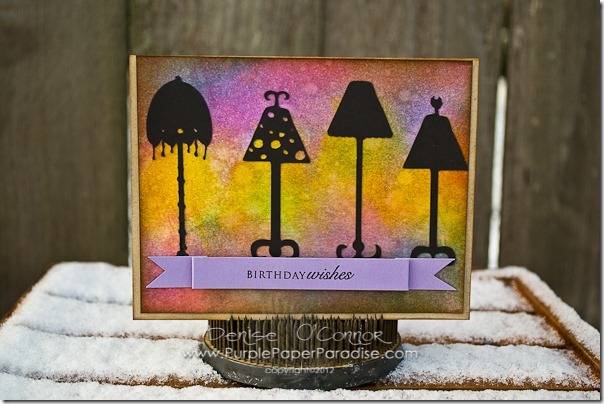
Merry Christmas to all of you!  Or Happy Hanukkah!  Or Happy Kwanzaa!  I wish health and happiness for all of you and your families this holiday season.  Since my family and I celebrate Christmas, I thought that for my post today, I would share with you a birthday card.  After all, Christmas is Jesus Christ’s birthday.  I chose to make a birthday card that could be used all times of the year.  This card is so versatile, it could really be used for anyone.  A good thing to keep in mind especially if you are tasked with making a birthday card for someone who you don’t know all that well.

20121221-DSC_0001

I used several colors of Distress Inks to ink up my background with my ink blending tool.  I then used THIS file from eCraftCentral.com 

image

Cutting this on the eCraft was quick and easy as always!  After cutting these lamps out, I placed them on my background paper and then marked with a pencil the angle of the shades so that I could add in some yellow ink to mimic the glow of the lamps.

Add the banner shape folded back and held in place with foam adhesive, and we are all set.

Happy Holidays!!

Monday, December 17, 2012

Simple Christmas Card


The rush is on!  At this point, most of us have our Christmas cards done and out the door.  However, some of us might not be quite done or maybe we forgot a few people.   Now is the time for simple, simple, and simple.  Today’s card is just that!  I put this baby together in about 5 minutes.

20121213-DSC_0001

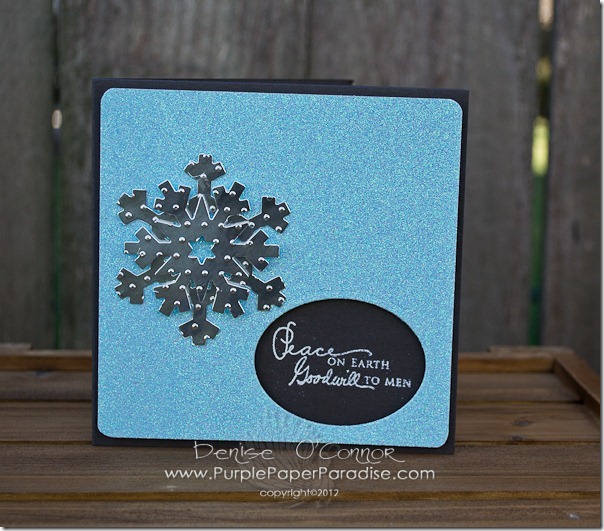
To start, I cut my card base from Papertrey Ink Smoky Shadow cardstock and then I cut a layer of American Crafts glitter paper.  I then rounded the corners and used a Spellbinders oval die to cut a window in the corner.  I then placed the layer on the card base and using heat embossed the sentiment from PTI’s Signature Christmas stamp set in the window.  Then I adhered the layer with foam adhesive and added the snowflakes that were cut with some Spellbinders dies out of Worldwin’s gorgeous foil paper.


That is it for me today…hope you get all of your crafty Christmas projects done in time!

Tuesday, December 11, 2012

Christmas Rustica


Hope all of you are enjoying the holiday season!  We are two weeks away from Christmas Eve which means that it is mad dash crafting time!  Today I am going to share with you my third card in my clean, simple, and easy Christmas cards.  For this card, I wanted to do something that was a bit rustic, so here is what I came up with.
20121128-DSC_0017
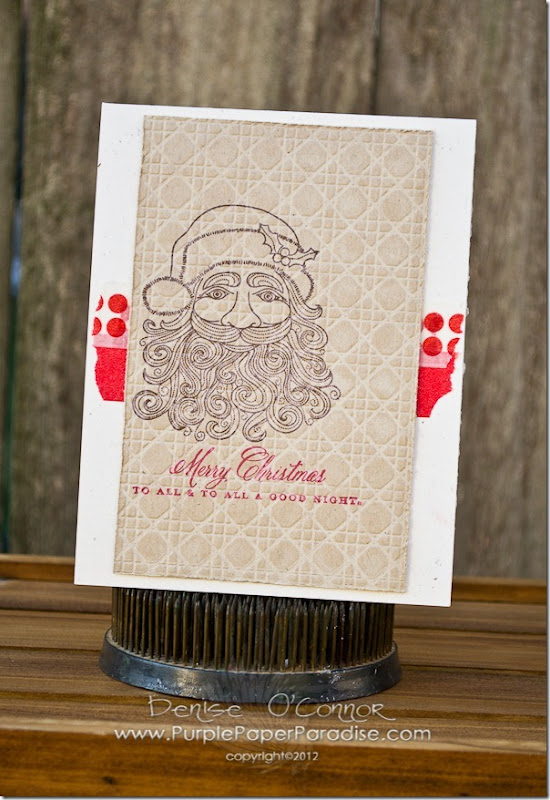
This card is probably the easiest one yet.  My eBosser helped me to achieve a very subtle yet effective look for this card.  I started with a piece of Kraft cardstock and then I stamped the Santa image from Papertrey Ink’s Santa Stationary stamp set in brown ink slightly off center.  I then stamped the sentiment from the same set in red.

Now, it is eBosser time.  I took the Cane Print Impression Plate from PTI and I inked it up with some Vintage Cream ink and ran it through the eBosser.  If you want to learn how to work with this impression plate as well other various products, you can check out my video HERE.
20121128-DSC_0017-2
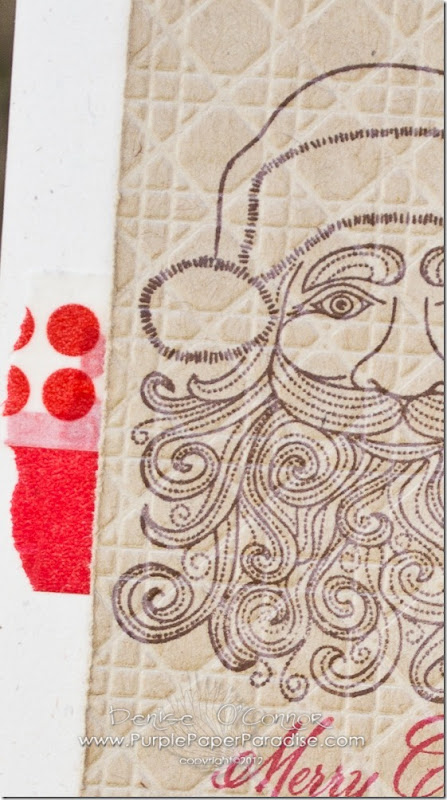
By inking the impression plate before running it through, it gives the kraft paper a nice chalky like finish to it and because I did all of my stamping before running it through, I still have nice clean stamped images. I also added to the rustic look by distressing the edges of this panel. To finish off the card, I adhered a few strips of washi tape from Target onto my Rustic Cream card base and then using the Thin 3D foam square from 3L Scrapbooking Adhesives.  By using this thinner foam adhesive, I still get some nice dimension to the card, but I can still fit it nicely into a standard envelope.  I have not weighed this card, but I am sure that I would not be charged any additional postage which is nice when you may have several of these to send out.

That’s it for me today!  Hope you all have a wonderful week!

Monday, December 3, 2012

This card was SO quick!


So in my quest to make clean, simple and fast cards, I could not resist using some of the great snowflakes that are included on the Jen Allyson Celebrates eCraft SD Design Card.  Of course, I have to do it a little different.

20121114-DSC_0091

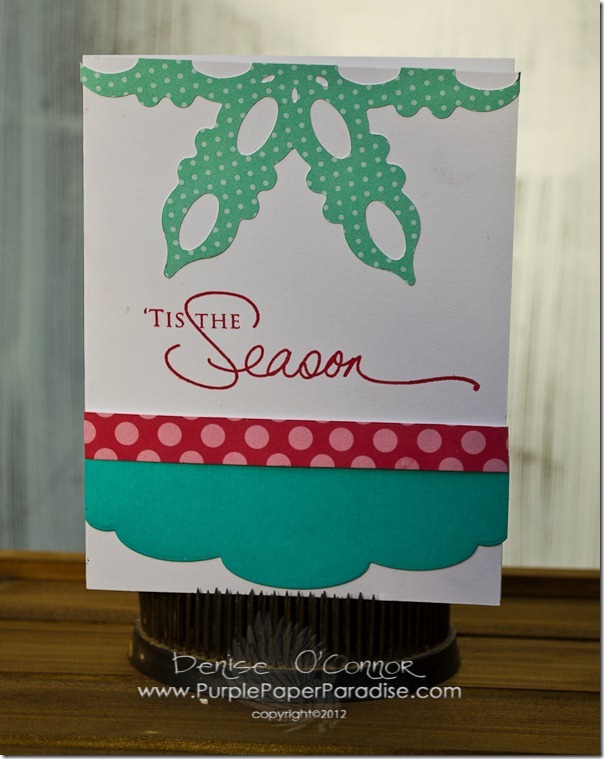
First thing that I did was cut the snowflake at 5” in my eCraft using a pressure setting of 4 with a veggie mat stabilizer.  Then using my paper trimmer, I cut the snowflake in half.   I also cut some Papertrey Ink Hawaiian Shores cardstock with their Edgers #3 dies and then a simple strip of Pure Poppy Large Dot patterned paper.  The large sentiment from Think big Favorites stamped in red ink ties the whole card together.


This card came together so quickly, that you could make several of these in no time flat!  Hope all is going well with your Christmas crafts!  Please share what you are working on and what kinds of special crafts you do for the Christmas season!

Monday, November 26, 2012

Christmas is in the Air


Happy Cyber Monday everyone!  This time of year, it always seems like there is not enough time to get all of our crafting projects done and the one that seems to send me in a panic is my Christmas cards.  I have vowed that I am going to stick to clean and simple cards this year that won’t require nearly so much assembly time.  So with that in mind, I thought that I would devote this month to creating some simple Christmas cards for the Design Team using my eCraft and my eBosser.  So to kick things off, here is an unconventional Christmas card for you.

20121114-DSC_0096

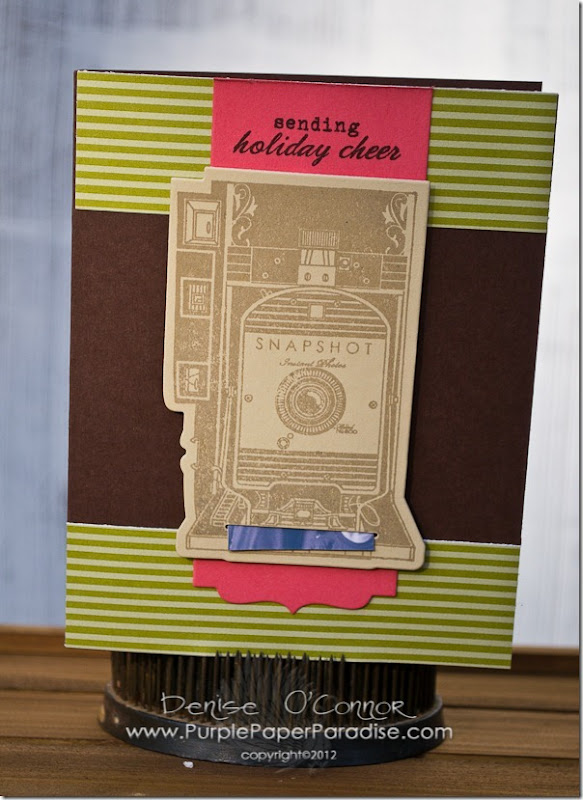
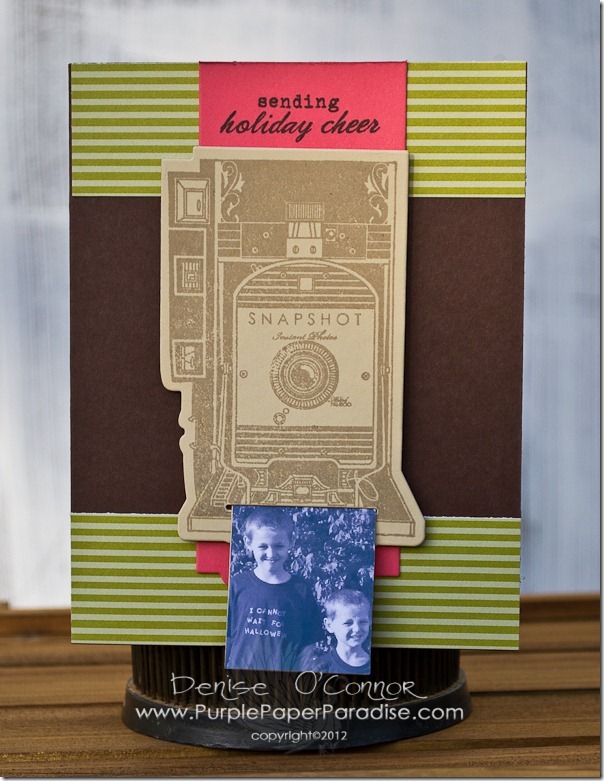
I love an unconventional color scheme for Christmas!  This card was inspired by my love of putting a picture of my kids in the Christmas card and when I saw the Shutterfly stamp set and coordinating dies from Papertrey Ink, I instantly thought of a Christmas card.  Using my eBosser, I cut out the dies on PTI’s Fine Linen cardstock and then stamped the camera image in Classic Kraft ink.  The strips of striped paper along the top and bottom are PTI’s Simply Chartreuse Striped patterned paper and the pink border was created using PTI’s Half and Half dies and Berry Sorbet cardstock.  Now, watch out, here is the cool part of this card…

20121114-DSC_0099

How neat is that?!?!?!  Since I used some unconventional colors for my card, I cannot help but ask what are your favorite Christmas color combos?  Leave me a comment and let me know, and I just may make a Christmas card using your color combo!

Monday, November 19, 2012

Scrapbook Inspiration


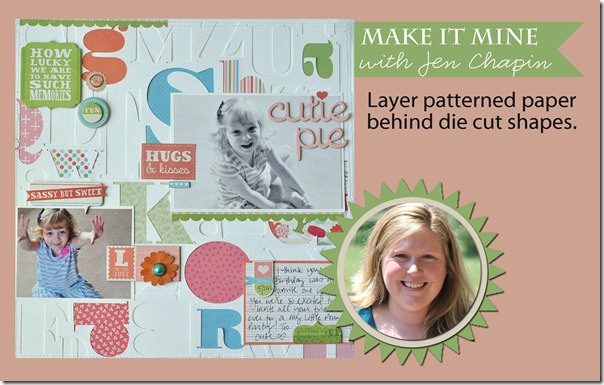
This was a really fun project for me!  This week, our wonderful sponsor Carta Bella asked us to create a card based on a scrapbook layout.  So after spending far too much time looking at so many gorgeous layouts to pick the one that I would emulate, I finally settled on this one from the Carta Bella blog created by Jen Chapin.

Patricia-Roebuck-Blog-Header1

To see how Jen created this masterpiece click HERE to see the full details.  And here is what I created with my inspiration…

20121115-DSC_0103

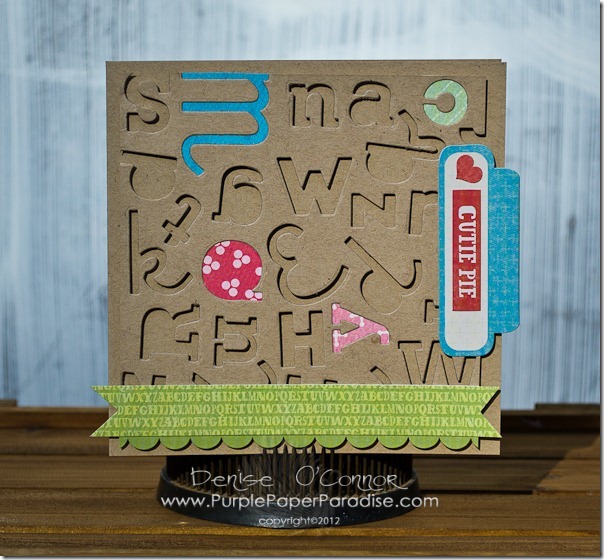
As you can see I was really inspired to make a lettered background like Jen did.  She did hers with an SVG file, but I did mine with the eBosser and my supply of alphabet dies.  I also backed a few of the letters like she did with some of the Carta Bella Alphabet Junction paper.  The scalloped border on the bottom is from the elements that are included in the Alphabet Junction pack and I used another Alphabet Junction paper to create the banner shape.  The Cutie Pie elements were also included in the Alphabet Junction paper pack.


Thanks for stopping by today and make sure that you sign up for the giveaway that Craftwell is doing this week!

Monday, November 12, 2012

More Christmas Tags

Last week, I shared with you how I took some Carta Bella paper from the Paris Girl collection and made some Christmas tags with it.  This week, I thought I would do that again, but this time with some Carta Bella Alphabet Junction paper.

20121031-DSC_0047-1

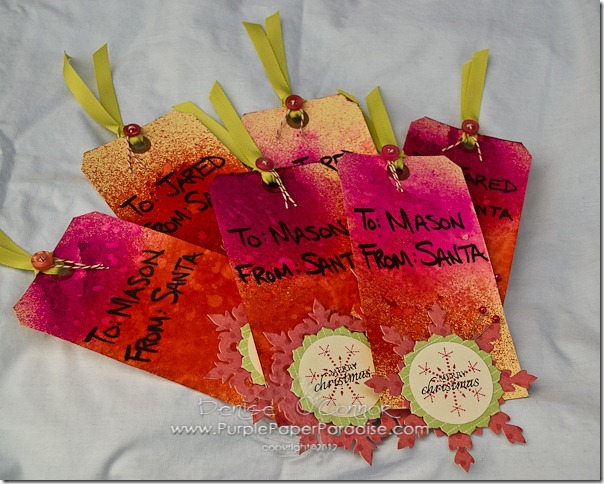
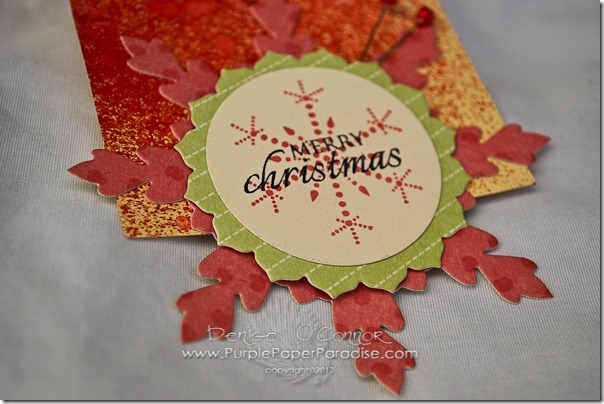
I started with some plain old shipping tags and applied some spray inks in shades of red and pink.  I then flicked some droplets of water on them so that the dye in the ink would react.  While I let those dry out completely, I got to using my eBosser to cut away.  I used Papertrey Ink Damask Snowflake dies to cut the pink and red dot paper from Alphabet Junction.  Then I also cut that pale green paper using PTI Limitless Layers dies.  The cream circle is 1 3/4” so that it coordinates with their Holiday Tag stamp line.  The snowflake stamp was stamped in a pink dye and then the sentiment in black on top.

20121031-DSC_0049-1

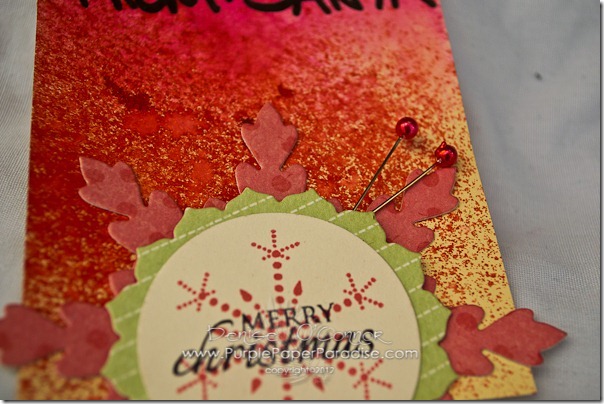
I decided to place my layered snowflakes along the bottom of the tag so that there would be plenty of room to write the “To” and “From” on the top.  I also decided to add a couple of pearlized pins that were colored with a matching Copic marker by inserting them into the foam adhesive in the layered snowflake.

20121031-DSC_0050-1

It really is amazing how some patterned paper that was not designed for Christmas can inspire a Christmas project!

Monday, November 5, 2012

A Paris Christmas?


Yep, it’s that time of year!  It is that time when all of us crafters start our Christmas crafts because we know that if we don’t get it going, we won’t get all of it done before Christmas.  This month, our wonderful sponsor Carta Bella sent us two amazing collections to work with…neither which are Christmas.  Not to worry though!  Just because a collection is not designed for a certain occasion doesn’t mean that you cannot adapt it to work for your occasion.  That is exactly what I did.  I took the gorgeous Paris Girl collection and used it to make some Christmas tags!

20121031-DSC_0044-1

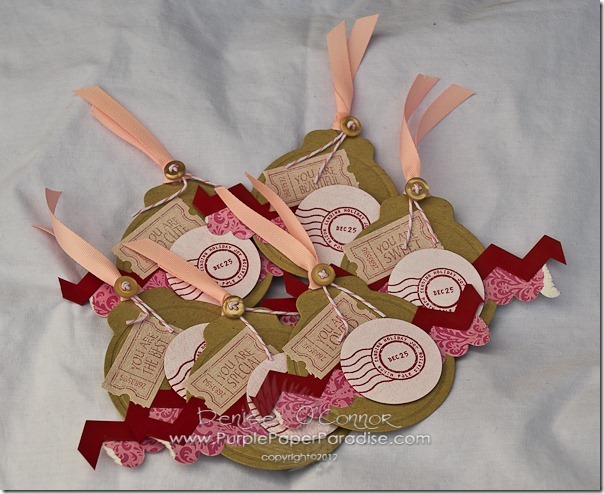
I tend to make a lot of tags at Christmas because I like to give them as gifts, so you just might see some more tags very soon Smile.  For my tags today, I started with the Papertrey Ink Tag Sale #4 die.  This is a great die, that has a beautiful embossed edge.  When you are cutting with this type of die in your eBosser, you may need to experiment.  If your embossed edge is cutting through your paper, then remove your E plate (or shim) and try again.  Each machine is going to be a little different and the type of paper that you are cutting will make a difference.

20121031-DSC_0046-1

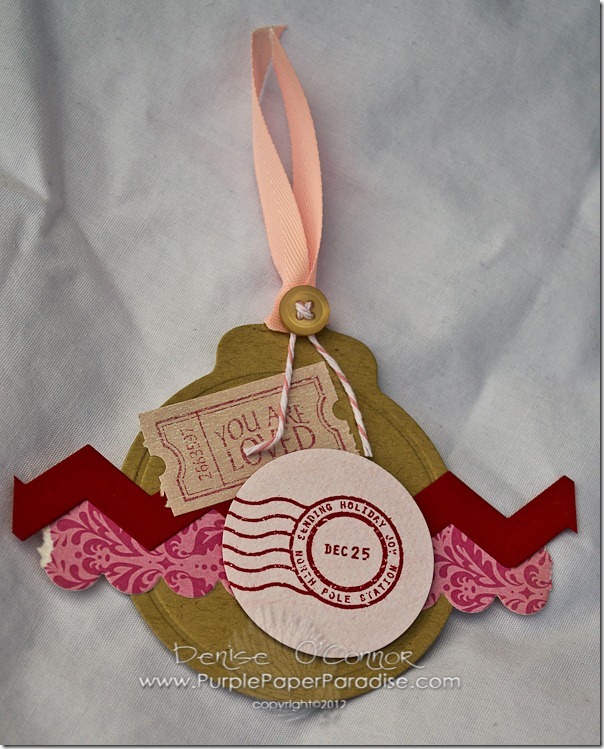
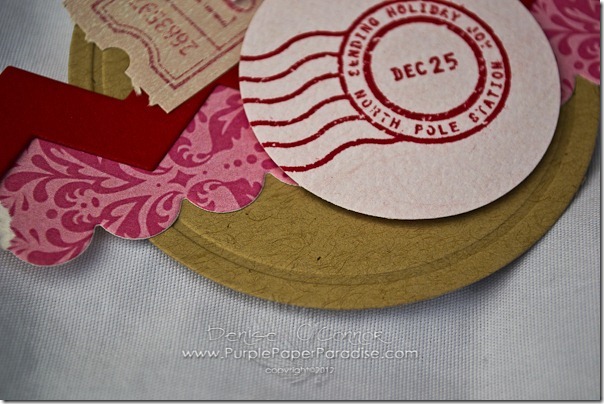
The next thing that I did was cut some gorgeous Paris Girl paper by Carta Bella with the small scalloped die from Papertrey Ink. I purposely tore the edges to add a little bit of organic feeling to it. I also took their Chevron die and cut some red cardstock.  Then using a 1 3/4” circle punch I cut circles from some more Paris Girl paper.  I did a little stamping with some red ink on this paper with the Papertrey Ink 2010 Holiday Tag stamp set.  I also found those beautiful ticket embellishments included with the Carta Bella Paris Girl collection.  A little assembly, some ribbon threaded on the top and topped with a button threaded with twine, and we are done!

20121031-DSC_0042-1

When doing tags like this, it is really easy to do several at once.  I typically do 6 in each design and then I can mix and match them when I give them away as gifts.  Please share, is there anything special that you make to give away to friends, neighbors, teachers, etc.? 

Monday, October 29, 2012

Beautiful Bella!


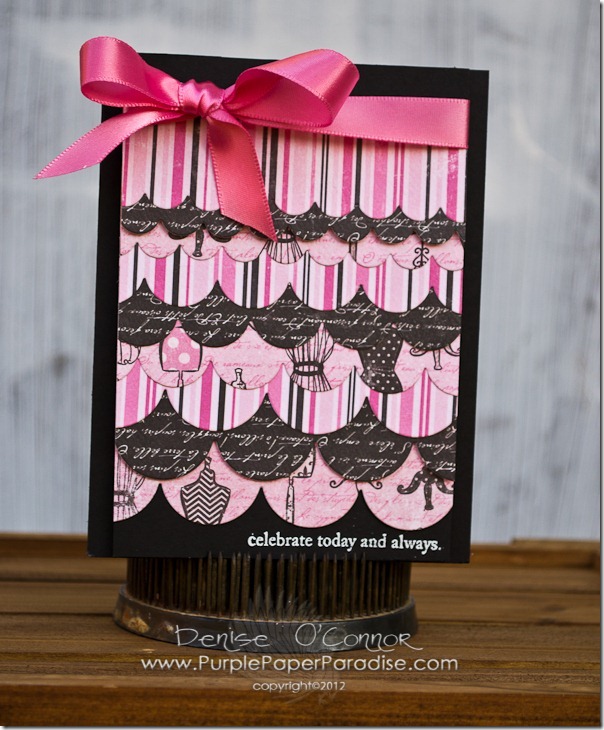
When you have gorgeous papers like Carta Bella…it is so easy to make something stunning!  My project today has very few supplies and it came together so well.  On top of that, depending on the paper that you use, this is a design that could be applied to just about any occasion.  For my card, I used the gorgeous Carta Bella Paris Girl collection.

20121025-DSC_0032-1

To start with, I took a piece of black cardstock and cut it to 5 1/2” x 5 1/2”.  I then cut all those gorgeous scallops.  To do that, I used Papertrey Ink’s scalloped dies in all three sizes, small, medium, and large.  I laid the three dies on my eBosser plates, placed my Carta Bella paper on top of all three dies and cut.  That way I had a small, medium and a large for each piece of patterned paper.  I then started to layer them on the piece of black cardstock, alternating the scallops slightly.  Once I had all the scallops in place, I trimmed the sides off with my heavy duty Carl cutter. My panel is 3 1/2” x 5 1/2” If you don’t have a heavy duty trimmer, you may want to trim as you go along and make your panel the exact size you want.  I did mine larger so that I could pick the section that I liked the best.


Then I took a sentiment from PTI’s Mat Stack 2 collection and heat embossed it with white embossing powder.  I also grabbed some Hibiscus Burst stain ribbon (PTI) and tied a bow around the top edge.  Then using some foam adhesive I adhered the panel to my black card base.  I love the look of tone on tone for this kind of card because it really makes the patterned paper the star of the card.


I hope everyone has a lovely week and that all the kids enjoy their Halloween!

Monday, October 22, 2012

Halloween Treats made easy with Bake and Shrink!


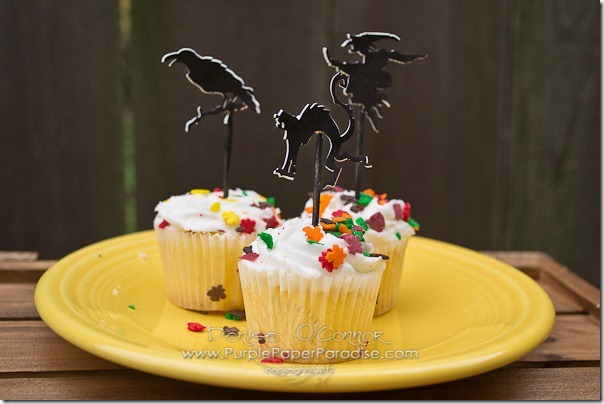
PrintOnIt.com just helped me out of a jam!  I had to bring some treats for a little Halloween get together, and since I am known as the “crafty” mom, I couldn’t just bring something that I picked up real quick at the store.  After all, I have a reputation to keep LOL!  I have been extremely busy lately, so time was critical!  PrintOnIt.com’s Bake and Shrink helped me make the cutest little cupcake toppers that fit right on these mini cupcakes!

20121018-DSC_0019-1


Using some Tim Holtz dies, I die cut out (using my trusty eBosser of course!) a bunch of Halloween images from the Bake and Shrink.  Tim’s dies tend to be fairly large and would never work on cupcakes, but that is the beauty of the Bake and Shrink!  With this material, you can get those images that you love in miniature form and I LOVE how well it maintains the detail.  After cutting, I just smeared some black Archival ink on them and then used my heat tool to shrink them.  While I let them cool off, I took some regular old toothpicks and colored them black with a permanent marker.  Once the Bake and Shrink was cool, I adhered the toothpicks to the back with some liquid adhesive.


While I was putting these in the cupcakes, I discovered something else that is really neat about the Bake and Shrink.  You can easily clean them up with a wet paper towel which means that they are totally re-useable.  Gotta say, loving that!


Be sure to come back to the blog everyday this week to see what the other ladies have created with the amazing products from PrintOnIt.com!

Monday, October 15, 2012

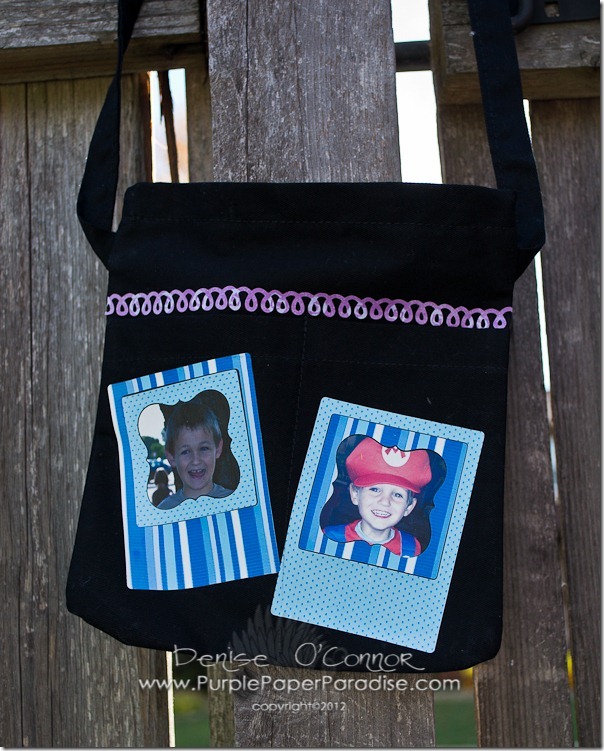
Wearable Art with PrintOnIt.com’s Transfer Paper


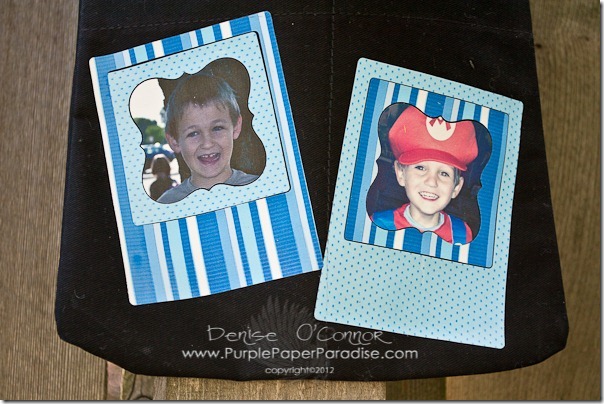
I very rarely make something for myself, but today’s project is just that.  Normally, I carry a purse that is rather large and has room for all sorts of stuff, but sometimes I just want to grab the bare necessities and go.  So, one day at Joann’s, I found this little plain black cloth purse with a couple of front pockets and I knew I could do something with this.  It is just the right size to throw my wallet and phone in there and I can dash off.  Of course, as a mom, I can’t resist doing something with it that reflects how proud I am of my boys.  That instantly brought to mind a die that I got from Papertrey Ink a few months back called Fabulous Frames.  Pair that up with transfer paper from PrintOnIt.com and we have a perfect combination for my new little purse.

20121012-DSC_0013-1

The first thing that I did was print up some blocks of digital paper (and of course some recent pictures of my boys) onto the transfer paper using my inkjet printer.  Then I set to work using my wonderful eBosser and the dies to cut out the the pictures and the frames.  This die actually cuts all three pieces of once, so by mixing and matching the exterior frame with the interior frame, I saved a lot of material.  I also used PTI’s Loop De Loop die on another piece of the transfer paper for the border that is right above the pockets.

20121011-DSC_0011-1

After doing all my die cuts, it was pretty smooth sailing.  I just lined everything up onto the purse and laid a piece of parchment paper on top and ironed everything in place.  Done!


PrintOnIt.com’s transfer paper really makes projects like this a breeze.  I also love that the transfer paper is thin so that it conforms well to your fabric.  If you are thinking of making some wearable art, be sure to check it out!

Tuesday, October 9, 2012

eCraft Special on HSN!


Hi all!


Just wanted to let you know about an upcoming HSN eCraft Special!

HSN10-9-12LARGE

TOMORROW IS THE BIG DAY!!!

Monday, October 8, 2012

The Boys are getting anxious!


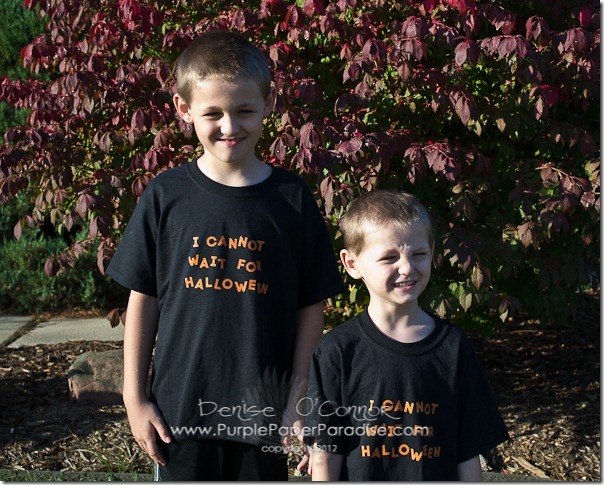
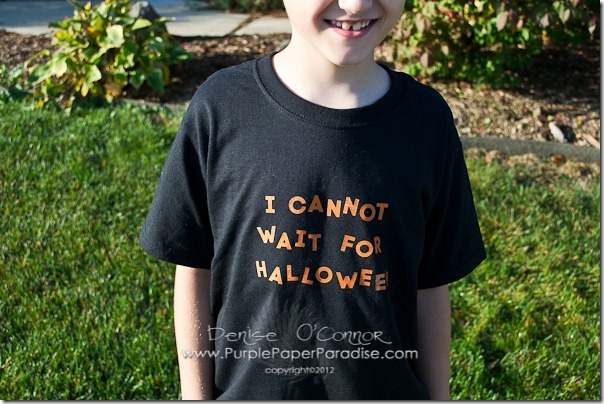
As you all probably know by now, I am the mom of two wonderful boys.  They are my pride and joy and I feel very blessed to be their mom.  They cannot wait for Halloween so I thought why not make them some t-shirts to express that!  Here are my two little munchkins, Jared and Mason, showing off the shirts that I made for them.

20121004-DSC_0003-1

I used some of Cooler Concepts’ Dark t-shirt transfer film to make these and have to say it…love this stuff.  It is nice and thin once ironed on.  Now, I wanted to make these using my eBosser of course (because I am addicted) so here is how I did it.


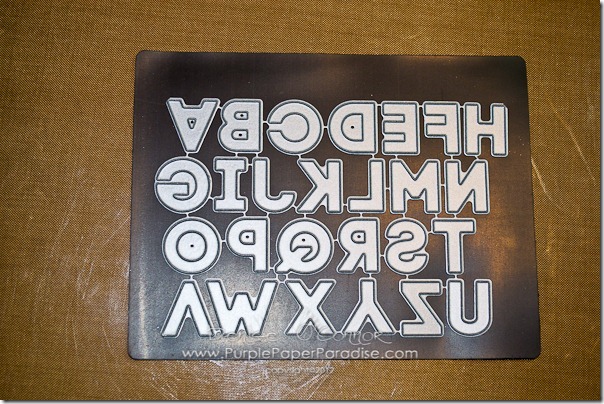
First off, I printed some digital paper onto the transfer film. I used Echo Park’s Apothecary Emporium Collection which you can get digitally at JessicaSprague.com.  Then I turned to a die from Papertrey Ink called Modern Alphabet (Upper Case).  Here is how the die comes.

20121003-DSC_0001-1

It comes on this sheet of magnet and also notice that the letters are attached with a thin piece of metal.  The reason for this is that you can break them apart.  No tools needed , just a little bending back and forth and they come apart.  That means that you can cut only the letters that you need.  When you do that, just put them on the magnet sheet for storage so you don’t lose any of them.


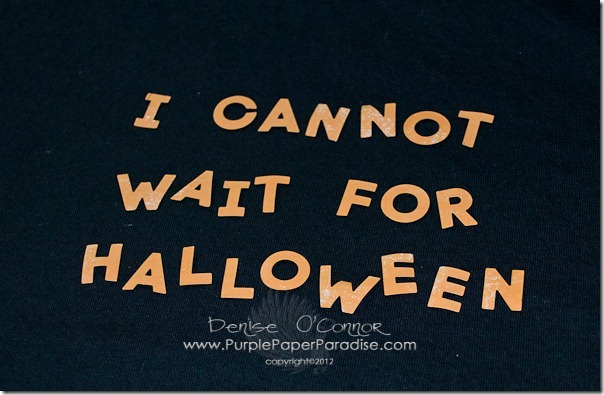
The eBosser cut the transfer paper like butter and in no time at all, I had all my letters ready to iron onto the shirts.  After removing the backing paper from each letter, I laid them out on my shirts.  I decided to go with a wonky line up just to add a little interest.  Here are all the letters laid out.

20121003-DSC_0002-1

All I had to do at this point was place some parchment paper on top and them iron on.  So Easy!  My sons loved them and had to wear them the very next day.  Jared even told me that one of his teachers told him that she loved his shirt.

20121004-DSC_0006-1

Now to survive the next 23 days until Halloween!

Monday, October 1, 2012

A Quick Halloween Decoration


Halloween is coming and my kids can hardly stand it!  Each year, we order costumes extra early (in fact we have had them for a few weeks now) and they begin counting down the days until I start to decorate the house.  They love Halloween probably more than Christmas so what is a mom to do?  Get crafty!


For my project today, I used some awesome shrink film made by Cooler Concepts and my trusty eBosser to whip up a quick decoration.  In fact, it was so quick that I started to think that these would make amazing placeholders or party favors for a Halloween party.

20120927-DSC_0009-1

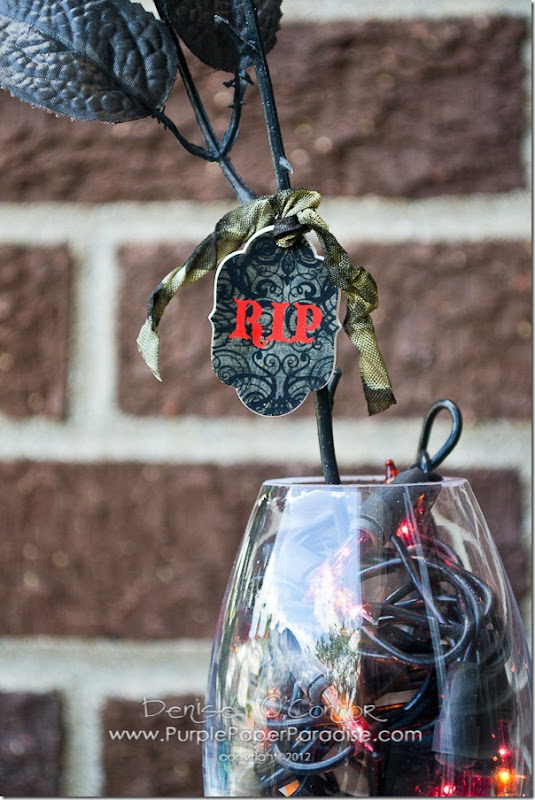
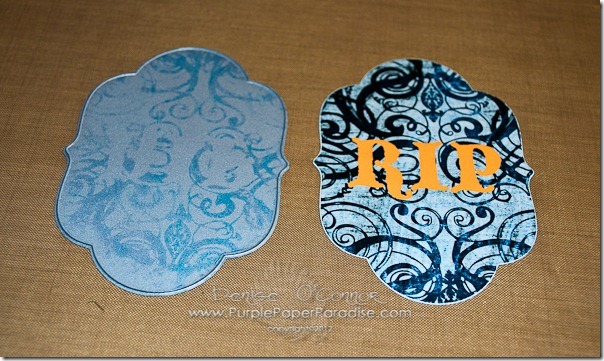
To start with, I printed some digital paper from Lettering Delights (Haunted Halloween) and the RIP sentiment onto my shrink film.  This is pretty easy to do with Photoshop or most photo editing software since the digital paper is a picture file.  Just import your digital paper and then add your text on top.  I used a light orange for the text because once you shrink it down, it will darken.  After letting the shrink film dry (i.e. time to clear off my desk LOL) I set to work.  I used a die from Papertrey Ink called Mat Stack 5 and lined it up so that the sentiment was in place and taped it down so it would not shift.  Then I ran it through my eBosser using the sandwich appropriate for that die.  In this case, the thin metal die sandwich.  It cut just as clean as any paper I have thrown at it.  Love that eBosser!

20120927-DSC_0003-1

You can see here that some of the ink from the printing actually transferred to the die, but no worries…it cleans up easily with a baby wipe and did not affect the look at all. Next, I punched a 5/8” hole in the top and then started to shrink it with my heat gun.

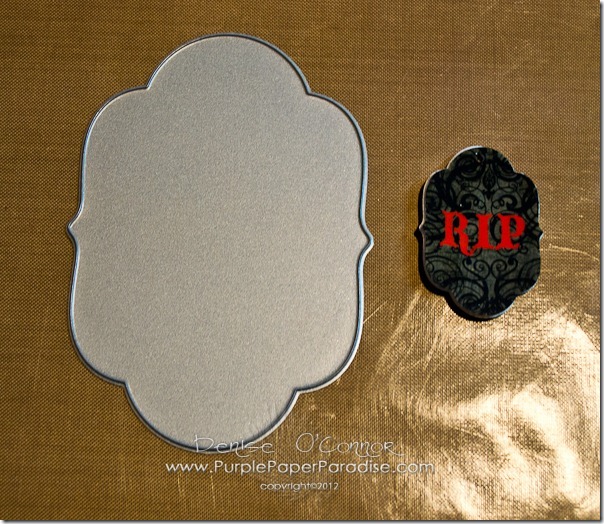
20120927-DSC_0005-1

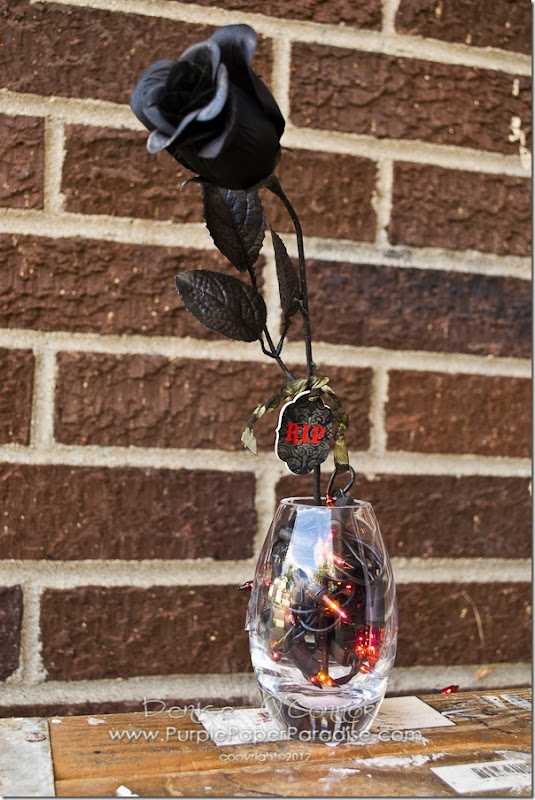
Here you can see how much it shrunk down compared to the die itself.  Next, I threaded my label with some homemade crinkled ribbon and tied it around the black plastic rose (which I found at Target).  I took a strand of Halloween lights and fed as many as it would hold in a glass container and then added my rose.

20120927-DSC_0010-1

I am thinking that I will have to make some more of these, I think they would be awesome lined up on my fireplace mantel.  Anyone care to share some quickie Halloween decorations that you make?  I’d love to hear them!

Monday, September 17, 2012

Can you Smell Autumn in the Air?


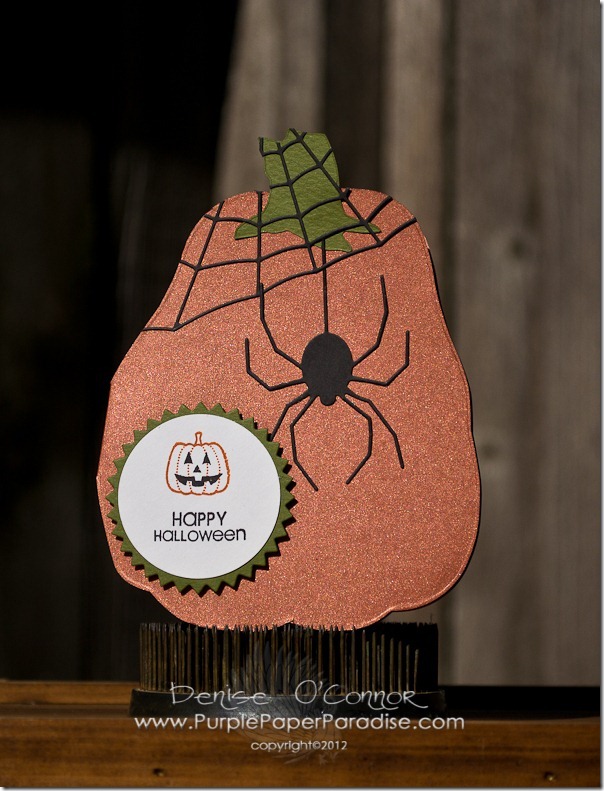
Here in Chicago, the weather can play lots of tricks on us.  For example, a few days ago, the weather got cool making us think summer is over, welcome Fall.  While it was cool out, I started to think of all the things that we like to do in the fall, like eat chili, go to the pumpkin farm, etc.  Not so fast Denise!  You got WAY too ahead of yourself!  Summer came back and the temps got up into the mid 80’s again!  While I was in my “Fall” mood, I made a Halloween card.  I don’t normally do Halloween cards, but I had this idea to make a shaped card with the eBosser using one of my dies and the Tim Holtz Pumpkin Jack die was just beckoning me!

20120912-DSC_0035-1

Making a shaped card with a die is SUPER easy with the eBosser.  I took a piece of Worldwin Petallic’s Copper Ore paper and folded it in half.  I have to say…this paper is PERFECT for my pumpkin!  It is a gorgeous orange color and it has the perfect amount of shimmer on it.  Just love it!  After I folded the paper in half, I got my plates ready for the eBosser and placed my die down and then my paper.  I had the fold in the paper slightly off so that the die did not cut through that edge.  Added my A plate on top and ran it through the eBosser 1 time!  Yes, only once and it cut through both layers perfectly.  I then ran the same die through with some Worldwin CutMates in Olive Oil for the pumpkin stem.  Then I decided to add some more die cuts on this card and cut some Worldwin CutMates in Black Licorice using Memory Box Creepy Web and Creepy Spider dies.  Using my Xyron (love it!) I adhered the web onto the die so that edges were overhanging and then the spider so that he was hanging from the web.  I then used my scissors and snipped off the edges of the web that were overhanging.


After this was done, I cut a 1 3/4” circle from Worldwin CutMates in White Flour and stamped the little pumpkin and the sentiment from Papertrey Ink’s Tag-Its #7 using PTI Canyon Clay ink and True Black ink.  I then cut the pinking circle in Worldwin CutMates Olive Oil using PTI Limitless Layers dies.


My son has already staked claim to this card!  He loves Halloween and can’t wait!

Wednesday, September 12, 2012

Announcements!


The eBosser is going to be on HSN tonight!!!!


Actually for some of us, it will be Thursday morning.  If you are a night owl, be sure to watch because they are going to have limited quantities of the eBosser so they just may sell out really fast!  The show starts at 1 AM EST!!  If you are like me and can barely keep your eyes open after 10, then you may want to set the DVR and your alarm clock for as early as possible in the morning so that you don’t miss out!  Also, the eCraft is going to be on in 4AM EST hour.


Another announcement…I am a scatterbrain!  I completely forgot to announce a winner from my giveaway for the Craftwell Back to School Blog Hop!  So here it goes….the winner of 100 (4”x6”) muslin bags courtesy of State Line Bag Company is…..

image

Congratulations Marg0006…I will be contacting you shortly to get your information to get your goodies to you!


Oh….and if you watch the HSN debut of the eBosser, you just may see a TON of amazing inspiration for Halloween!  The Design Team gals and I created projects for the show and from what I have seen, you all are going to love what you see!  Can you guess what I made for the show?

Monday, September 10, 2012

Going Pink Today


Happy Monday Everyone!  Today I am back with another quick and easy card using my eBosser and the fabulous papers made by Worldwin.  I am loving how these papers can take a very simple card design to the next level!

20120906-DSC_0031-1

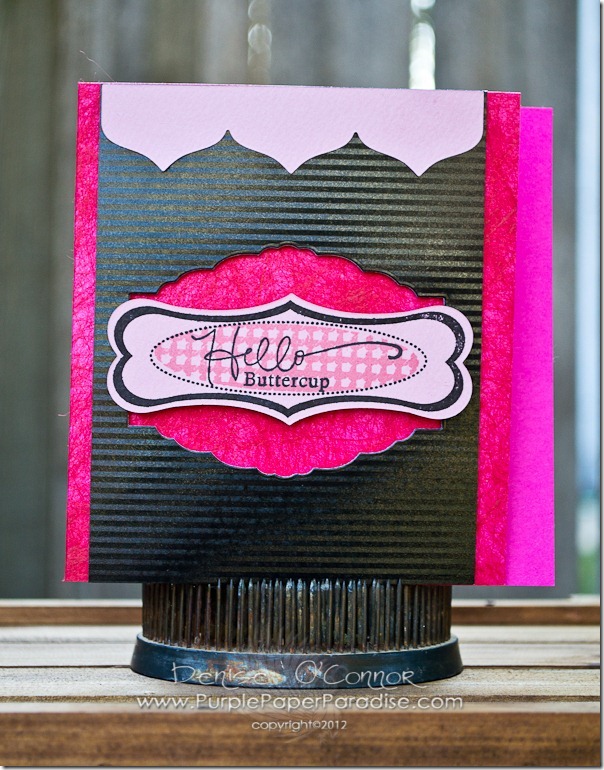
To start, I cut a piece of Worldwin Twist cardstock in pink to 9 1/2” x 5” and then scored at 5”.  This paper is gorgeous with the fibrous texture, but I just had to show you the gorgeous color that is on the other side of this paper, so I made a 5” x 5” card base and then trimmed a piece off the front so that you get a peek of that color on the inside.  The next thing that I did was take a piece of Worldwin’s High Gloss Black Stripe paper and using the Papertrey Ink Celebrations die, I centered it in the middle, and decided to use the negative shape.  Using foam adhesive, I adhered that to the card base.  I decided to really go with the pink color some more, so using PTI’s Banner Borders die, I cut some Worldwin CutMates in Cotton Candy and added that to the very top of the Black Stripe paper.  I also used that paper to cut PTI’s Christmas Label die.  On that die cut, I stamped the frame (in black) and the houndstooth background (in Archival Rose Madder) from their Sweet Spring stamp set and then topped it off with the sentiment from Papertrey Ink’s Signature Greetings II stamp set.


This card took just minutes to conceive and create.  After all, how easy is it to put something together with these gorgeous Worldwin Papers and the eBosser…um pretty darn easy!


ALSO….HSN Update!!!  The eBosser will be making it’s HSN debut on Thursday, September 13th from 1AM EST – 2AM EST followed by the eCraft from 2AM EST-3AM EST.

Monday, September 3, 2012

Showing a little love to my eBosser and Worldwin papers


Happy Labor Day everyone!!  The past week or so have been really exciting because eBossers are finding their way into homes from all those lucky enough to have pre-ordered them.  The response has been fantastic!  So many people are LOVING their eBossers!  In honor of all of you, I have a REALLY quick card today for you.  It took me about 10 minutes and it was completely made with the eBosser and Worldwin Papers!

20120830-DSC_0007-1

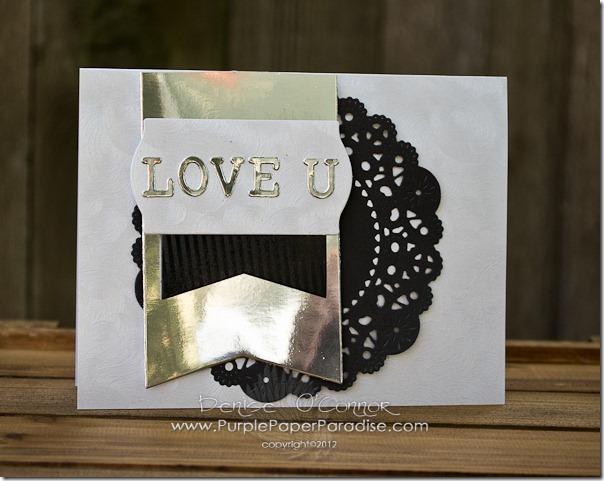
To start with I used Worldwin’s Pearlescent Swirl Cardstock for a cardbase.  The picture really does not do it justice, it is so pretty.  I also cut this same cardstock with Papertrey Ink’s Fillable Frames 11 die.  Then I turned my attention to Worldwin’s High Gloss Silver Foil paper…can you say WOW!  That paper is just amazing.  I cut some it with PTI’s Wine Bottle Tag die (I just cut off the top of it and used only the bottom) and then I cut some letters with my Die-Versions A Little Lime Die.  Then I felt like I needed to get more high gloss in there LOL!  So I cut Worldwin’s High Gloss Black Stripes using PTI’s Fabulous Frames dies.  This paper is so beautiful, you will definitely see me use more of it!  Note to self:  When cutting striped paper, make sure the die is straight and then make sure that it is straight before adhering it to the card.  Smacking my forehead right now!  To make the card complete thought, I had to cut some of my favorite cardstock…Worldwin’s Cut Mates in Black Licorice with PTI’s Parisian Doily Die. 


Have you gotten an eBosser yet?  If not, be sure to check out the eBosser’s debut on HSN September 13th! 

Monday, August 27, 2012

Back 2 School Blog Hop


Hi everyone!!!  Welcome to the Back 2 School Blog Hop!!  If you came here from Cassie’s Blog….you are in the right place!  If you just happened upon the Blog Hop, please start over at Cassie’s Blog so that you don’t miss out.  There are giveaways along the way and Craftwell is giving away an eCraft Machine!!


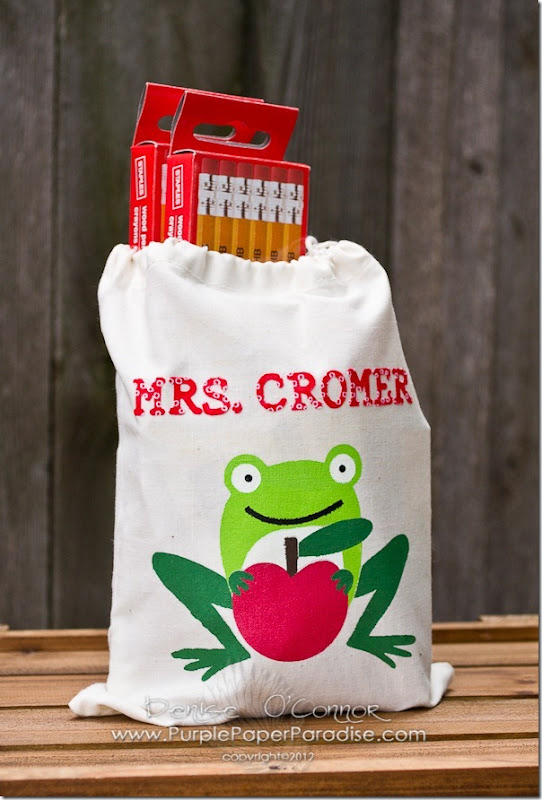
When I get my boys ready to go back to school, we always come up with a little gift to give the teacher to welcome him or her back as well.  Usually we like to include some school supplies because teachers can’t seem to get enough school supplies!  A couple of weeks ago, I was contacted by State Line Bag Company and they asked me to try out some of their new Premium Muslin bags.  I just knew that these would be perfect for my teacher gift.  These bags are perfect for packaging so many kinds of things.  They are made from a high quality muslin and come in lots of different sizes.


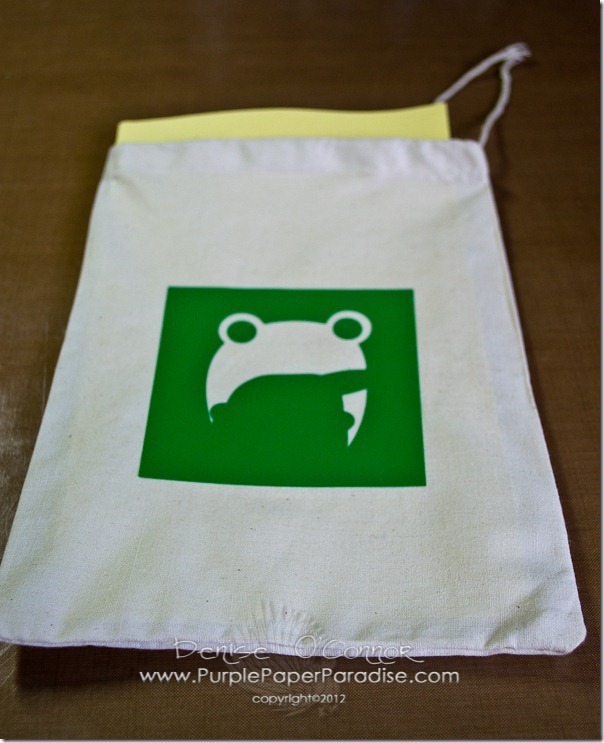
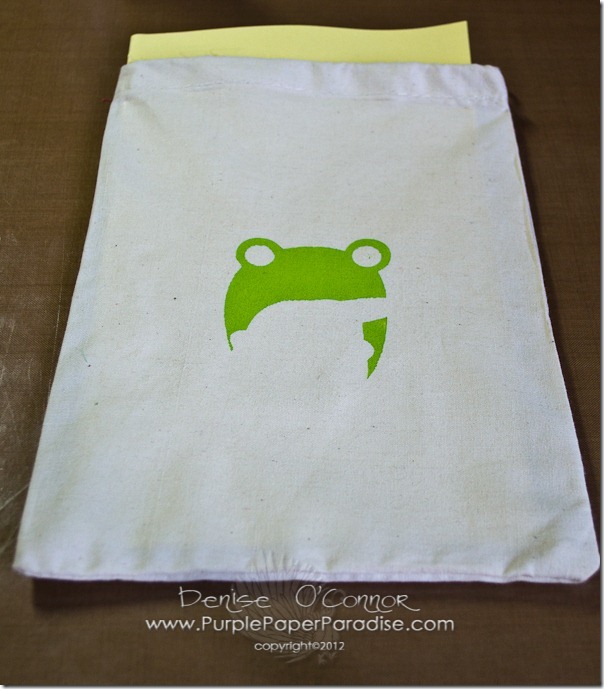
To start my project, I turned to a Lettering Delights Cut Its Set called Toad-ally School.  I selected my image and then using Make the Cut, manipulated it by using the Boolean Join function so that I actually created a stencil of each color.  Then I cut out each one in vinyl.  Next, I took some scrap cardstock and placed it inside the bag.  I applied the first vinyl stencil.

20120819-DSC_0004-1

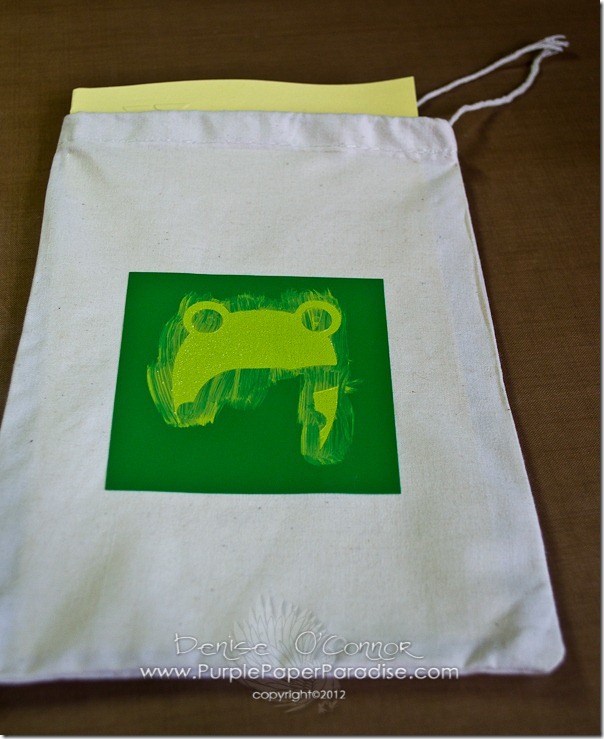
Then I painted it in…

20120819-DSC_0005-1

Then removed the stencil…

20120819-DSC_0006-1

Once the paint is dry, apply the next layer and repeat until all done.

Now, I couldn’t stop there.  I decided to add the teacher’s name to the bag using a thin metal die and fabric and to do that I used my trusty eBosser.  I am guessing that you want to see how I did that, so I made you a little video…

Here is the final project!

20120819-DSC_0011-1


GIVEAWAY TIME!!

Now, on with some fun stuff!  State Line Bag Company has given me some bags to give away!  To win the bags, you must be a follower of my blog and you must leave me a comment below!  That’s it! Easy Peasy!


And you don’t want to miss out on that eCraft giveaway, so make sure you continue on with the hop by going to Kelly’s blog next.  Here is the whole lineup in case you get lost!

Cassie Box http://www.somethingfromcassie.com/

Denise O’Connor: http://purplepaperparadise.blogspot.com/ <—YOU ARE HERE

Kelly Feldman: http://www.wannabeescrapper.blogspot.com/ <—GO HERE NEXT

Kim Gaughan: http://www.craftypinkanchor.blogspot.com/

Carrie Walz http://everydaymoments-carrie.blogspot.com/

KimberlyRae Forde: http://kreationsbykimberlyrae.com/blog/

Aimee Maddern: http://aimeesarmoire.typepad.com/

Jodi Baune: http://dancingintherainjb.blogspot.com/

Debi Tullier: http://fabric-ecraft.blogspot.com/

Lowri McNabb: http://www.papervinenz.com/

Craftwell Blog: http://blog.craftwellusa.com/


Happy Hopping Everyone!

Monday, August 20, 2012

Sweet Teacher Cookie Basket and another eBosser Video


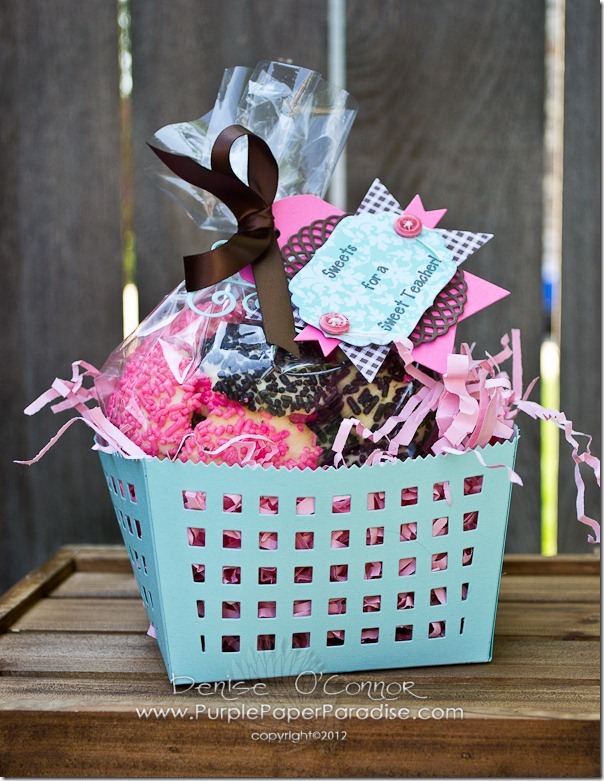
So, I got the Papertrey Ink Berry Basket Die a few months ago and haven’t even used it yet…and I was sitting there thinking what can I make with this that is Back to School?  The problem was that none of the ideas that I thought of really worked with those classic back to school colors.  Then I thought…DUH!!!  I don’t have to use the classic colors if I don’t want to!

20120815-DSC_0001-1

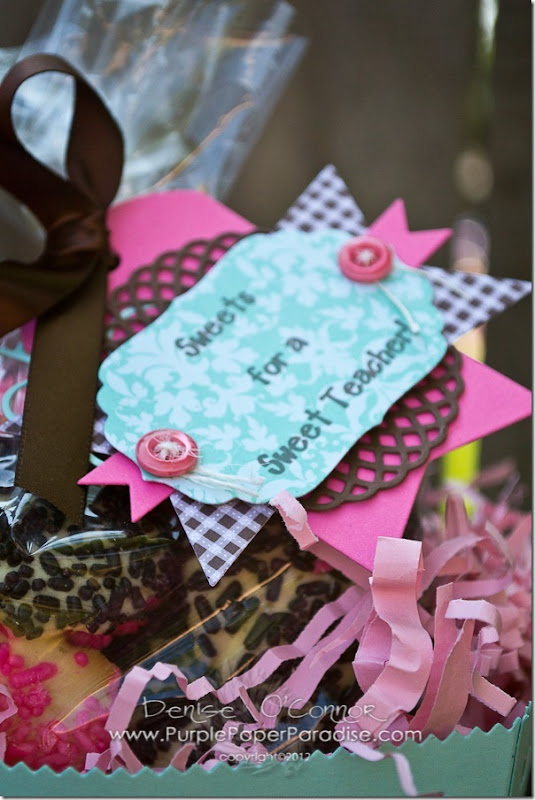
I went with my gut and drove myself over to our neighborhood bakery.  They make these wonderful sprinkled butter cookies and I could just envision a bag of them sitting in that berry basket.  After I bought the cookies (way more than I needed), I went home and got to work.  I cut the Berry Basket die four times from Aqua Mist cardstock and scored and adhered the four sides together to create the basket.  I added some pink shredded paper to the basket and then a clear bag and filled it with the cookies.  I knew that I wanted to make a tag to be tied in with the ribbon that I was using to hold the bag closed.  Again my eBosser came to the rescue!  I cut PTI’s Tag Sale 5 from Hibiscus Burst Cardstock, My Favorite Things Fancy Flourish from Aqua Mist, PTI Doily Details from Dark Chocolate, PTI Ad Sense from Dark Chocolate Gingham pattern paper and PTI Double Ended Banner from Hibiscus Burst. Now for my sentiment…

20120815-DSC_0003-1

For the sentiment, I went through my stash of sentiment stamps and did not find something that I wanted to use.  So that is when I decided that I would just need to create my own.  Using my computer and the Lettering Delights LD Carefree Black font, I printed out my sentiment onto a piece of PTI Aqua Mist Damask patterned paper.  Then I picked out a Spellbinders Label #4 die that I wanted to cut it with.  The question was how to do that so that my sentiment was perfectly lined up.  That is when the experimenting started with different sandwiches in the eBosser.  I finally found one that allowed me to get that cut perfectly lined up and so that is what today’s video is all about!


Now, what to do with these leftover cookies…LOL!!!

Tuesday, August 14, 2012

eBossers are Shipping!!!


Hello Crafty Friends!!


I have gotten confirmation that late last week, Craftwell started shipping eBossers to retailers that placed pre-orders at the CHA Winter 2012 show or sooner.  What this means is that stores may be getting them in stock any day now! 


I have been absolutely loving my eBosser and I can’t wait to hear what all of you think of it!  To celebrate, I have a little list for you!


Untitled-1

5. Can cut all kinds of dies from thin metal dies to the old AccuCut wood dies.

4.The larger platform means I can cut out more dies in one pass.  Great time saver!

3. Love the safety features, don’t have to worry about my kids getting their little hands stuck in there.

2. Auto-eject feature!  Now I don’t have to worry about breaking my machine by using a sandwich that is too thick!

1. This is a no babysitting machine!  Love that I can get it going and then go and do something else while it cuts.  No button to hold down, and no need to catch the platforms when it is done!


This actually was a hard list to come up with!  There are just so many things that I love about the eBosser!  To help you get ready for your eBosser, I thought it would be a good idea to share one more time all the videos to date that I have done on the eBosser.  I do have more videos coming too!  So here we have over 50 minutes of videos all about the eBosser.  Sit back, relax, and dream about what you are going to create with your eBosser!


Monday, August 13, 2012

Back to School Chalkboard Countdown and Another eBosser Video


So we are in big time Back to School mode in our house!  My son Jared is going to be starting 2nd grade and he is a little nervous about it.  Part of the reason why he is so nervous is that for Kindergarten and 1st Grade, he had the same teacher whom he just loved!  Now with 2nd Grade he is about to get a new teacher and he is worried that he won’t like her as much as his last teacher.  To get him prepared for 2nd grade and maybe even excited about it, I decided that we needed to have a Countdown to the first day of school.


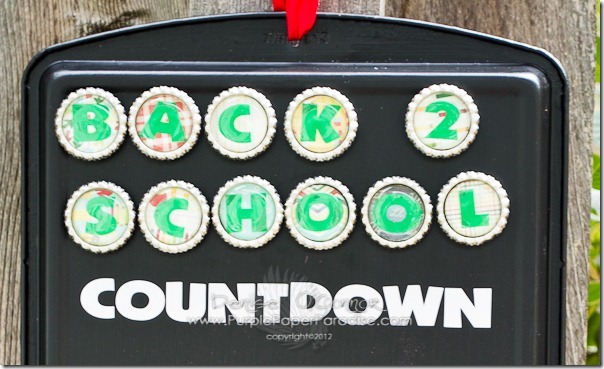
When thinking about how I wanted to do this project, I knew that I wanted to make something that could be used for other occasions as well.  So, my trusty wonderful eBosser helped me to create some bottle cap magnets for the title.  My eCraft has been a little lonely since the eBosser came home, so I had to show my eCraft some love too.  My eCraft cut out the green vinyl for the letters in the bottle caps as well as the “Countdown” out of the white vinyl.

20120808-DSC_0001-1

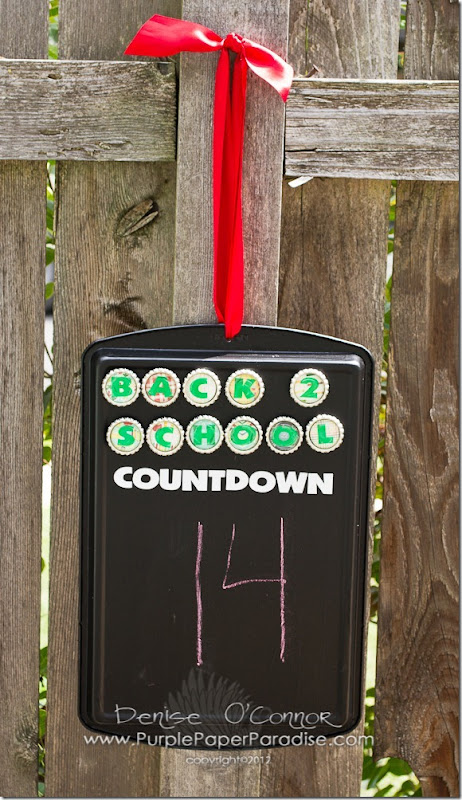
The very first step was to prepare my surface…do you recognize what it was?  It is actually a cookie sheet.  I got a three pack of Chefmate cookie sheets from Target and decided to use the smallest one for this project.  I began by painting the back of the cookie sheet with some Martha Stewart Chalkboard Paint.  While my cookie sheet was drying, I cut out all my vinyl using the Lettering Delights font called LD Mon Cherie.  I set those to the side, and set out to flatten some bottle caps with my eBosser.


I experimented with a couple of sandwiches and finally found one that works great with the No More Shims Embossing Mat made by Scor Pal.  Want to see how it works?  Check out the video below!

After flattening the bottle caps, I used a 1” punch to punch circles from the My Mind’s Eye School Daze 6x6 paper pad.  I added one letter to each circle and then using a little Glossy Accents adhered the paper inside the bottle cap.  I added an epoxy sticker on top of each one and then once that was dry, I adhered a magnet onto the back of the bottle cap.  The cookie sheet is still magnetic through the chalkboard paint.  You just want to make sure the magnet is strong enough for it.  Once my cookie sheet was dry, I added the “Countdown” vinyl onto the chalkboard and then using my Big Bite punched a hole into the Cookie Sheet so that I could attach my ribbon.  I made the ribbon kind of on the long side so that my son can erase the numbers and write in the new one each day.

20120808-DSC_0005-1

I just love that when Halloween comes around, I can make a new set of bottle caps that say Halloween to add on the board.  Also by using the back of the cookie sheet, the Back 2 School bottle caps can be stored on the other side for next year.  So easy! 


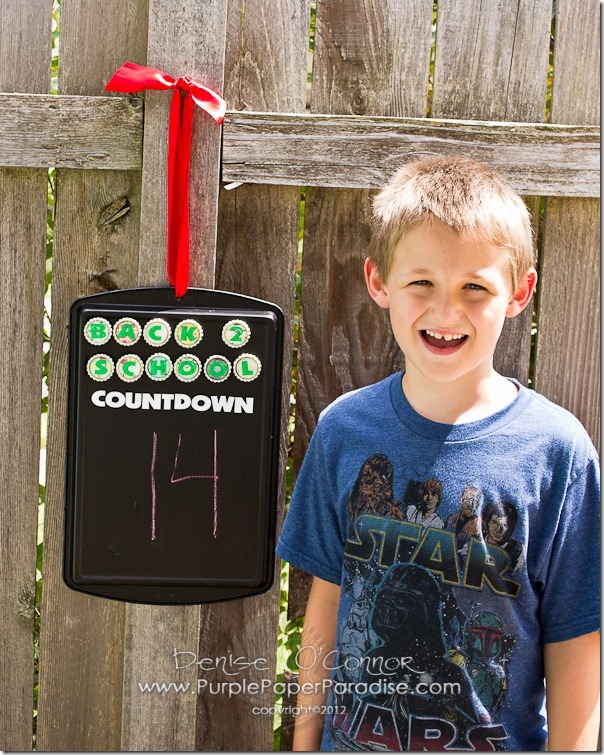
I think this just may work because when I was taking the above pictures, Jared asked me if he could be in the picture with it, and of course I said YES!

20120808-DSC_0007-1

What do you think?  Have I won this Mommy battle? 

Monday, August 6, 2012

eBosser Videos & Back 2 School Project


BOY OH BOY!!!  My eBosser got a work out with my project for today!  Starting today, the Craftwell Design Team is going to be focusing on Back to School projects.  My oldest son starts 2nd grade in a couple of weeks and my youngest starts pre-school next month, so I have lots to get ready for!


Since my eBosser was on overdrive, I went ahead and filmed TWO all new eBosser videos for you!  Before we get to the videos, let’s talk about my project.  Today I made a card to give to one of the teachers.  This is something that I always do, mainly because I want them to understand that I am here to support them.  I always try to build a relationship with the teacher, because if there is something that I can do to help my kids do well in school, I want to be sure to know about it.  The extra little touch makes a difference!

20120801-DSC_0018-1


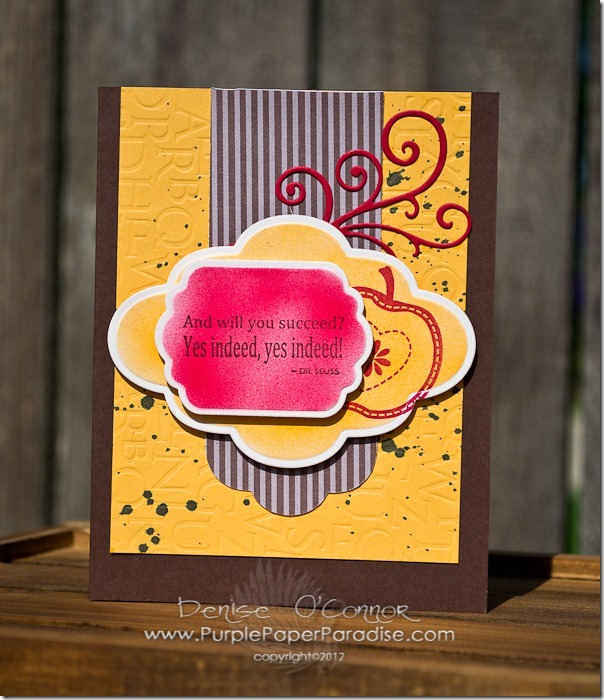
To start with I picked my color scheme.  I decided on Papertrey Ink Dark Chocolate, Summer Sunrise, Pure Poppy and Vintage Cream.  I decided that I wanted to use a Papertrey Ink impression plate called Bookprint for the background so I used that in my eBosser onto a piece of Summer Sunrise cardstock.  The first video that I have for you today is all about embossing with various different materials.  Next I took a piece of Vintage Cream cardstock and using two Spellbinders dies (Labels #6 & 11), I cut and embossed those in the eBosser.  That just so happens to be the subject of my second video.  I then decided to use my Copic markers (R29 & YR15) and air brush those labels to enhance the embossing even more.  I also cut some Pure Poppy cardstock with the My Favorite Things Fancy Flourish die and some Dark Chocolate Striped Pattern Paper with a PTI Half & Half Die.  On the larger Spellbinder die, I stamped an apple from a Unity Stamps Itty Bitty set called To The Core with some Pure Poppy ink.  On the smaller Spellbinder die, I stamped my sentiment from the Taylored Expressions The Places You’ll Go stamp set in Dark Chocolate ink.  The final touch that I threw in right before assembling was to spritz the impressed background with a little Mister Huey’s Warm Calico spray ink.  Put it all together and I have a card that was created using my eBosser in about 20 minutes. 


So, now that I have my card all put together, it is time to watch the videos.  First we have one that is all about embossing!  In this video, I demonstrate embossing with embossing folders by Cuttlebug, Sizzix, and Lifestyle Crafts.  I also show how to use the Papertrey Ink impression plates like I used in my project today as well as using the Fiskars Texture Plates.


Next, we have a video that was requested by several people on demonstrating cutting and embossing with the Spellbinders dies.


Hope you all enjoyed my project and the videos today! 

Monday, July 30, 2012

Another eBosser Video!!!


Happy Monday Crafters!!  I am so excited for today’s post because I have an all-new eBosser video for you!


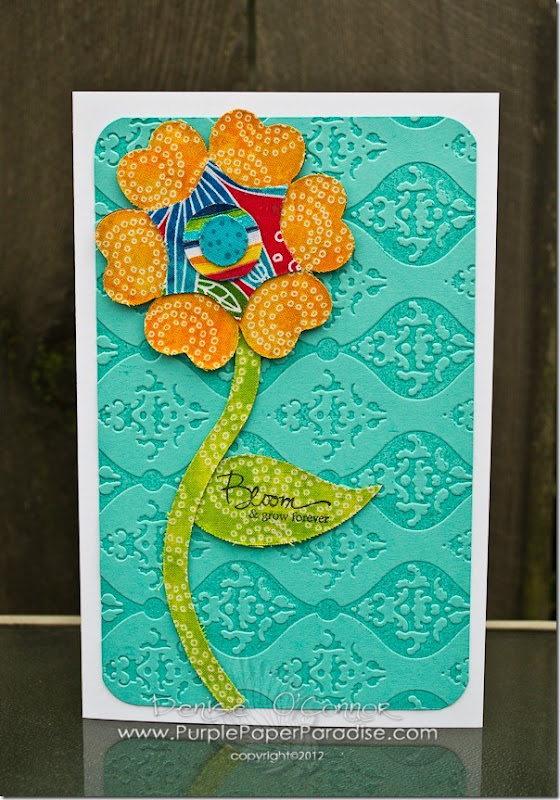
Before we get to the video, let me share with you first the card that I made using fabric cut with the eBosser which is what the video is all about.

20120726-DSC_0014-1

The flower in my card is cut using the AccuQuilt Go Die called Round Flower.  The first thing that I did was cut all my fabric pieces (up to 8 layers at a time) in one pass with the eBosser.  That’s right!  8 Layers!  How awesome is that?


Next, I used that same die to cut out some cereal weight chipboard from the same die and I used some liquid adhesive to adhere the fabric to the chipboard to create this layered, dimensional fabric flower.


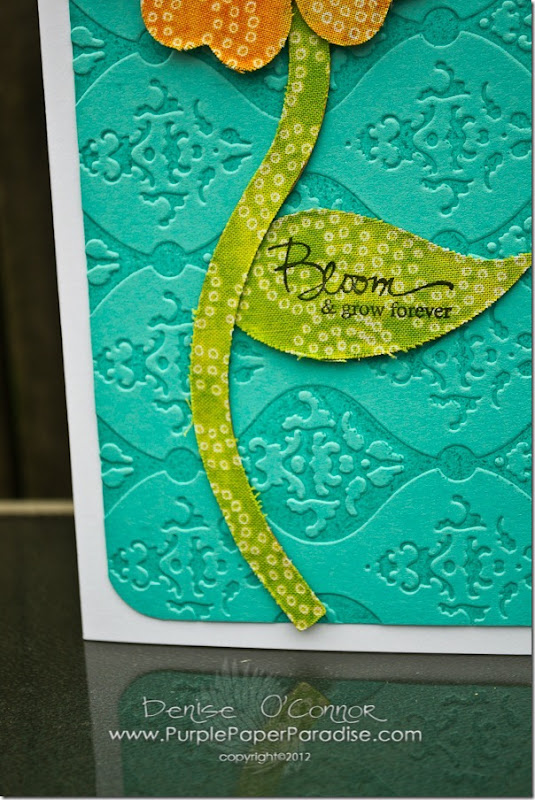
I couldn’t stop there, after all the eBosser was all warmed up and ready to go for me, so I decided to have some fun with embossing!  Using the Craftwell Regency embossing folder, I brayered on some Papertrey Ink Hawaiian Shores ink onto one side of the embossing folder.  I then carefully inserted a piece of Hawaiian Shores cardstock into the folder and ran it through my eBosser.  This technique really adds something to embossing and I just love how it makes this folder look even more vintage.  All that was left to do was to round the corners, add it to a white cardbase and stamp my sentiment on the leaf of the flower.  The sentiment is from Papertrey Ink’s Signature Series: Butterfly stamp set.

20120726-DSC_0016-1

I just love how this card came together and it just goes to show you….the possibilities are endless with the eBosser.


So, now here is the video that I put together for you showing you how to cut 8 layers of fabric in a single pass.  I demonstrate this with two of the most common types of steel rule dies available…AccuQuilt Go dies and Sizzix Bigz dies.  Enjoy the show!


Wednesday, July 25, 2012

More CHA Pictures!


Hi everyone!  Today, I have some more pictures to share with you from CHA.  This time I am focusing on some of the things that I saw at the show that I would LOVE to get my crafty little hands on!  WARNING…lots of pictures so you might want to get comfy with a nice hot cup of coffee or an ice-cold Coke!  Also, sorry about the lighting in these pictures.  The convention center does not have the best lighting LOL!


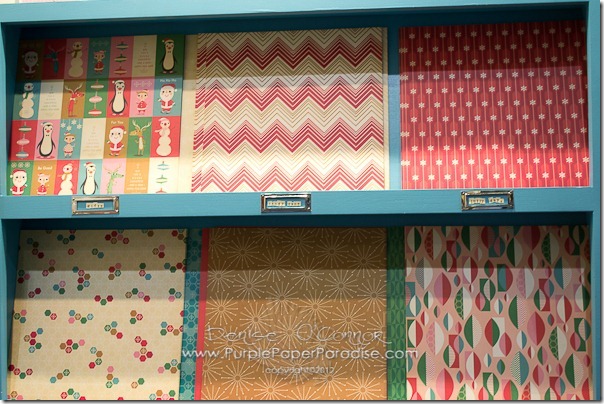
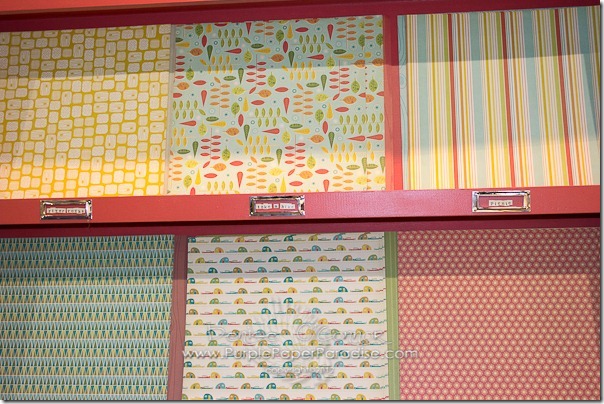
First up, Cosmo Cricket had two paper lines that I just love.  The first is Jolly Days…loving the candy cane chevron paper!
20120718-DSC_0012-1

And the next line is called S’more Love…how cute is that? Since I am a mom with two boys, these papers would be perfect for layouts featuring them or even cards that I want to make for them.
20120718-DSC_0016-1


Tim Holtz always seems to come out with some fabulous new things.  Here is a picture of his new 3D Christmas Trees…each one stained with a different color of Distress.  Not sure what I would use these for, but I think they are just stunning sitting on the shelf like that.

20120718-DSC_0018-1

Also loving the new totes shown here from the District Market line…
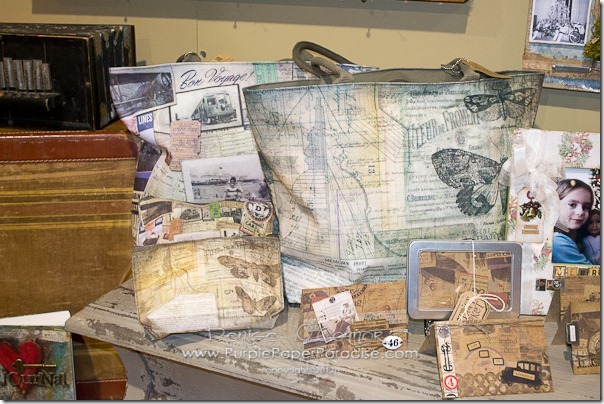
20120718-DSC_0020-1

Kaisercraft definitely made me fall in love with these vintage style stamps.  Totally want them all!
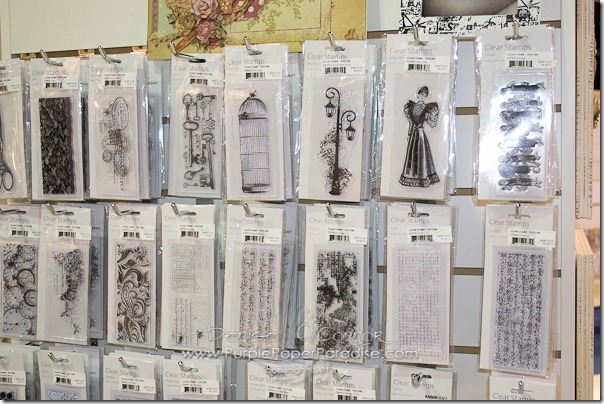
20120718-DSC_0042-1

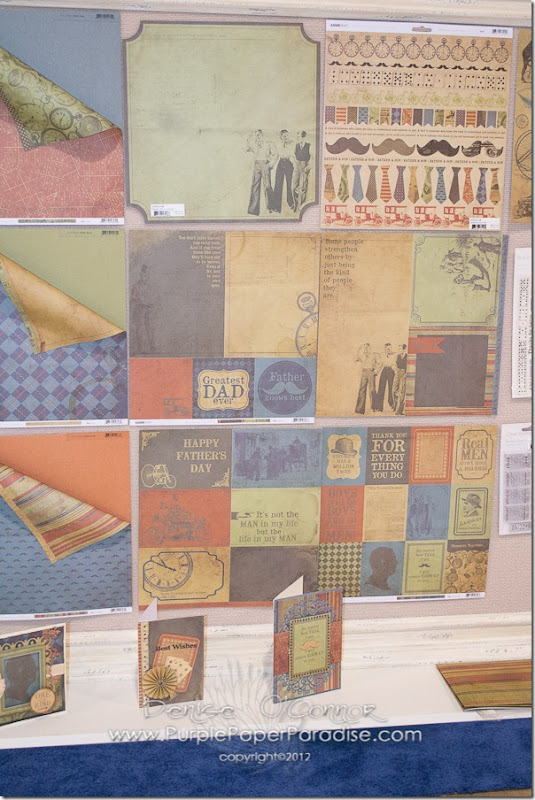
Also love this steampunky paper line from Kaisercraft too!
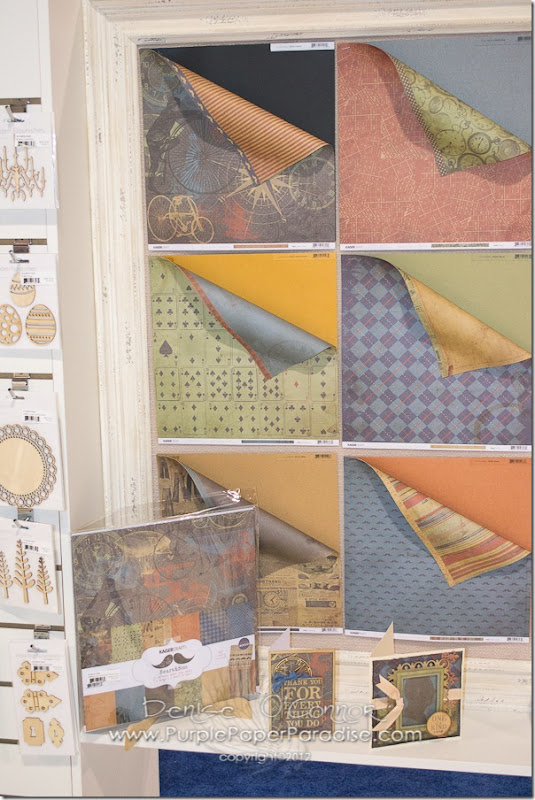
20120718-DSC_0046-1

20120718-DSC_0047-1


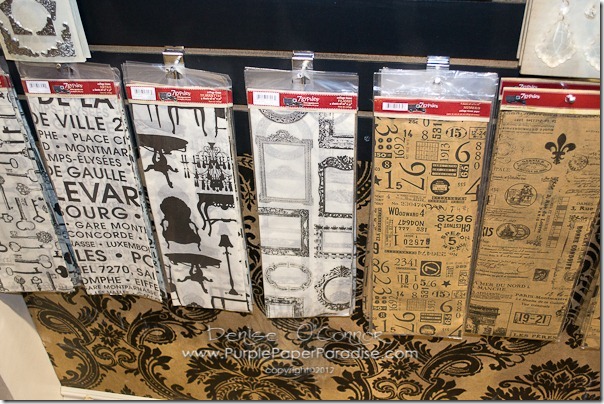
From 7 gypsies…printed tissue paper…LOVE!  Imagine the possibilities!
20120718-DSC_0058-1

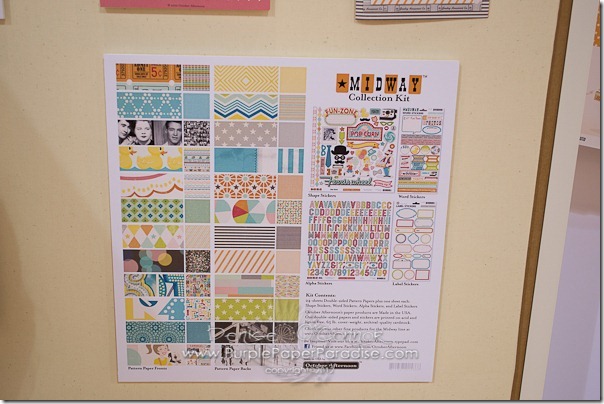
Over at October Afternoon (one of my favorite paper companies), I fell in love with this fun collection called Midway.
20120718-DSC_0061-1

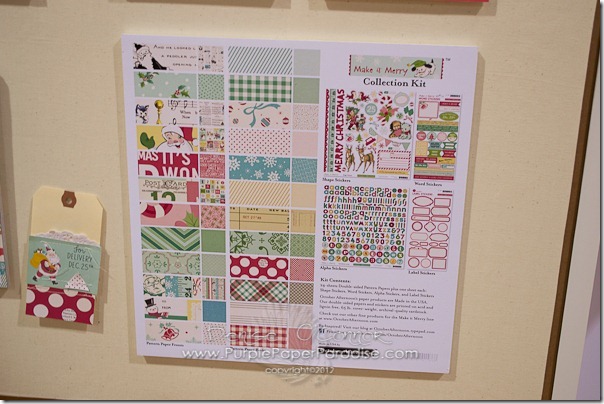
Also loved this Christmas line from them called Make it Merry.
20120718-DSC_0063-1

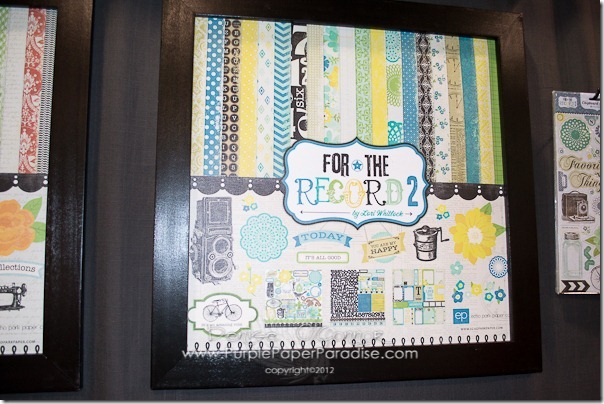
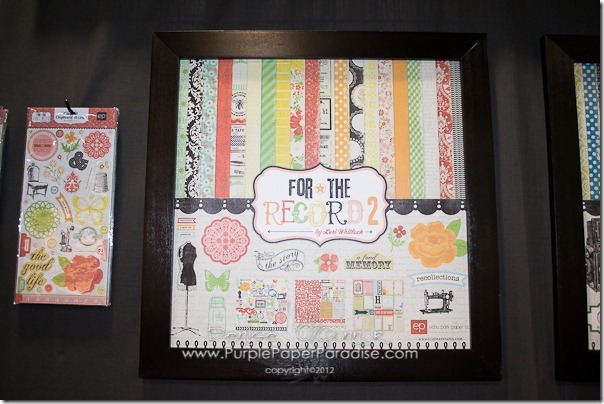
I cannot forget about Echo Park!  They are bringing back some of their most popular lines with twists.  To start off…For the Record 2 done in two different color ways.
20120718-DSC_0066-1

20120718-DSC_0067-1

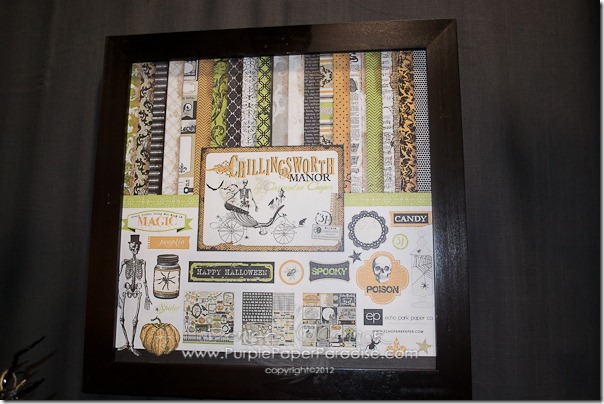
Echo Park had my favorite Halloween paper of the year with Chillingsworth Manor!
20120718-DSC_0068-1

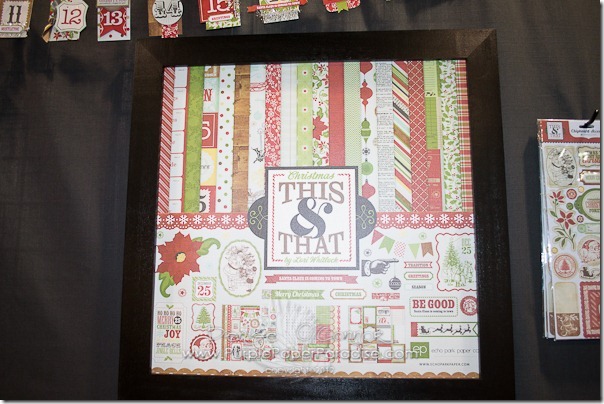
How about a Christmas re-do, with the Christmas This & That collection.
20120718-DSC_0070-1

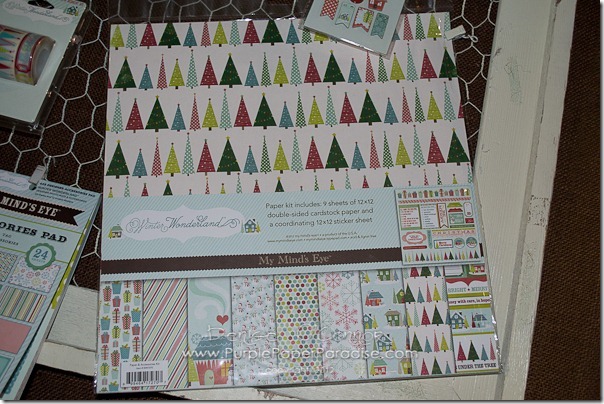
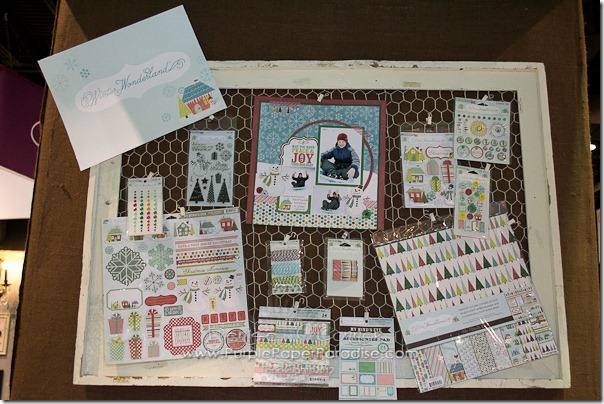
Also loved some of the new papers from My Mind’s Eye!  The Winter Wonderland collection is just beautiful!
20120718-DSC_0114-1

20120718-DSC_0115-1

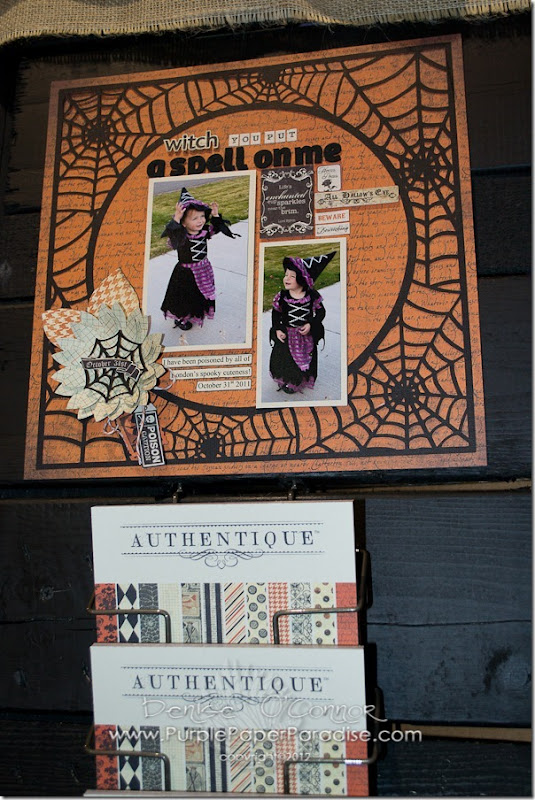
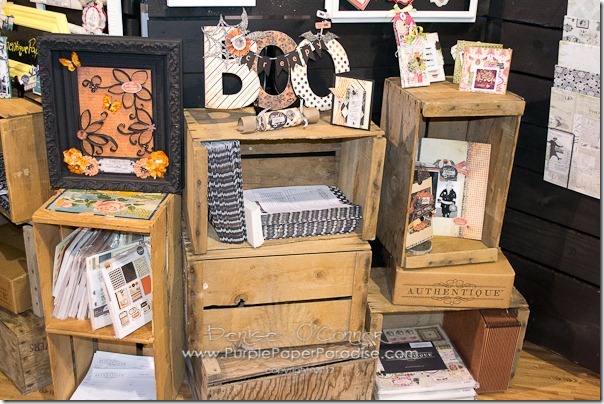
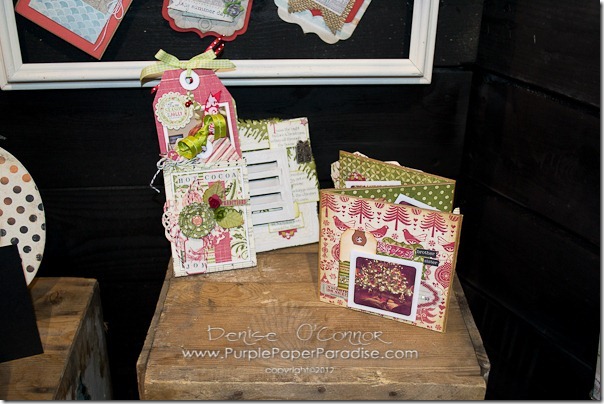
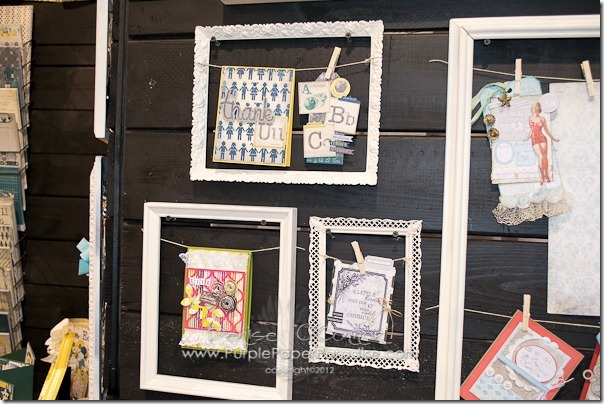
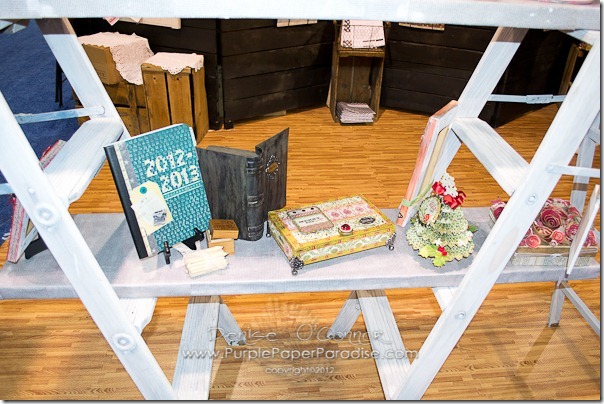
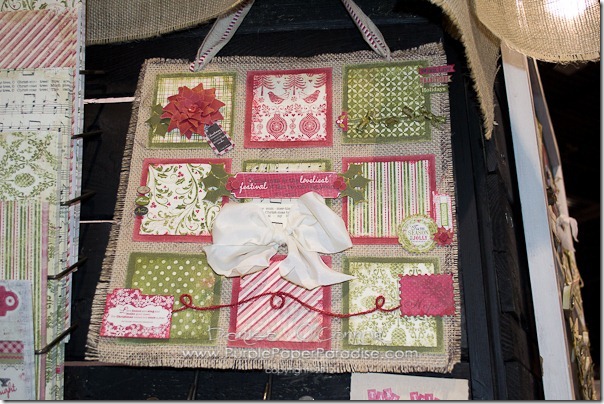
Kim Gaughan from the Craftwell Design Team and the Crafty Pink Anchor blog asked me to check out Authentique and she was right on the money!  They have some gorgeous papers coming out too!
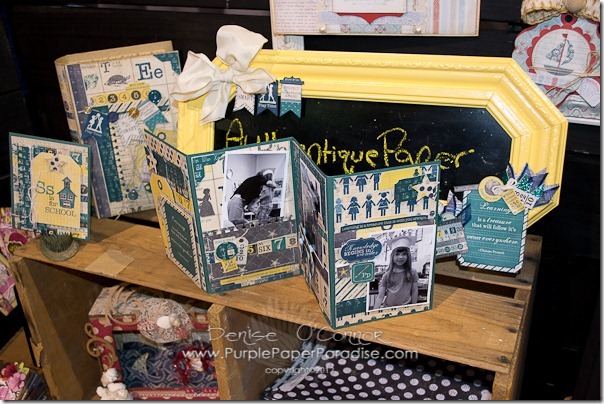
20120718-DSC_0120-1

20120718-DSC_0121-1

20120718-DSC_0122-1

20120718-DSC_0123-1

20120718-DSC_0125-1

20120718-DSC_0128-1

20120718-DSC_0135-1

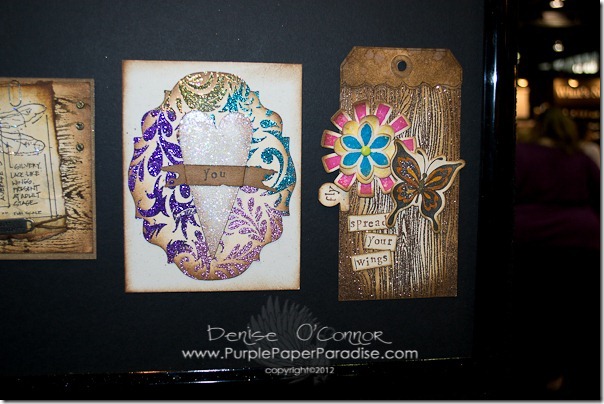
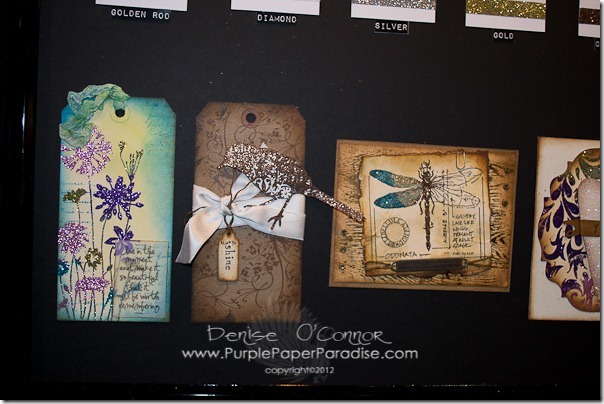
I am not really that into glitter…it can be pretty messy!  I have to say though that I am excited to try the new Stickles Dry Glitter from Ranger.  Take a look at these samples!
20120718-DSC_0117-1

20120718-DSC_0118-1

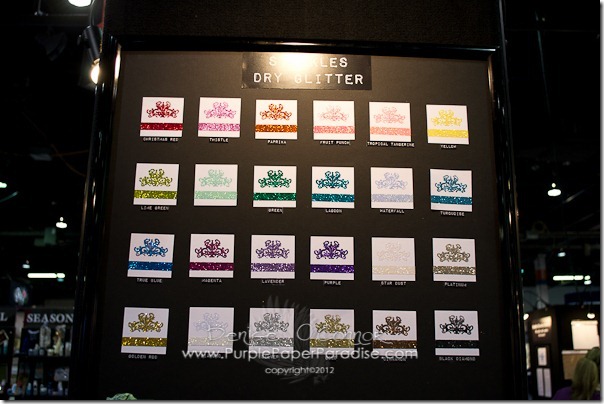
And here is the whole color line…

20120718-DSC_0116-1

That’s it for me today, but I will be back on Monday with another eBosser video!

Related Posts Plugin for WordPress, Blogger...