Tuesday, September 24, 2013

#Fabulous You

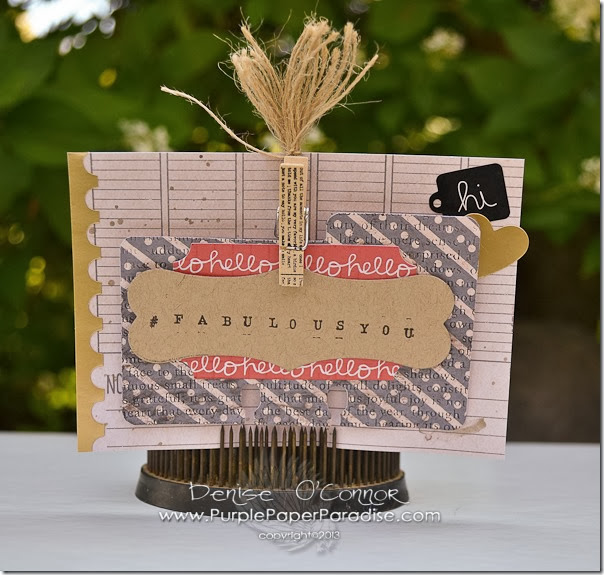
To finish off our month with American Crafts, I decided to make a tag using the super cute Pebbles From Me to you Collection.  What I love about their lines is how well everything works together and this tag is a perfect example of that.  Of course when you add the eBosser by Craftwell into the mix, you can make it even better!  I really wanted to show the versatility of this collection, because it is perfect for mixing modern with vintage, so decided to mix those two styles together to create something that I hoped would work well….and it did.

DSC_0005


To get started, I cut a piece of patterned paper from the From Me to You collection to create the base for my tag.  I used a hole punch to add the hole into the long side of the tag.  Then I spritzed some Perfect Pearls mist in Heirloom Gold onto the tag and added the gold Postage edge sticker that is also from the From Me to You collection.  I then pulled out some coordinating papers from the From Me to You collection and using my eBosser die cut the Rolodex card and the Plaque label.  Then I grabbed some kraft cardstock for the label to hold my sentiment.  Like last week, I used the American Crafts stamp to create my own sentiment and decided to use “#Fabulous You”.  This shows you just how long your sentiment can be and it fit perfectly on that kraft label.  Love how it adds that vintage feel to an obviously modern sentiment.  I then took the Rolodex card die cut and decided to impress it with an impression plate in my eBosser.  Before I did this, I inked up the impression plate with some dark grey ink.  Love how this looks!


Then I assembled the layers and added a cute little clothespin from the From Me to You Collection from Pebbles. Before adhering it to the tag, I couldn’t resist adding a few more little stickers from the collection to the corner.  Then since this whole tag is playing with opposites, I decided to bring in another rustic element and created a little tassel with some twine.


Hope all of you have a #Fabulous You day!

Tuesday, September 17, 2013

Hello! Call me!


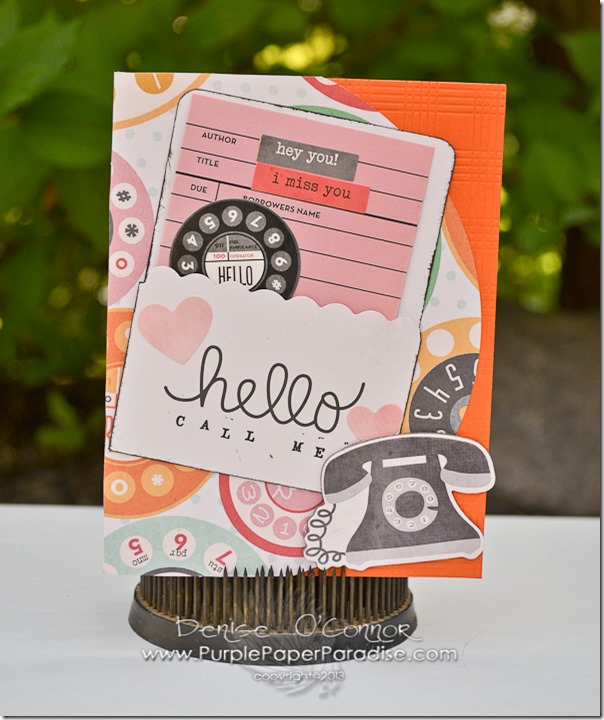
It is so easy to create a card using American Crafts From Me to You from the Pebbles line!  I just fell in love with the phone dial paper and knew that I just had to create a card for a friend of mine that I haven’t talked to in awhile!

DSC_0003

I started off with an orange card base and I impressed it using my eBosser by Craftwell.  This is such a nice touch to add in the background, gives it some texture.  I then took that fun phone dial paper and cut a large 6” circle and then adhered it onto the front of the card base and trimmed it off.  Then I grabbed these super cute envelopes from the From Me to You line along with the Chipboard accents and stickers.  I added the “hey you!”, “I miss you” and the phone dial stickers to the insert for the envelope.  The heart stickers were added to the envelope.  The “hello” on the envelope is originally there, but I added the “Call Me” with my super fancy roller stamp from American Crafts.  This wonderful stamp allows me to create a sentiment that is 15 characters long. LOVE IT!  After all that, all I needed was that beautiful retro telephone chipboard accent to top it all off.


Thanks for coming by, see you next week!

Saturday, September 14, 2013

Teresa Collins eBosser Blog Hop


Welcome! Today is our special blog hop featuring the Teresa Collins eBosser!  We are so excited because Teresa is going to be on HSN on Tuesday, September 17th to show off the eBosser with all the great things that it can do.  To get her off to a great start, we are having a jam packed blog hop this weekend and there are a lot of giveaways too!

First off, if you stumbled here and would like to go back to the beginning of the hop…shoot on over to blog.craftwellusa.com!

If you came here from Cheripiles, then you are in the right place!  If you have gotten lost, no worries!  At the end of this post is a complete line up for you so you can find your place again.  Let’s get on with it!

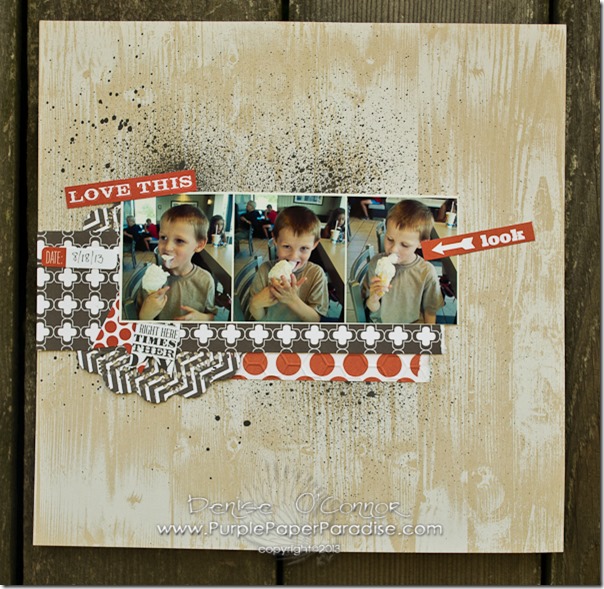
For my project, I really wanted to show you how well the eBosser embosses and how well it cut those dies that we love to collect!  When I saw Teresa’s Family Stories collection, I felt the urge to do something that I really don’t do very often….a scrapbook layout.  That is right!  If you have been following me, then you know that I am primarily a card maker, but Teresa inspired me to go out of my comfort zone and create a scrapbook layout showing some pictures that I recently took of my little boy Mason.  Isn’t he a cutie?
DSC_0002
One of the great things about Teresa’s collections is that everything coordinates so well together that this type of layout works perfectly.  You almost don’t have to think about it!  The eBosser is an amazing companion to her collection because it allows you to take something that is already gorgeous and kick it up a notch!  Let’s take a look at a close up, so you can really see what I am talking about!
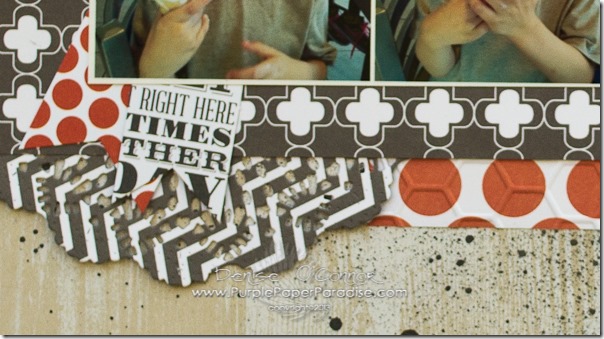
DSC_0002-2
OK, so see the black and white chevron doily?  Can you see how perfectly the eBosser cut out all of those tiny pieces?  It just amazes me every time!  In fact with this die, there is some embossing along the edges that you might be able to see.  Don’t strain yourself if you can’t, it is really tiny!  It is one of those things that you really appreciate in person.  Also, do you see the white and orange polka dot paper sticking out from under the doily?  That is a piece from the Family Stories collection that I simply embossed with one of the eBosser embossing folders created by Teresa Collins.  Because I wanted to use the black and white paper for underneath my pictures and then add in a little more of the orange, I needed to add some depth to this paper so it would be grounded and I was able to achieve that with embossing.  Pretty cool huh?
Now before I tell you all about the amazing giveaways, I want to point out some other really cool features of the eBosser that maybe you don’t know!
  • The Teresa Collins eBosser is universally compatible with any brand of die or embossing folder on the market. Yes, really!  With that 8 1/2” x 12” platform, you can even fit some of the large AccuCut dies!  Oh and if you use those really long AccuCut dies, you can even get a platform set to work with those. 
  • Teresa Collins folders are large! {letter size}.  Love this because I can easily emboss a whole card front without worry that one edge is going to be unembossed.
  • Teresa Collins exclusively created this embossing folder line for Craftwell!
  • 10 designs of embossing folders available, with more to come in the fall!  Oh and did I mention that they are gorgeous and I want them all…really I do want them all!
  • HSN Teresa Collins eBosser bundle includes: Teresa Collins eBosser, two Teresa Collins embossing folders +two bonus Teresa Collins folders for ordering on HSN!, full platform set {which includes magnet shim, and rubber embossing mat!}.  Totally sweet package that allows you to emboss away right out of the box, what could be better?
  • World Launch of the Teresa Collins eBosser on HSN! Limited Quantity!  In other words, don’t wait to buy!  This could sell out and fast!
TC-Machine-Final-300dpi (2)
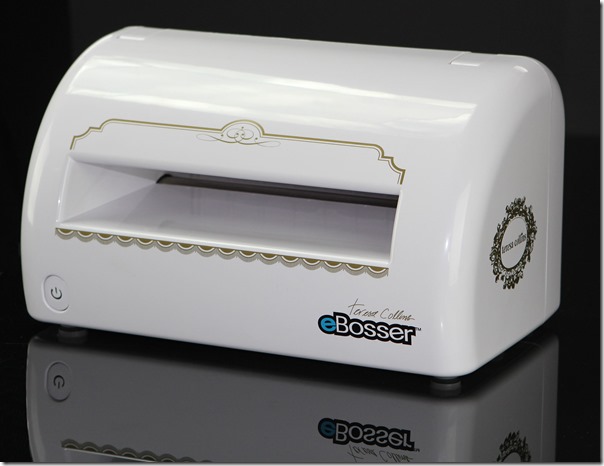
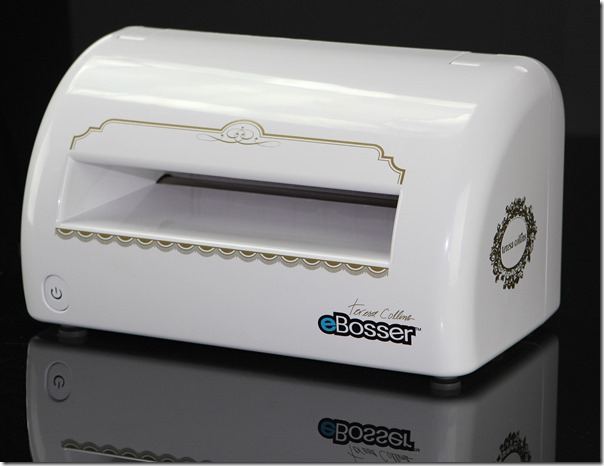
And one more thing…..Isn’t it pretty?!?!?!?!?!  Well done Teresa, well done!
So now it is GIVEAWAY TIME!!  That is right, there are lots to give away, so make sure to sign up!  Craftwell has generously put together prizes for 250 people!!!!  Woohoo!!!  The first 250 people that leave a comment on each and every blog in the hop will receive one of the new Teresa Collins designed eBosser embossing folders.  10 people will receive a tool kit and one lucky grand prize winner will receive a shiny new Teresa Collins eBosser!!!!

You MUST leave a comment on each and every blog to win!!!!  The comments will be counted starting at 8AM EST!! 

Once you have left your comment here, you can then skedaddle on over to the Favecrafts Blog!  Thanks for stopping by and I hope that all of us inspired you to spread the eBosser love and don’t forget Tuesday, September 17th….HSN….Be there! 

Here is the whole lineup!
Craftwell - blog.craftwellusa.com <----EVERYTHING STARTS HERE!  DID YOU GET ALL YOUR COMMENTS IN?
TCD Design Team http://teresacollinsdesignteam.blogspot.com/
Sesil Cratin:http://www.sesilcratin.com/
Cheripiles - http://cherinspirations.blogspot.com/
Denise O'Connor -http://purplepaperparadise.blogspot.com/ <----YOU ARE HERE
Favecrafts Blog:http://www.favecraftsblog.com/ <-----GO HERE NEXT!
Lyssa Zimmerman:http://joe-lyssa.blogspot.com/
Yvonne’s Blog - http://www.yvonneblair.com/
Caroline Duncan:http://stampingsandinklings.blogspot.com//
Teresa Collins - http://teresacollins.typepad.com/

Friday, September 13, 2013

Teresa Collins eBosser Blog Hop Tomorrow

Edited...see in red below!

EXTRA!!!!  EXTRA!!!!
In case you haven’t heard, Teresa Collins has teamed up with Craftwell to create an eBosser….oh and it is gorgeous!!  If you have been hemming and hawing over getting an eBosser, the good news is that now you can get a Teresa Collins eBosser AND you can get it at a great price too!  Teresa will be on HSN on September 17th with an eBosser package that you won’t want to miss!  I will make sure to post the times when we get closer so that you can keep your eyes glued to that screen and call in to get the eBosser.  You don’t want to miss this deal!
TC-Machine-Final-300dpi (2)
To celebrate all that the eBosser can do with the Teresa Collins style, we will be having a BLOG HOP with some tremendous giveaways!


Tomorrow morning (bright and early especially if you want to be a winner Winking smile) go to blog.craftwellusa.comMake sure to leave a comment on everyone’s blog for a chance to win! Comments will start at 8AM EST for the giveaways! The blog hop will only last for Saturday, September 14th and Sunday the 15th! 

Tuesday, September 10, 2013

A Little Americana with American Crafts


OK, so I am not a big scrapbooker.  If you follow my blog, you know that.  I love making cards, they are my absolute favorite, but sometimes you just have to mix it up a bit!  Recently the boys and I went to the Museum of Science and Industry with my parents for the day.  The boys had never been there before and after this visit, they will definitely want to go back.  These pictures were just too cute not to scrapbook!  When I saw the background paper in the Pebbles From Me to You collection by American Crafts, I knew that it was just the thing for my scrapbook layout!

DSC_0007

The first thing that I did was in Adobe Photoshop by adding the location and date labels to each picture and then I cut the pictures out in hexagons.  Then I turned to my background paper and added some spritzes of Dylusions London Blue spray ink and some Perfect Pearls spray in Perfect Pearl.  When I was going through the From Me to You paper pack, I just loved this reverse newsprint paper, so I cut out some large stars to nestle the pictures on top of. 

DSC_0007-2

I also embossed these stars with the Dotted Elegance embossing folder by Craftwell made for the eBosser. The embossing really gives a nice texture and since the eBosser is always by my side when crafting, it is always an easy solution when you need to add a little something extra. I needed more blue, so I also cut out some flourishes to give everything a little movement.


I am really starting to like this “anything goes” style of scrapbooking.  Speaking of which, you might want to check in at the Craftwell Blog this coming Saturday (September 14th), but you didn’t hear that from me Winking smile

Tuesday, September 3, 2013

It is a Happy Day with American Crafts

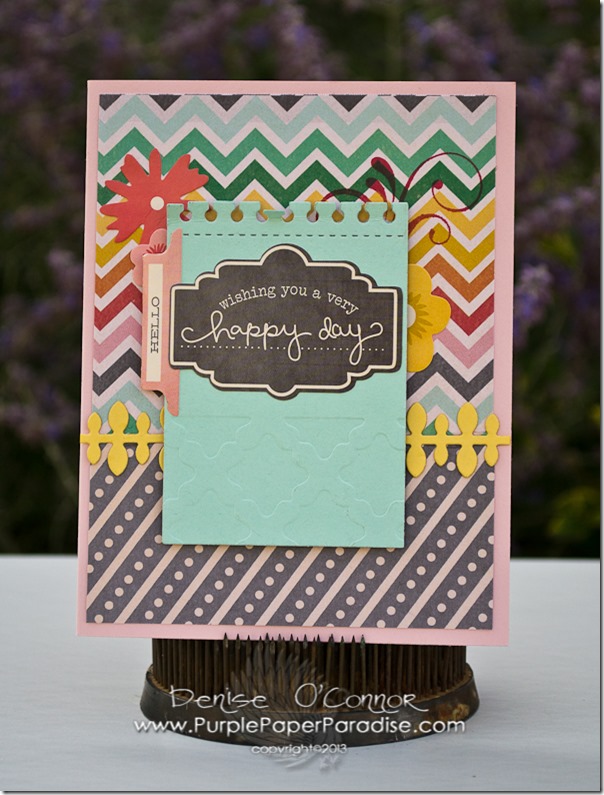
It is a whole new month and that means an all-new sponsor for the Craftwell Design Team and I am just thrilled that it is American Crafts.  For the month, I will be working with the From Me to You collection from the Pebbles line.  I just love the colors in this collection, so I could not resist making a card that showcases the amazing color palette.

DSC_0031

The two background patterned papers are separated with a vine border die that I cut with ease out of yellow cardstock with my eBosser.  I also die cut that notebook paper at the same time.  Since the eBosser has such a large platform, you can fill up that platform with many dies as long as they are all the same height and cut them in one pass.  For the notebook paper, I decided to add a few sticker embellishments from the From Me to You Collection.  There are a few flowers tucked behind the notebook paper (along with a flourish stamp) and then there is the tab and the beautiful sentiment label.  Since there was some extra room on the notebook paper and I really didn’t want to add anything else, I decided that I would do a partial embossing on it.  I used Craftwell’s Gracious Argyle embossing folder. 


Thanks for stopping by, be sure to come back next week to see what else I am cooking up with my eBosser and American Crafts.

Related Posts Plugin for WordPress, Blogger...