Showing posts with label Digital Paper. Show all posts

Monday, March 12, 2012

Baby Frame for the eCraft Design Team Challenge


Welcome to Challenge Week on the eCraft by Craftwell blog!  This week we have been challenged to use the products from PrintOnIt.com to create a baby gift.  Now, all sorts of ideas popped in my head for this including onesies, socks, blankets, ornaments, etc.  I decided to do something a little bit more personalized.  I made this to show how the Inkjet Opaque Transfer Sheets don’t have to go on clothes.

20120306-DSC_0017-1

I printed out some digital paper from my stash onto the Inkjet Opaque Transfer Sheets and then cut out the letters using my eCraft.  This paper is very slippery so to get some clean cuts on these letters, I had to pull out all the stops.  I used a little spray temporary adhesive and adhered that to my veggie mat from Dollar Tree.  I also decided to tape down the edges with some painters tape just to make sure that I didn’t waste any of this material…this may have been overkill, but it worked!


Next I used my heat press to adhere the letters onto a piece of solid colored fabric from Joann’s.  If I had to do this project again, I would have to come up with a better method to keep the letters straight.  I put a piece of cardstock there and lined up the letters to the edge of the cardstock, but they are so light that at some point a couple of them shifted.


After my letters were adhered to my fabric, I adhered the whole panel to a piece of chipboard that was cut to fit my frame.  Now, it was time to do something with my frame…


This frame was originally black and the mom that I made this for really likes the distressed look so I actually did two different distressing techniques on it.  First, I painted the frame in some pale blue paint from Martha Stewart (Blue Sky) and then I used a sanding block to sand off some of the paint in some places.  Then I applied a heavy coat of Weather Crackle Effect by Martha Stewart and let that dry.  Once that medium was dry I painted on top of it in another Martha Stewart paint (Greek Tile).  I have to tell you…this was really cool because the crackle starts to happen once your top coat of paint starts to dry and the Martha Stewart paints dry pretty quickly.  I got the frame, the paints, and the Crackle from Michaels. After my painting techniques were done, I sprayed the frame with a clear coat to preserve the look (and to prevent any paint from chipping off). I love how this blue compliments the yellow in this little boy’s room.


20120306-DSC_0017-1-2


Thanks for stopping by and make sure you visit the eCraft by Craftwell blog each day this week to see what the other girls have done with this challenge!

Monday, October 24, 2011

eCraft Monday Design Team Project


It’s Monday again, and that means another eCraft Design Team Project! This week the Design Team was tasked with making some Halloween Home Décor using the wonderful Square 1! When I saw the Cut-Its Set from Lettering Delights called Monster Lights, I knew exactly what I wanted to do!

DSC_0070-2_edited-1

Spooky huh?  I used the Print & Cut Hinge Method to cut this entire design out of one piece of Square 1 by printing blocks of colors and textures with Make the Cut.

DSC_0067-1

I cut these out using a pressure of 2 1/2 to get a great kiss cut on the pieces.  I did not cut out the end pieces on the bolts because I wanted to experiment with using Perfect Pearls on Square 1.

DSC_0071-1_edited-1

To start with I mixed a little Pewter colored Perfect Pearls with some water on my non-stick craft mat.

DSC_0072-1_edited-1

I then masked off the end bolt with a post it note and painted my Perfect Pearls on.

DSC_0073-1

Here they are all painted on!  Love that shimmer!


DSC_0070-2_edited-1

I used my Copic Multiliner to color in the pupils and make him a little bit silly!  The Perfect Pearls worked well, but I think it would work better if the Square 1 was not printed already.  I did have a little flaking on this after my son was playing with it, so this may also not be great on something like this which will come in contact with little fingers.


One of the things that I just love about Square 1 is that it is removable, so that means when Halloween is over, I can peel this off the light fixture and place it back on the backing paper and save it for next year!


Since this is my last Design Team project using Square 1, I just have to say that I LOVE this stuff!  I will definitely be using it again in the future, and it is now a new staple in my craft room.  My oldest son is also enjoying that his mommy can make any kind of stickers that he wants.  I actually have to limit him on this, because the requests have just gone crazy!  If you have not ordered some Square 1, be sure to do it!


Debi, Lisa and Raven will be sharing some more Square 1 projects with you this week, so make sure that you are following us on the eCraft by Craftwell blog, and then next week we will have a new fabulous sponsor that you will not want to miss!  Have a great week everybody!

Thursday, October 20, 2011

eCraft Video–eCraftshop Pro-Working with Long Mat Sizes


Hello everybody!  Have I mentioned that this time of year is a very busy crafting time for me?  Well it is.  Not only do I have my Halloween crafts, but my son’s birthday is shortly after Halloween.  That means that right now I am busy making invitations and party favors, all that fun stuff!  For this month’s eCraftshop Pro video, I decided to show you how to work with longer mat sizes in the software.  One of the great things about the eCraft is that even though it has a Roll mode, you can still cut longer pieces using Front mode or Tray mode.  Since the vinyl that I am using in this video comes on a roll that does not fit on the eCraft roll end caps, I decided to cut my vinyl and feed it through the front.  Works like a charm!

DSC_0080-1_edited-1

I used a glossy outdoor vinyl in black for the base layer of Darth Vader (which you will see me cut out in the video) and then if you look closely you will see that there are some accent pieces layered on top that were cut in a matte finish vinyl in black.  Very cool effect!  Works especially well for Darth Vader since his helmet is shiny!  The SVG that I used came from Katydid Creativity and Paper Adventures.  I did modify the file from a shaped card to one that would work for my purposes.  Also the background paper I got on Etsy from CocoaMint.


Hope you enjoyed the video!  And yes, in case you were wondering there will be more Star Wars stuff coming soon! 

Monday, October 17, 2011

eCraft Monday Design Team Project

Happy Monday everyone!  This week, the Design Team has been given free reign!  That’s right, we have each been tasked with making a project of our choice using the amazing Square1!  I am absolutely loving this material especially since it helped me out with a Halloween tradition here in our house!


My eldest son, who is about to turn 7 is in LOVE with Halloween.  I asked him if he liked Christmas or Halloween better, and he could not decide!  This year marks the third year that we have “dressed up” our Halloween candy to pass out to the trick or treaters and of course to share with his friends at school. I always like to do this project so that he can help me with it!  He loves to help Mommy, but sometimes it gets too complicated for him.  This year, I decided to do something pretty easy so that it would keep his interest.  I did all the prep work ahead of time, and then invited him to help me with the assembly.  Here is what we did this year.


DSC_0078_edited-1


Now, you may be wondering how did Square 1 help with these simple candy wrappers.  Well it came in the seal on the back of the wrapper or the sticker as my son called them.


DSC_0079_edited-1


Let’s start at the beginning, I used an assortment of pre-made candy wrappers that I got from Lettering Delights and printed them all out on my printer and then trimmed them with my paper trimmer. Since I was making 72 of these candy bars, I wanted to keep it simple! Next I printed up some coordinating digital papers onto my Square 1 (I just LOVE how vibrant the colors are printed on this stuff!).  Next I turned to my Make the Cut and the Lettering Delights Halloween Cut-Its Set.  I selected Tombstone 1 and added that to the mat. 

Capture2_edited-1


I next added some text to fit inside that tombstone.  The font that I used here is LD Twylight from Lettering Delights.


Capture3_edited-1


I then used the Duplicate feature to copy all those tombstones with the words to fill up the print area.  Next I deleted the ones that were outside of the print area.


Capture4_edited-1


The next thing that I did was hide the tombstones so that only my text was showing on the mat and then I ran the Square 1 that I had printed my digital paper on through the printer again and printed the text on. After doing that,  I hid all the text and selected all the tombstones and rotated them so that they fit in the bottom right hand corner of my mat. 


Capture5_edited-1


Next I cut out my Hinge from the Print & Cut Hinge Method.  Once I had my Hinge in place, I lined up my Square 1 underneath it so that the tombstone shapes would cut around the words.  Since I had taken the time to line up all the text with the tombstones earlier, those dimensions were all in tact so that I could cut out all of my candy wrapper seals for that page in one pass.  I made extra careful to keep my hinge in place the whole time so that I could re-use it for each sheet.


DSC_0081_edited-1


Then it was time for the assembly and this is where the Square 1 really helped me out!  You see, I love doing these things with my kids, but I am also a perfectionist.  I wish it didn’t bother me so much that my son didn’t line up the “stickers” the way I would, but it does.  As my son was doing this, I was cringing in my head, but then I remembered that Square 1 is removable!  So guess what I did…whenever he put one on that was crooked or something, I would peel it up and re-stick it down to my liking.  You do need to be careful peeling it up off of paper, but it can be done! Crisis averted!


DSC_0073_edited-1


Another thing that dawned on me as we were doing this project is that since Square 1 is removable…it would make an excellent envelope seal!  So I just had to try it out, and it is wonderful!  You can open and close that envelope many times over!  Oh the possibilities!

DSC_0083_edited-1

Hope you enjoyed my project today and maybe it even inspired you a little to get the kids in your life involved with your crafting!  Be sure to go to the eCraft by Craftwell blog every day this week for more projects by Debi, Lisa, and Raven!

Monday, October 10, 2011

eCraft Monday Design Team Project

Happy Columbus Day!  It is time for another eCraft Design Team post.  If you are not following the eCraft by Craftwell blog, by all means start!  My fellow Design Team Members are amazing and I am sure that you will all be inspired by them.  Also, I will be back tomorrow with a new Make the Cut video!

This week, we are again using the awesome Square 1 printable, removable, fabric to create projects incorporating leaves and/or pine cones. When I think of leaves and pine cones, my mind tends to go to Thanksgiving when the beautiful fall colors are still out there and the Christmas season is right around the corner. I decided to do a super easy project for you with Thanksgiving in mind that packs a punch.

clip_image001

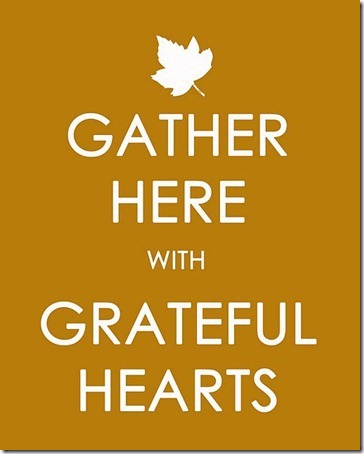
My inspiration for this project came from this picture on Pinterest

clip_image002

Source: myblessedlife.net via Denise on Pinterest

I love the saying and the fact that it is like the “Keep Calm and Carry On” style but with a Thanksgiving twist was just the ticket for my project. To start, I used a digital paper from Scrap Girls that is a text background, and I just knew I had to use it because the text on this paper is all about blessings. Perfect right? I then printed that out and then went back and added my saying on top of it using Century Gothic font. After I did this, I realized that I could have done this all in one step if I used my Photoshop Elements, but it certainly isn’t necessary.

I then turned to my trusty Square 1 and using the leaves found on the eCraft Fundamentals 1 SD card, I cut out a few of each. I did a “kiss cut” on the Square 1 like you would do for vinyl.

clip_image003

Since Square 1 is a printable material, I took a gamble here that I could color the leaves myself. I had GREAT success using alcohol inks. I added a bunch of autumn colors onto a felt pad using my ink blending tool and then dabbed them on the Square 1. I then went back and added some Gold Mixative and a little Alcohol Blending Solution to come up with the gorgeous colored leaves. The picture shows them when the inks were still wet. It only took a few minutes for them to dry.

clip_image004

I wanted to make sure that the leaf that was on my digital paper did not get lost on the page, so I took my leaf and placed it down on my non-stick craft mat and gently inked the edges with Vintage Photo Distress Ink.

clip_image005

One of the wonderful things about Square 1 is that the adhesive is removable so I was able to very easily remove it from my craft mat and place it on my digital paper.

clip_image006

Here is a close up for you!

clip_image007

I then grabbed a black picture frame that I had purchased last year during a crazy ridiculous sale and decided that a touch of embellishment on the frame would just add a little something special to this clean and simple project. I used some of the other leaves that I cut out of Square 1 and colored with alcohol inks and placed them right on the frame.

clip_image008

Again, since they are removable I was able to position them just right so that they peeked out from under the little pumpkin and pine cones that I added on top with some Glossy Accents.

clip_image009

Every week, I am loving Square 1 more and more. It is so versatile! Hope you enjoyed my project today! I promise next week, I will have another Halloween project for you!

clip_image001[1]

Supplies & Other Directions:

Black Picture Frame

Matte Photo Paper printed with Digital Paper and saying (Digital Paper from Scrap Girls and font used was Century Gothic)

Square 1

eCraft (used a pressure of 2 1/2, blade cap on, tabs off to get the kiss cut on the Square 1)

Alcohol Inks – I used Adirondack Alcohol Inks in colors Butterscotch, Sunset Orange, Latte, Cranberry and Caramel, Gold Mixative and Alcohol Blending Solution on a felt pad with the Ink Blending Tool.

Sunday, July 25, 2010

Papertrey July Blog Hop Challenge

So this month the challenge at http://www.papertreyink.com/ is to use office supplies.  I thought about this challenge quite a bit to come up with something that was a little different.  Here is what I came up with...


I decided to use my scanner to make my own digital paper.  I had these large colored paper clips so I just scattered them all over the scanner and scanned them.  Once I printed out the sheet, I picked the spot on the sheet that was the most interesting to me and cut out that section.  I rounded the corners, I applied a few strokes of a pale green acrylic paint, inked the edges with Hawaiian Shores ink and wrinked that paper up and then ironed it out.  It looks so much better in person!. The notebook paper actually was a complete accident.  My son was playing with the printer when I wasn't looking and before I knew it this notebook paper was coming out of the printer.  I took that as a sign that I should use it, so I fed that paper back into the printer and using MS Word and a font called "Dear Teacher" typed out my sentiment.  I tore the corner out to keep with the distressed look of the patterned paper.  The circular tag was stamped first with Polka Dot Basic in Hibiscus Burst on Hibiscus Burst cardstock.  I then stamped the star with the dashed lines from the 2009 Holiday Tag Collection in Hawaiian Shores ink as well as ink the edges.  I love when you find a stamp in a seasonal set that can be used for other things!  I handwrote the A+ using a black Sharpie pen and then stapled the tag onto the notebook paper.  The ribbon is Hawaiian Shores Swiss Dot.

Thanks for coming by, and if this is your first time here, I have a giveaway going on and you can read about it more on this POST.

Have a Great Day Everybody!

Friday, July 23, 2010

A Few of My Favorite Things...#2 Digital Paper

I am just like so many of you out there...I have a ton of paper!  It got to the point where I didn't have enough room to store it all and I am a sucker for a sale, so I end up with a lot of paper.  That recently changed when I discovered digital paper.  There are a lot of places online where you can download free digital paper.  The best part is that you can re-color the paper to suit your needs.  I often find papers in my stash that I love the pattern but not the colors, so this is a great solution.  Another bonus...less storage space (only the space on a hard drive necessary). Oh and another bonus is that you can print the paper out as many times as you like.  So for today I thought I would share with you my first video tutorial on how to re-color your digital paper so that they coordinate together.


Here is the final result....


The "Golden Dots" paper is from freedigitalscrapbooking.com and the Retro Squares paper is from scrapbook-papers-and-more.com. The base cardstock is Spring Moss, the ribbon is Orange Zest bittydot, and the sentiment is from Mega Mixed Messages, all from papertreyink.com.   The cut is from the Cricut Paisley cartridge.

If you have not signed up for the giveaway, make sure you sign up HERE by becoming a follower and posting a comment on that post.  I am just thrilled that so many people are interested in the things that I am doing and I can't wait to share more with all of you.  I have some really cool things coming down the road, so be sure to keep an eye out!
Related Posts Plugin for WordPress, Blogger...