Thursday, December 29, 2011

My Christmas Traditions Christmas Card for Friends & Family


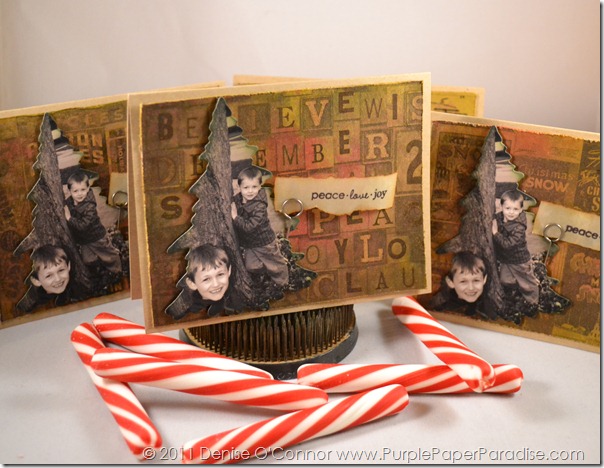
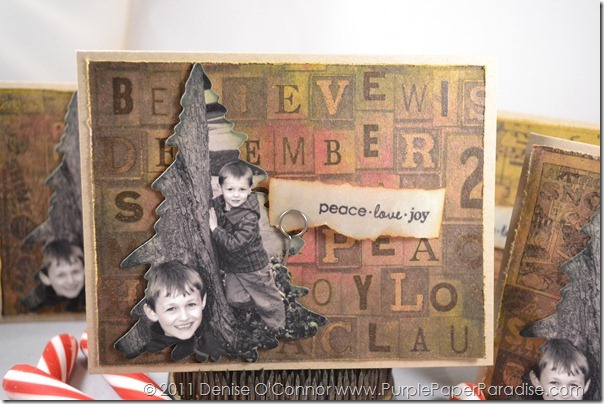
For about three years now, I have been making Christmas cards to send to friends and family.  This year, I did was all about Tim Holtz.  I always enjoy making the card and this year was no exception.


DSC_0017-2


The picture is one that I took of the boys on Thanksgiving day and I sized it so that it would fit in the die from Papertrey Ink. I then inked the edges with a little Bundled Sage Distress Ink. The background paper is all from the Christmas Kraft Resist paper pack from Tim Holtz.  I used Distress Stains to color the background and then spritzed it with some red Perfect Pearls spray.  The edges were distressed.  The sentiment (also from Papertrey Ink) was stamped on vellum using Archival Ink and then I heavily inked it with Old Paper Distress Ink and heat set it.  Then I tore the vellum into strips and inked the edges with Vintage Photo Distress Ink.  I slid the vellum strip into a memo pin that was stuck into the foam adhesive behind the picture.


DSC_0020-2


I will be sharing a few other Christmas Traditions tomorrow, see you then!

Wednesday, December 28, 2011

My Christmas Traditions Food for Christmas Day


Christmas Day is always a very hectic day in our house. Of course Santa comes to visit, but I am also in charge of the Christmas Day dinner for my husband’s side of the family.  Here is the problem with that…our house is TOO small for this crowd of people.  This year we had 16.  My in-laws house is where we have the meal because they have the space for all these people.  My mother-in-law has fibromyalgia and physically cannot handle preparing such a large meal, so I do it.  Since I have young kids, I clearly don’t want to make a beeline for their house right away in the morning, I want to enjoy my kids and their cute little faces with all the smiles.  So what to do?  Well I think this year, I finally have it nailed, so it is perfect for me to share with all of you in case you are in a similar situation.


FRENCH TOAST CASSEROLE

This is a great recipe that I have been using for about 5 years now because you make it the day before and then just pop it in the oven to cook.  This allows plenty of time to open presents.  My husband usually fries up some bacon to go with it and breakfast is served.  The kids love it.  Since there are only four of us, I usually halve the recipe and cook it in a loaf pan.  I make this with the Praline topping but skip the raspberry syrup because the kids and my husband don’t like it.  It is sweet enough for me that I don’t add any syrup to it at all.


STANDING RIB ROAST

This is a super easy way to get a WOW factor from your guests and with a roaster oven, it can easily be transported.  In the morning, while breakfast is cooking, I take this out of the fridge (I always season it the day before) and let it rest at room temperature and then pop it in the roaster oven.  When you turn the oven off, that is when it is OK to transport.  I also tape the lid onto the oven for two purposes, the first to make sure the lid doesn’t slide off in the car and the second to prevent any relatives from trying to sneak a taste…very common with the O’Connors.   Make sure you follow these instructions exactly!

STANDING RIB ROAST

Standing Rib Roast (any size…crazy I know, but I have done this with a 3 lb roast all the way up to a 15 lb. roast)

Seasoning – You can use any that you like, I use Paula Deen’s House Seasoning (1 cup salt, 1/4 cup pepper, 1/4 cup garlic powder)  Apply seasoning liberally, this will create a crust.


Season roast the day before and let sit in fridge overnight.  In the morning, let roast rest at room temperature for 1 1/2-2 hours.  Preheat roaster oven to 375 degrees.  Place roast in oven and cook for 1 hour and then turn oven off.  Do not remove the lid (or open door if in a regular oven) and let the roast rest in the oven for 3 hours.  Turn oven back on to 375 degrees and cook for 1 hour to reheat the roast.  After one hour, remove roast from oven and place on a cutting board and tent it with foil and let it rest for 30 minutes before carving.  This should give you a perfect blend of medium well on the very ends, to medium and then then medium rare in the middle.  This year, my husband rushed the resting after cooking and started carving a little too early and we had a few pieces in the middle that were more rare.  This is easy to fix because he just sliced that section and placed them on cookie sheets and put them in a 400 degree oven for a few minutes and then they were perfect.


BAKED POTATOES

Of course this is easy to do.  I usually have the potatoes all scrubbed and ready to go in the oven when we get to my in-laws.  Here is the method that I use to cook them.  Then I also bring butter, cheese, bacon, green onions, and sour cream so that everyone can pick their own toppings.


BROCCOLI CASSEROLE

This was a new addition this year and was a BIG HIT!!  Several people asked me to add it to the regular repertoire.  In years past, I had made the infamous Green Bean Casserole, and I decided to switch it out with this and no regrets.  I mixed up everything except for the Ritz crackers that go in the casserole as well as those that go on top.  I tripled this recipe and it fit nicely in a 9x13 pan and I cooked it longer (about 40 minutes or so) and it was perfect.  This recipe is from Paula Deen’s Lady & Sons cookbook

BROCCOLI CASSEROLE

1 (10 oz) frozen package of broccoli, chopped

1 small onion, chopped

4 TB butter

1/2 cup grated Cheddar cheese

1/2 cup crushed Ritz crackers

1/2 cup condensed cream of mushroom soup

1/4 cup mayonnaise

House Seasoning to taste (1 cup salt, 1/4 cup pepper, 1/4 cup garlic powder)

Preheat oven to 350 degrees.  Steam broccoli until limp, about 10 minutes.  Remove from heat, drain.  Saute onion in butter and add to broccoli.  Add all remaining ingredients; mix well.  Pour mixture into a casserole dish.  Add topping.

Topping

1/2 cup crushed Ritz crackers

1 TB butter, melted

Combine crackers and melted butter for topping; sprinkle on top of casserole.  Bake for 20-25 minutes.

SALAD

Tom’s aunt brings a Caesar Salad which she just mixes up when Tom starts carving the roast.


BREAD

This year I heated up some frozen French Bread from Costco and serve it with butter and also Honey Butter from Land O Lakes (or you could make your own…here is a good recipe)


DESSERT

I like to try to keep dessert kind of light because the meal can be so filling.  Again, I serve the Oberweis Ice Cream that I mentioned yesterday and then a few Marie Callendar pies.  I also have Egg Nog and Hot Chocolate ready for anyone that wants it as well.  This gives plenty of variety for everyone to pick what they want.


Probably the biggest challenge to this meal is to make sure that I don’t forget anything at home.  Thank goodness, my husband always double checks me.  Without that I would forget at least one thing…it is a given.  Sure enough, this year, he found that I almost left the Broccoli Casserole at home.  He knows me so well!

Tuesday, December 27, 2011

My Christmas Traditions Food for Christmas Eve

The food that we serve at Christmas always seems to become an integral part of the Christmas Tradition.  Back in November I shared with you some food gifts that you can give out to friends, neighbors, co-workers, etc.  Today I thought I would share with you the traditions that my family has for the food that we share with each other during the Christmas holiday.

When I was growing up, we had revolving Christmas Eve dinners until I was maybe 12.  My mom wanted to have a meal that she could serve us that would become a tradition and it took awhile for us to find that meal.  Since Christmas Eve at that time was just the four of us (mom, dad, me and little brother) it made sense that it be something special but also something easy to prepare as well.  We rarely had an additional guest for Christmas Eve, except for the occasional aunt or cousin.  Once we all decided on this menu, which is SO easy to prepare, it has become the traditional Christmas Eve dinner in our house.

BEEF FONDUE
Yes, I know what you might be thinking!!  Really fondue??  YES, it is a meal that we only have once a year.  It’s super simple to prepare.  You need a fondue pot and oil.  We also typically use a high quality steak for the meat, it really makes a difference!  The trick to making this something special is the array of dipping sauces.  We use barbeque sauce, teriyaki, horseradish, and just about anything else that we can find.  We also ALWAYS make mushroom sauce (my favorite!).  Fondue is quite versatile because you can also use chicken, fish, shrimp, or any other meat you have on hand.  For the vegetarians, there is always cheese fondue too which is super yummy!
FONDUE MUSHROOM SAUCE
3 oz. mushrooms, chopped
1 beef bouillon cube
2/3 cup boiling water
2 TB butter or margarine
2 TB flour
1/2 cup sour cream
2 tsp. Worcestershire sauce
Add bouillon to boiling water.  Stir until dissolved.  Melt butter and add flour.  Stir quickly.  Add water and bouillon.  Cook until thick.  Add sour cream and Worcestershire sauce.  Heat through.  (Note:  Can be made ahead of time and re-heated for your meal…so yummy!)

CHRISTMAS POTATOES
This is another family recipe that I have no idea where it came from.  It takes a bit of preparation, but you can prepare it ahead of time and then just store it in the refrigerator until it is time to bake.  These potatoes are SO good!  They are truly one of my favorite parts of this meal, my mouth waters just thinking of them!

CHRISTMAS POTATOES
6 large baking potatoes
1 bunch green onions, chopped
1 1/2 cups grated sharp cheddar cheese
4 cups sour cream
1 1/2 tsp. salt
1/4 tsp. pepper
paprika

Peel baked potatoes and cut into cubes.  Combine all ingredients except paprika in greased casserole dish.  Cover and refrigerate overnight or for 3 hours.  When ready to heat sprinkle paprika and bake at 350 degrees for 30-45 minutes (Note: The original recipe calls for 30 minutes, but it always seems to take 45 minutes for us, so keep an eye on them the first time you make them)

SPECIAL SALAD
This is another family recipe that has been around so long that none of us know what it’s official name is anymore!  This salad is good for any special occasion!  It is one of those dishes that when we go to a pot luck, it is often requested by the hostess!

SPECIAL SALAD
Caramelized Almonds:
1/2 cup sliced blanched almonds
1/2 cup sugar
Dressing:
1 tsp. salt
Dash pepper
4 TB sugar
2 TB parsley
4 TB vinegar
1/2 cup salad oil
Dash hot pepper sauce
Salad:
1 head romaine
2 cups chopped celery
4 chopped green onions
1 can (15 oz.) mandarin oranges

To caramelize almonds, cook over medium heat, stirring occasionally until sugar melts and sticks to nuts.  Remove from heat and spread on foil to cool.  Break into pieces.  Combine all dressing ingredients and shake.  Chill.  Just before serving, assemble salad ingredients and toss with dressing and sprinkle almonds on top.

DESSERT
Dessert is super simple too….Oberweis Ice Cream!!!!  If you live in the Midwest, then you are probably already familiar with this truly sinful ice cream!  For those of you that live out of the area, they offer shipping on ice cream!  I have no idea how they do it, but can I say that it is probably worth it!!!  Their Egg Nog is also amazing!  In addition to the ice cream we also have Buckeye Balls which I shared with you last month.  Just a quick story about Buckeye Balls…I was going to bring some Buckeye Balls to Christmas Eve dinner, but my brother proclaimed that I didn’t have enough, so he made some for the meal this year!

This entire meal is filling, but not heavy which is just what we need to get a restful night for Christmas Day!

Monday, December 26, 2011

eCraft Monday Design Team Project

I hope all of you had a great Christmas!  Today, I am planning on sitting back and relaxing a little bit after all the hustle and bustle!  Even though Christmas is now behind us, it is a good time to start a little bit of planning for next year.  Typically I make a list of the things that I know I want to do again next year.  That way when the season comes around next year, I already have a list in hand.  This practice has helped me to institute a few family traditions. Today, I thought I would share one of the newest traditions in our house with all of you and it has to do with wrapping presents!


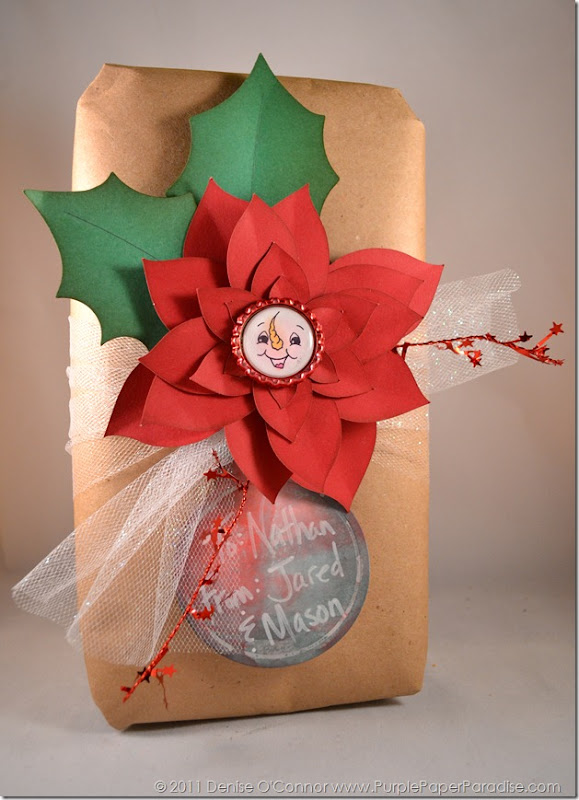
YES I know that we all do this, but I do things a little differently than most.  You see both of our children are young and Santa is alive and well in our house.  Santa always wraps his presents in traditional Christmas wrapping paper, so to help the kids distinguish a Santa present from a Mom & Dad present under the tree, I always wrap those presents in plain brown kraft paper.  YES it sounds boring, but that blank slate allows my creative mind to embellish to it’s hearts content!  Here is just one example for you!

DSC_0038

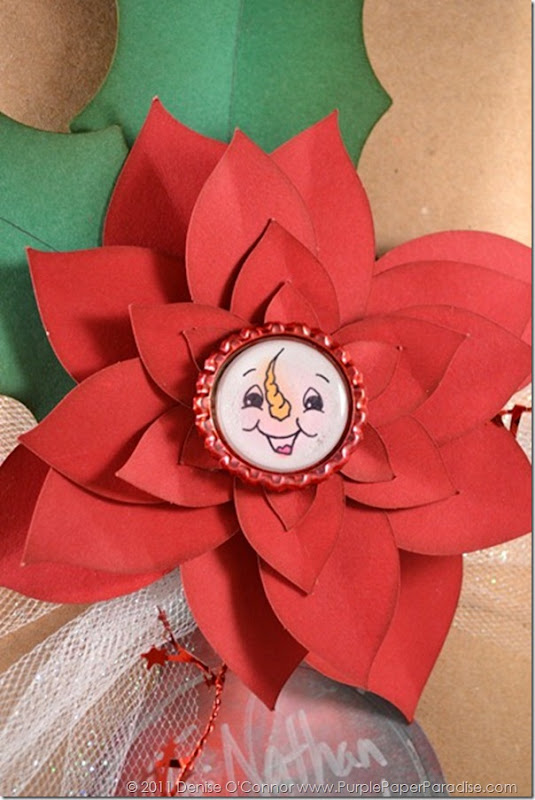
Believe it or not, this present only takes a little bit of extra time and it really makes an impact!  For this particular present, the shape of the box was odd (like most toys are) so I wanted to disguise it’s awkwardness as much as possible.  I decided to cut out the Perfect Poinsettia Cut Pieces from My Time Made Easy.  This is a great resource for files to embellish your packages.  Before adhering the layers that form the flower, I slightly bent each petal in half to give them a little more life and I also inked up the edges.  In between the layers, I added some 3L Scrapbooking Adhesives 3D Foam Squares (in regular height and thin to vary it up some) to add the dimension to it.  I then turned to my Year of Celebration eCraft SD Design Card to cut out the holly leaves which also got bent a little and inked up.


Now, you may have noticed that little gem in the middle…well of course I used my Peachy Keen Stamps for that adorable little snowman face.  This is what makes the project as far as I am concerned because this present was going to a kid, I felt I needed to make this present more appealing to a kid.  The snowman is perfect for this!  I stamped him in Archival Ink and colored him in and then added an epoxy sticker on top of it.  I was really surprised to see that some of my color spread out when I put the epoxy sticker on.  Not sure why this happened, but I decided that I liked the look of it.  I then added him to a flattened bottlecap that I colored red with some Red Pepper alcohol ink from Ranger. 


DSC_0039


The tulle is from Hobby Lobby and I just tied it around the middle and tied it in a knot.  The red wired garland was purchased at Target and I just threaded a piece of it into the knot. On the tag,  I used the Winter Seasonal Distress Ink Pads from Tim Holtz (Festive Berries, Iced Spruce, and Evergreen Bough) to color the tag.  To do this I just swiped some of each color directly onto my non-stick craft sheet and spritzed with water and then dragged the tag through the colors and dried them in between layers until I got the look I wanted.  All I did then was use a White Paint Pen from Michaels to write in my To and From.  I used some bakers twine to tie the tag to that wire garland.  The whole flower with the leaves is then added to my present using some more 3D Foam Squares (love these, can you tell?) and I put it slightly off center so that the petals would cover the knot.


I probably only spent an additional 5-10 minutes on wrapping this present as compared to a present using traditional Christmas wrapping paper.  I had my eCraft cut up all the petals and the leaves while I wrapped the box in the brown paper, so it really can be done quickly.  This week on my blog, I will be sharing some more of my Christmas traditions with you, so I hope you will join me and maybe get an idea or two for next year and I would love to hear about the traditions in your home and how you eCraft your way through the holidays!

Monday, December 19, 2011

eCraft Monday Design Team Project


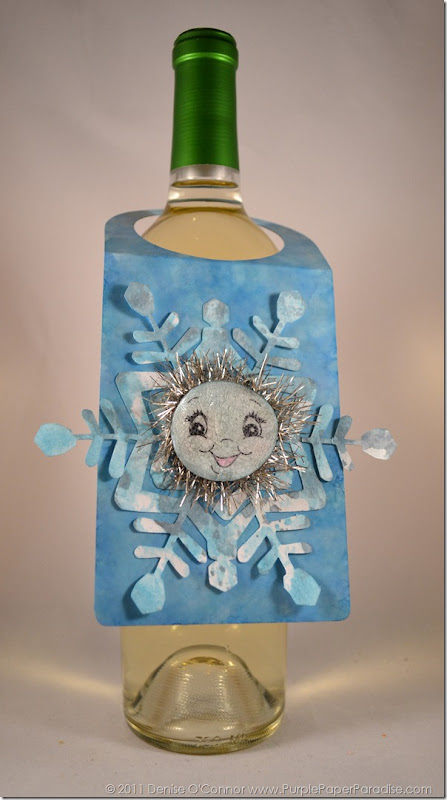
Less than one week until Christmas!  But, we cannot forget that New Year’s is shortly after Christmas!  This week, the Design Team was assigned with the task of making a New Year’s project using our wonderful Peachy Keen Stamps and 3L Scrapbooking Adhesives! With so much going on, I opted again to make a quick and easy project that anyone can duplicate in a short amount of time!  Oh, and I also have a free SVG file for you too designed specifically to use with our eCraft machines!


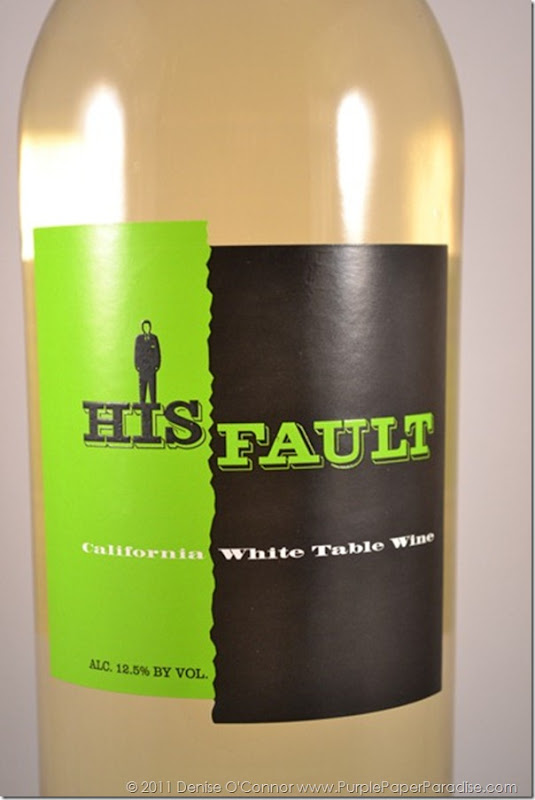
A friend of mine is going through a rather nasty divorce, and this will be her first New Years without her husband, so knowing how the holidays can make people feel kind of down, I decided to try to perk her up a bit!  It involves a bottle of this wine…hey it’s New Years, wine has to be the guest of honor!


DSC_0037

I just loved the name of this wine!  So perfect for my friend!  Of course, I have to dress it up a bit!  So here is what I did.

DSC_0033-1

The first thing that I did was cut out my Wine Bottle Tag using Glossy Cardstock from Ranger.  Because I have set up this file to have a score mark that is being drawn by the pen, I cut this with the glossy side down so that the pen drew the score mark on the back of my tag.  You can download this Wine Bottle Tag SVG right HERE!


I also cut out the snowflake from some regular white cardstock.  This snowflake is from the Year of Celebration SD eCraft Design Card.  I used the eCraftshop Pro software to cut this so that I could also cut out a circle that fits in the center of it.


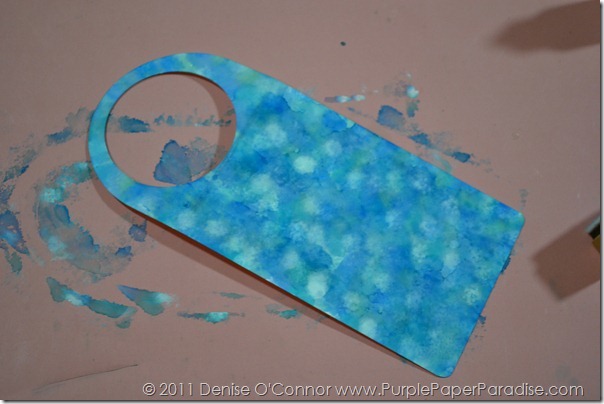
Next to add in my color…I got my tag and some alcohol inks together in various shades of blue.  The colors that I used were Stonewashed, Juniper, Pool, Aqua, Cloudy Blue, and Sail Boat Blue.  Using my Ink Blending Tool and a felt pad, I added a dot of each color onto the felt.  I also added a little Snow Cap Mixative onto the felt.  Then I just dabbed away filling up my entire tag with some color.

DSC_0002-5

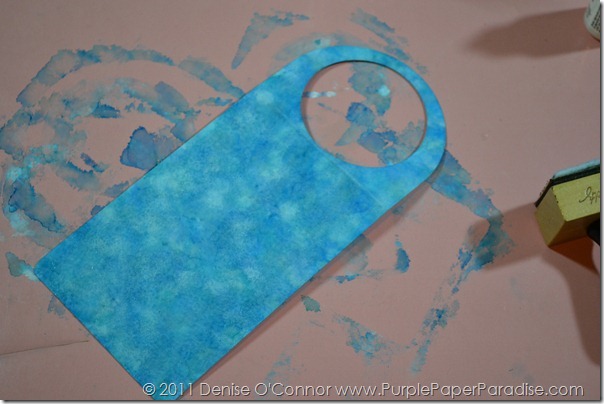
I decided after doing this step that I wanted the colors to be a little more blended, so I added some Alcohol Blending Solution onto the same felt pad and went over it again.  This is the results of that Alcohol Blending Solution.  Love this look!

DSC_0003-5

I then turned my attention to my snowflake.  I wanted to add a little color to the snowflake, but wanted to keep some of the white in there as well.  What I did was swiped my ink pads (Distress Weathered Wood and Tumbled Glass) onto my non stick craft mat and spritzed it with some water.  I then dragged my snowflake through the watered down ink and dried it with my heat tool in between layers until I was happy with the look.

DSC_0035

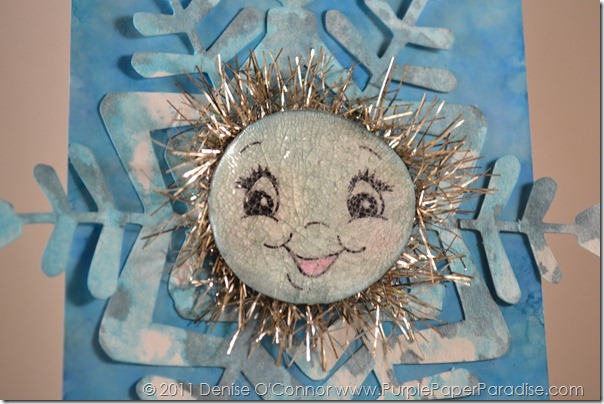
Now for the face…using the largest size stamp in the Winter Wonderland Assortment from Peachy Keen Stamps, I stamped my face onto my circle using Black Archival Ink (important to use a waterproof ink for this step) and then colored in the mouth and added a touch of pink chalk on the cheeks and set everything with a heat tool just to make sure that it was completely dry.  I then applied a thick layer of Rock Candy Distress Crackle Paint.  I let this all dry naturally, but you can speed it up with a heat tool once you see some of the crackle appear.  Once it was all dry, I used my Ink Blending Tool with a little Tumbled Glass Distress Ink to highlight the crackles.  And then I used Weathered Wood to ink up the edges.  Then I added some Melissa Frances Tinsel Ribbon with Crafty Power Tape from 3L Scrapbooking Adhesives onto the back of the face.  I adhered the snowflakes with 3L’s My Stik onto the tag leaving some places not glued down so to add a little dimension.  3L’s 3D Foam Squares are perfect to add the face onto the snowflake!


All in all, this tag went together really quick and would be very easy to mass produce if needed!  I will be back next Monday to share with you a little crafty Christmas tradition in our house!

Saturday, December 17, 2011

eCraft Videos Now for eCraftshop Pro


This is my second post of the day, so scroll down to see the Make the Cut video.


For my eCraftshop Pro video today, I thought I would show you all how to cut a banner from the eCraftshop Pro software.  I used the eCraft vinyl from Craftwell and used the roller end caps and everything for this video.  I hope this helps out some of you that have had questions about this!


eCraft Videos–First off Make the Cut


Hi everybody!  As promised, I have two videos to share with you today.  The first is my Make the Cut video.  In this video, I show you some tips on how to create your own rhinestone patterns in Make the Cut.  So much fun to do!


Here are some rhinestone videos that I did for the eCraft Design Team showing you how to do the entire process from cutting the rhinestone rubber, applying the rhinestones, etc.  In these videos I used a rhinestone patterns from eCraftCentral.com.  They have some really great patterns in case you don’t want to make them yourself! 

Wednesday, December 14, 2011

Where are the Videos?

Hi everybody,

I know that I am WAY behind on getting a new Make the Cut video out there for all of you…what can I say this time of year has me running in so many directions!  I am going to do my best to get the video to you in the next few days (and I am probably going to do my eCraftshop Pro video at the same time to save me a little time closer to Christmas) so that means that you will have 2 videos in the next few days.


Also, I wanted to let you know that due to some technical issues with my e-mail (should all be resolved now), there may be some of you that sent me an e-mail and is still waiting for a reply from me.  If you are one of those people, please e-mail me again.  I promise that I will respond as soon as humanly possible and I am very sorry if you have been missed as a result of this technical hiccup!


Thanks everyone!

Monday, December 12, 2011

eCraft Monday Design Team Project


The countdown is on!  13 days and counting…ladies, sharpen your scissors, ink up your stamps and get your eCraft roaring to go!  There is Christmas crafting to be done!  Today I am going to show a quick and easy eCraft project that is just perfect for when you feel like you don’t have enough time to get everything done!


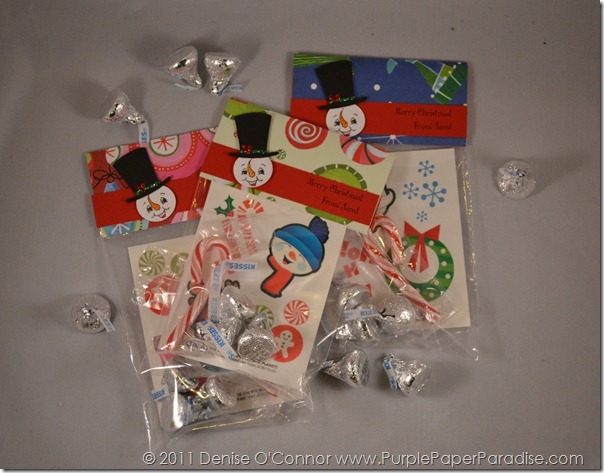
My son is going to be let out from school soon for Christmas break, and as the self-labeled “Crafty Mom” for his class, I have to make sure that he has a little something to give to all of his classmates for Christmas!  These cutie little bag toppers went together in a jiffy.  For detailed instructions and supplies go HERE! While you are there, make sure you sign up to follow the eCraft by Craftwell blog


DSC_0021-2 copy

Monday, December 5, 2011

eCraft Monday Design Team Project


Hi everybody!  Less than 3 weeks until Christmas!!!  Are you ready?  This time of year always seems to go by in a blink of an eye!  Every year, I try to accomplish my “Christmas Crafty To-Do List” and one of the items on my list is a gift for the teacher!  A few years ago when my son started attending pre-school, I asked a friend of mine who is a teacher what makes for a good teacher gift.  Her recommendations were…No Ornaments…No Coffee Mugs…Gift Cards…YES!  In our area, the teachers don’t have as much funding as they once did for classroom supplies.  Often, the teachers will send home a request to the parents to send in supplies.  The problem is that there are families that cannot afford to send in the supplies.  These teachers tend to provide the missing supplies out of their own pocket because they don’t want these children to be left out.  So, because of this, I always give a gift card to an office supply store.  However…my crafty nature, just won’t let that be it!


For the past three years or so, I have also given the teachers a set of handmade tags for their Christmas gifts, and they love them.  This year however, my son has the same teacher that he did last year.  On top of that, last year, for the last 3 days of school, he had a substitute teacher because her family all came down with a horrible flu.  Because of this, she did not get any of her Christmas gifts until after the New Year when the kids returned from Christmas break.  So, I know that she still has the tags that I made her last year, so I wanted to come up with a new gift for her this year.


Hello Pinterest!  I got incredibly inspired by the melt art pictures that I saw here.  Here are some of the ones that inspired my gift.

Source: cmybacon.com via K on Pinterest


So, I set about to create some Melt Art for the teacher.  I did want to personalize it for her, so that is where my eCraft helped me out!


DSC_0017 (2)


I used the eCraftshop Pro software to cut out the N from the Lettering Delights LD Mon Cherie font and cut it out of a piece of chipboard from an old gift box.  Yes, I recycle those too!  I used this because it was white one side and I wanted that for the monogram.  After cutting out the N, I swiped the edges of it with some white pigment ink so that you would not see the kraft colored edges.  I then covered the entire N in embossing ink and used Clear UTEE (Ultra Thick Embossing Enamel) and melted it with my heat gun.  My heat gun got a work out with this project!  The UTEE gave the N a glossy appearance and just added that little something that it needed.


(BTW, my hubby doesn’t normally come into my craft space, but he did one day and saw this sitting on my desk.  He loved it!  When I told him that I was giving it to the teacher, he insisted that I make some for our kids.  That will wait until after Christmas, but I just love getting the feedback especially from him!  Thanks honey!)


DSC_0002-3 (2)


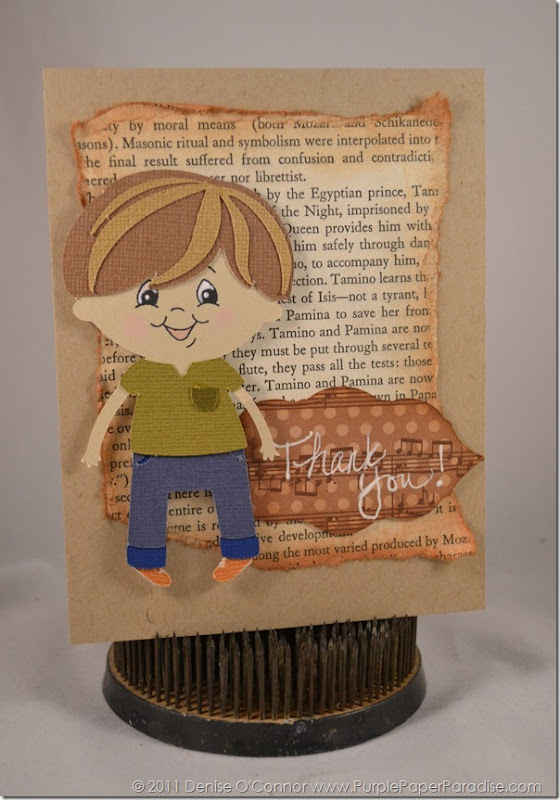
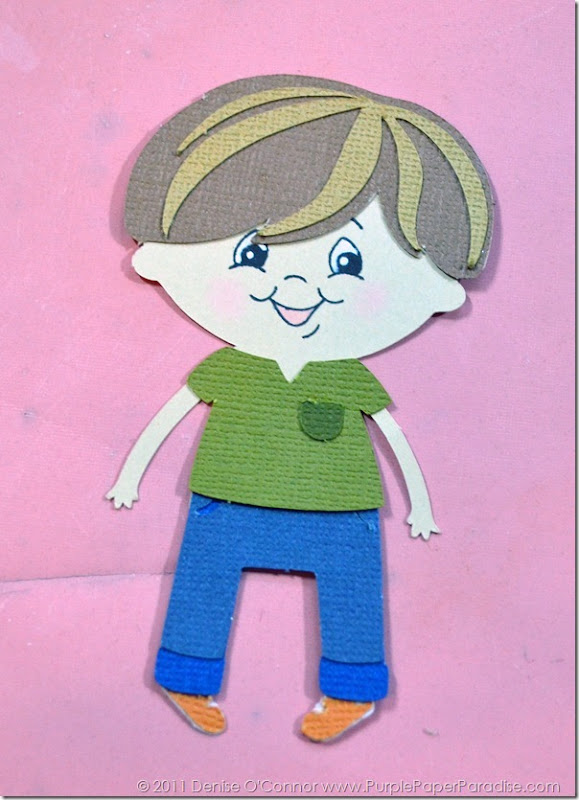
This project is not complete without a card to go with it!  After all, I need to put that gift card somewhere!  I decided to make a Thank You card instead of a Christmas card for the teacher because I really wanted to express to her how much we appreciate all of her hard work.  I decided to create this cutie little boy from the Lettering Delights Dress Up Paper Dolls Set.  Since, this little guy is small, it only makes sense to eliminate the cut face parts and use my Peachy Keen Stamps!


DSC_0002 (2)


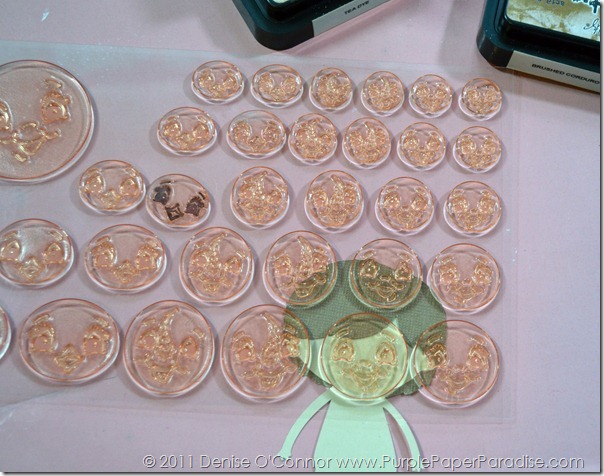
I used the Winter Wonderland Faces for this.  I just love that this set is not only for winter images, the boy and girl faces are perfect for this type of image too and fit in with what I wanted to do! I picked which size to use by lining it up before inking.

After stamping, it is time to color the face. Even though I used a flesh colored piece of cardstock, that white in the eyes makes a big difference!  I used my Signo Uniball pen for this.  I also used a marker to color in the mouth and some Inkadinkadoo chalks from Michaels to highlight the cheeks.


DSC_0005(2)


I also used the wonderful Adhesive Sheets from 3L Scrapbooking Adhesives to assemble this little guy!  This is great for adhering those little pieces!  Some of 3L’s Foam Squares also added dimension!  I love their foam squares because they aren’t too thick!  They work great for layering and they now have “Thin” foam squares so you can stack layered images with these and they won’t stick out too far from the card and make it difficult to fit in an envelope! I will show you how those work really soon!


The sentiment label is from eCraftCentral.com and you can get it HERE.  I am loving this shape lately!  It is one of my new favorites!  It can also be found on the Jen Allyson Designs SD card. The sentiment is actually handwritten by me, something that I don’t do very often, but I thought it would make it more personal.


The background is a page from an old book that I tore up and then inked up with some Brushed Corduroy Distress Ink.  On the inside of the card, I wrote out a note that expressed our appreciation and warm wishes to her and her family.  Now, that I have checked that off my list, I can move on to the next thing on my “Christmas Crafty To-Do List”.  Come back next Monday to see my next project on my “Christmas Crafty To-Do List”.  Also, don’t forget to come back each day this week to see more projects by the rest of our Design Team!

Saturday, December 3, 2011

eCraft Design Team Call!
 

Love your eCraft?  Then apply to become an eCraft Design Team Member!!!  There is now an open call.  You have until December 12th to get your submission in!  Being on the eCraft Design Team is a BLAST!


GO HERE for more information or to the eCraft by Craftwell Facebook page!

Friday, December 2, 2011

eCraft Videos–SCAL 3 Path Menu


This is my 2nd post (and 2nd video) for today.  So if you missed my Fun Foam video, be sure to scroll down.


This month’s SCAL 3 Video is on the features in the Path Menu.  These features are crucial to modifying your files so that you can get exactly the cut that you want.  Enjoy!


eCraft Design Team Video Tutorial!!!


Are you ready for some fun foam?!?!?!?!?!  I am SO excited about today’s video because I have been wanting to cut some fun foam with my eCraft for awhile now.  I have had trouble with it and could not get it right.  Then I got a wonderful e-mail from Tracy about how she was able to do it.  Here is the e-mail that she sent to me.


Hi Denise,

First, I want to say that your blog has been pivotal in my enjoyment of my ecraft - thanks soooooo much for all you do!  I wanted to add a new setting for your chart - I've had excellent luck cutting foam (Darice sticky-back foam, which I found at Joann individually and in value packages) on a pressure of 8 with blade cap ON, and the pen removed.  This has given me a perfect kiss-cut.  A few notes:

-the blade will cut a little into the foam just while moving the cutting head to position it- I found it's better to position the head, pull it up, load the foam, then put the head back down. 

-the kiss-cut seems essential, that is, attempting to cut all the way through both the foam and the backing will probably jam the foam in the rollers. 

-don't try to load the foam through the front rollers - it won't roll smoothly and will jam.  Position and load the foam only into the large rollers behind the blade.

Thanks again,

Tracy

Now, I will admit that I never tried this sticky back foam before, so I ran over to Joann’s and got some.  This product is 2mm thick and our eCrafts are really only designed to cut products up to 1 mm thick so I was a bit skeptical about it.  I was able to get it to cut.  The only problem that I had was that the cut was a bit jagged, so I decided to do another internet search to see if I could find someone that sells 1mm fun foam….and to my surprise I did!  WOOHOO!!  Wandy-foam is an eBay seller and I ordered some 1mm fun foam (12 sheets of 12x18 for $8 plus shipping).  It works great and leaves a much cleaner edge.  When I went back to Wandy-foam’s eBay store, I found that they had listed some 1mm fun foam with the sticky back, so I have that ordered.  I will report the results of that product once I have it all tested out.


Tracy was so nice to let me make a video of her discovery with the 2mm foam (and I also demonstrate the 1 mm in this video), so THANK YOU TRACY!!!


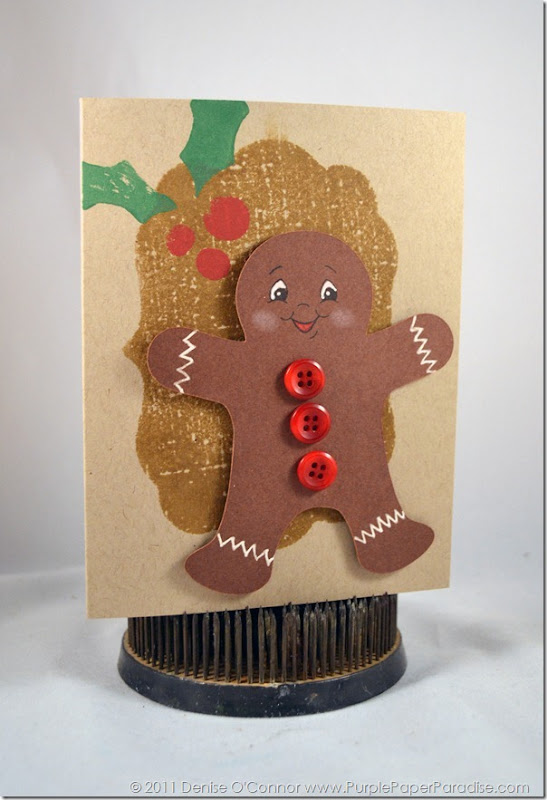
Oh and in case you are wondering, I used my fun foam to make some stamps!  So much fun!  Here is what I made!

DSC_0012-2 copy

Background frame stamp created with the 2mm fun foam which I texturized to give it a vintage look (LOVE THIS!) and I show you in the video how to do this.  The holly is made from the 1mm fun foam and stamped with paint.  My cutie gingerbread man is cut from my eCraft with some Core’dinations cardstock at a pressure of 5 1/2 and embellished with the WONDERFUL Peachy Keen Stamp set Winter Wonderland Faces and some hand drawn chevrons with my Signo Uniball white pen and adorned with some pretty red buttons.  I used 3L Scrapbooking Adhesives’ 3D Foam Squares to pop up him up!  Oh, and in the video you will also see me use the Adhesive Sheets from 3L Scrapbooking Adhesives.  These are great for when you need to add adhesive to any die cuts (especially small pieces)!


Now enough with my yapping….on with the video!


Hope you all have a wonderful weekend!  We are planning on a Christmas movie night, and I am also going to attempt to make a Gingerbread House with the boys…should be interesting!

Monday, November 28, 2011

eCraft Monday Design Team Project


Well now that Thanksgiving is over, that means that it is really time for us to kick our crafting butts into gear! LOL!  Today is Cyber Monday and that means….shopping!  If you are like me, then it seems like every Christmas when my husband asks me what I want, I tell him, “Don’t worry honey I got you covered!”  So that means that today, I just may be surfing some of my favorite crafting sites to see what he is going to give me for Christmas this year! Winking smile


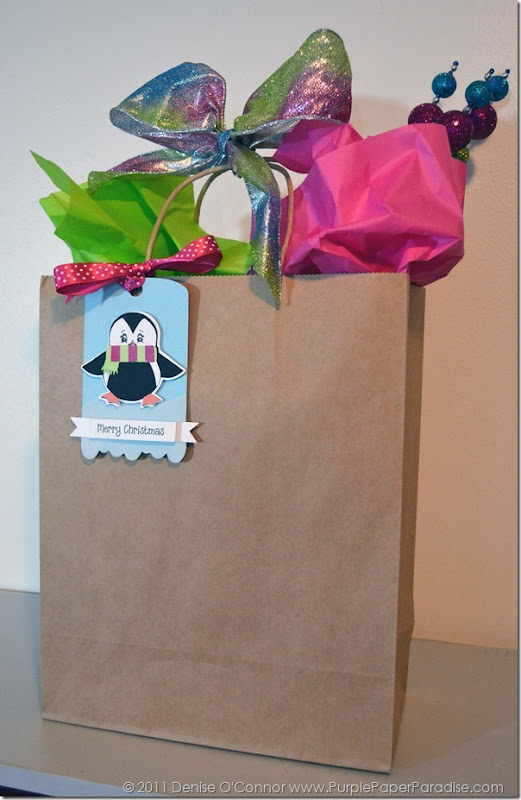
Speaking of presents, let’s get on with my project for today!  Last year, I started wrapping all of my presents in kraft paper and then decorating each present using various embellishments as well as my eCraft machine.  I always make my own gift tags, so I thought I would show you an example of one of gift tags today and how I “dress up” my presents. We have two new wonderful sponsors this month, and I am just over the moon about these great companies!  The first sponsor is Peachy Keen Stamps!  If you are not aware of this company, you must go check them out!  Their claim to fame is their fabulous face stamps!  They work directly with die cuts and you can get faces for just about anything that needs a face!  The other company is 3L Scrapbook Adhesives, and they have some of the best adhesive products on the market! I have been using their products for years and just love them!


DSC_0032 copy


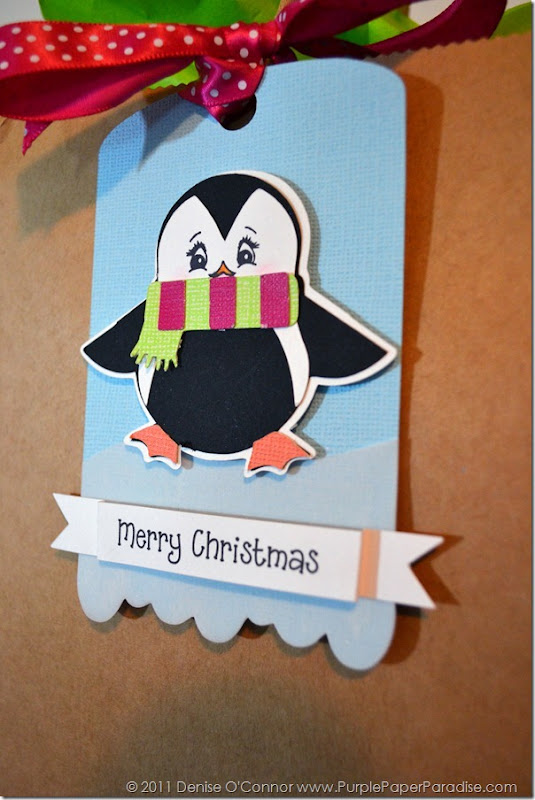
On my gift tag, you can see that I have cut out one of the tags that I created in my last eCraftshop Pro video which you can find HERE in case you missed it (you can also download my file from there as well).  I cut the tag out twice, once in a light blue Core’dinations cardstock that I got from Joann’s and the second time in a piece of vellum that I got from Hobby Lobby.  From there, I just hand cut the wave in the vellum tag so that I was left with just the bottom half.  I then used THIS adhesive runner from 3L Scrapbooking Adhesives to adhere the vellum onto the cardstock.  This is the BEST adhesive for vellum.  After you have applied the adhesive, just rub it and the adhesive almost vanishes into the cardstock.  You would probably need a magnifying glass to see it!


The next step was to cut out my penguin!  Isn’t she cute?  She is from the Eskimo Kisses set at Lettering Delights.  I cut her out of some more Core’dinations cardstock from Joann as well as a few scraps lying in my scrap drawer.  (That drawer is getting way too full!) All I had to do was eliminate the parts that make the face and then I can use my Peachy Keen stamps.  I stamped the face in black and then just colored in the beak.  This stamp is from the Winter Wonderland Face Assortment set. The final step was a little smudge of pink chalk on the cheeks.  You can get chalks just about anywhere, but I particularly like this set from Inkadinkadoo for the pink cheeks and I got it from Michaels.  I also used some 3D Foam Squares from 3L Scrapbooking Adhesives for some dimension on my penguin.


DSC_0033 copy


The little banner was printed out on my printer using the LD Delightful font and then I just cut the strip on my paper trimmer and used a small square punch on the ends to make the banner tails.  A few little score marks make the banner pop up from the tag.


Since all my embellishments are on the front of my tag, I can write the To and From on the back of the tag.  To finish off my present, I placed the gift inside a kraft gift bag from Michaels, filled it with some pink and green tissue paper that I had in stock.  That gorgeous ribbon bow is tied onto the handles and I created that with some ribbon from Michaels.  The colored ball spike thing was also from Michaels and it is just resting inside the bag, so that it can be recycled for another gift down the road.  The final step was to tie my tag onto one of the handles and I used a little Papertrey Ink Raspberry Fizz Swiss Dot ribbon to do that.


I’ll be back on Friday with a video tutorial for you and if you happen to see any great online deals…let me know!

Monday, November 21, 2011

eCraft Monday Design Team Project

Calling all eCrafters!  Today I have 3 BIG goodies for you!  The first is my project for this week using the fabulous Pink by Design Stamps!  We have all been challenged this week to create a 3-D object for you using our eCrafts and our Pink by Design Stamp sets.  I have been using the Beary Merry Christmas set and it is just so adorable!!  I decided to try to vintage up this stamp set with my project this week (and of course this is another food gift item as well).


DSC_0025 copy

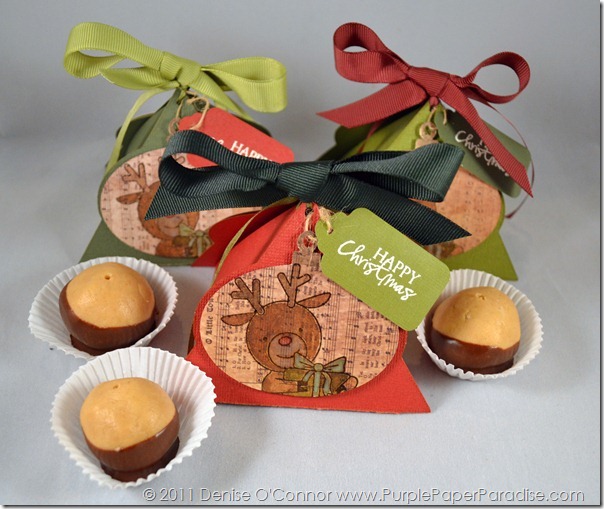
I made these cute little triangle boxes!  The ornament on the front is cut out of Tim Holtz Seasonal Paper and then I stamped my reindeer right on the patterned paper with some Walnut Stain Distress Ink and heat embossed it.  I then used some watered down Distress Inks to color in the reindeer (with a few Perfect Pearls mixed in for shimmer).  I love how you can see the patterned paper through the transparent color.  The tag is from the Laina Lamb Office Essentials eCraft Design Card.  I just love that SD card, so many things that can add that extra little touch!


I also added some Heirloom Gold Perfect Pearls to the ornament toppers.  I used some coordinating ribbons from Papertrey Ink in Pinefeather, Spring Moss, and Scarlet Jewel.  Oh and that sentiment on the tag is also from the Beary Merry Christmas stamp set from Pink by Design Stamps and I heat embossed it in vanilla embossing powder.  Even though it is a small sentiment, it embosses just perfectly!  And I love the font combination too!


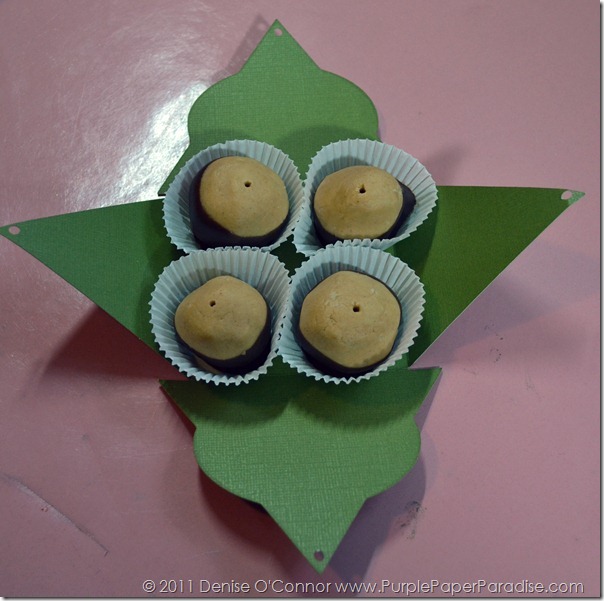
Now, for the second goodie for you!  This box was designed by yours truly and made specifically for the eCraft!  I have the SVG for the box and also the ornament overlay available to you FREE!  The box SVG even has the draw lines in it so that the eCraft pen can draw in those score lines for you.  Just make sure when you cut it out, that you cut the paper upside down so that the pen lines are hidden inside the box.  I made it so that there are two pieces that overlap in the middle so you have a reinforced bottom.

DSC_0021 copy

Just score the two pieces, adhere them together and then tie it up.  Super simple and quick to do when time is at a minimum during the Christmas season.


CLICK HERE TO DOWNLOAD THESE FREE SVG FILES


Now, I have one last goodie for you!  You may have noticed the treats that were packaged up in these little boxes…well, these are a family tradition that goes back many generations.  In fact, we don’t even know for sure how far back it goes.  My Grandma Elsie would make these and always at Christmas.  My mom started to make them especially because we were not always with Grandma Elsie at Christmas time and the recipe became so requested that now they are made on both sides of my family.  My husband’s family always request these at Christmas, so I usually make at least one Double Batch a season.  I give a few to co-workers and neighbors and I always get asked for this recipe.  I have seen other recipes similar to this out there, but they are never quite the same.  Could be because of all of my childhood memories of these, but I don’t think so!  My Grandma Elsie passed away in 1990 and I miss her greatly and whenever I make these, I think of her.  So in honor of her, I am naming this recipe after her, and I hope you enjoy them as much as me and my family do.


Grandma Elsie’s Buckeye Balls

1 1/2 cups creamy peanut butter

1/2 cup butter (softened)

16 oz. Powdered Sugar

1 tsp. Vanilla

6 oz. package semi-sweet chocolate chips

2 TB solid vegetable shortening


Line a baking sheet with wax paper.  In a bowl, mix peanut butter, butter, powdered sugar and vanilla with hands to form a smooth dough.  Mixture will be very stiff.  Shape dough into 2 tsp. for each ball.  Place on wax paper and refrigerate overnight.  When cool, melt chocolate and shortening together in a small bowl or a glass measuring cup.  Insert wooden toothpick into ball and dip in chocolate to cover half the ball.  Refrigerate on wax paper for 30 min or longer until chocolate is firm.  Store in plastic containers with wax paper between the layers.  Can freeze.


These are truly wonderful!  It just so happens that I am snacking on one as I type. Smile  Have a great week everybody and I want to wish all of you a Happy Thanksgiving!  Don’t forget to follow me, Debi, Lisa and Raven on the eCraft by Craftwell blog we have a lot of great things in store for you and you won’t want to miss it!
Sunday, November 20, 2011

eCraft Video using eCraftshop Pro for November


Hope all of you are doing well today!  Today, I have a video on eCraftshop Pro using basic shapes to create some tags.  Hope you all will find this useful!


Oh, and HERE is the file with the two tags as shown in the video so you can use these for yourself!  Have a great day!

Monday, November 14, 2011

eCraft Monday Design Team Project


I am back with some eCrafty goodness today!  This week the Design Team was challenged to make another Christmas project using our wonderful Pink by Design Stamps and incorporate a sky element into the project, such as stars, clouds, sun, moon, planets, etc.  Continuing on with my personal challenge to make every project this month a food gift, I am incorporating one of my favorite ways to give food gifts.  This is so quick and easy to do and really makes a simple food gift special!

DSC_0202 copy

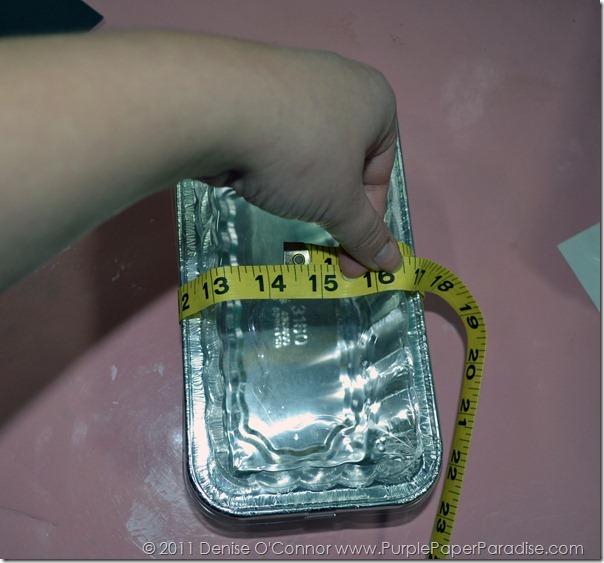
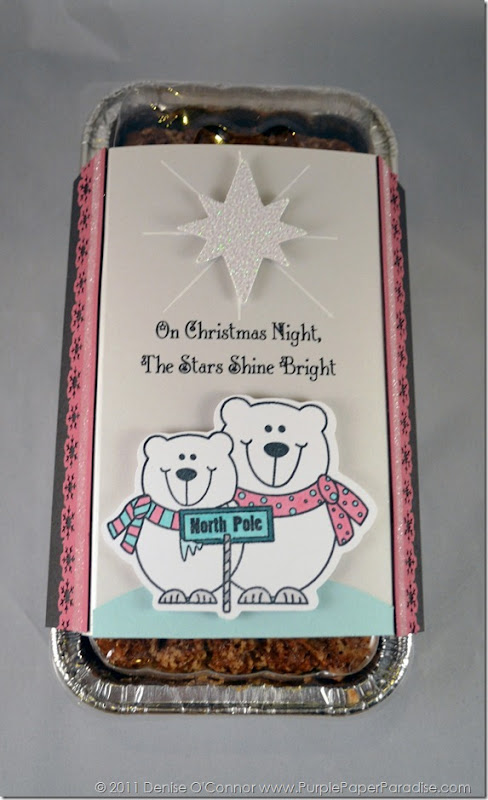
For this project, I started with a simple aluminum pan that you can find at any grocery store.  The ones that I got came 3 in a package, so while my Zucchini Bread was baking in 2 of the pans I used the third one to create my wrap.  These pans came with clear lids, so I attached the lid and took some measurements.  I used a flexible sewing tape measure to get my measurements.

DSC_0134-1 copy

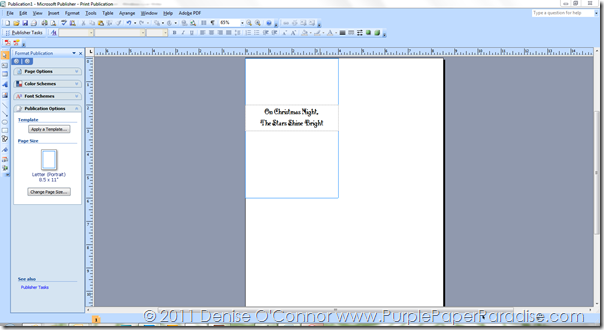
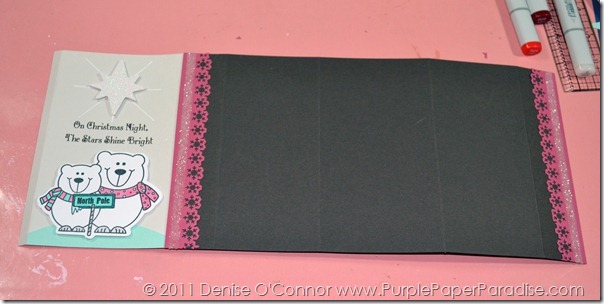
All the way around, my measurement came in at 14 1/4” so I knew that I would have to paper piece the wrap.  I then proceeded to take some measurements of the sides and where I would need to score to get a nice clean fit.  Then I started to create the wrap.  I knew that I needed a panel on the top that measured 3 1/2” wide and then added 1/2” so that I would have something to attach to the rest of my wrap on each side.  I decided to use my computer to print my sentiment directly on this panel.  To do this I used Microsoft Publisher and set up a 8 1/2”x11” page document and used the Layout Guides to see the finish area.  This will also be where I want to cut this paper after it is done printing.

publisher set up print sentiment

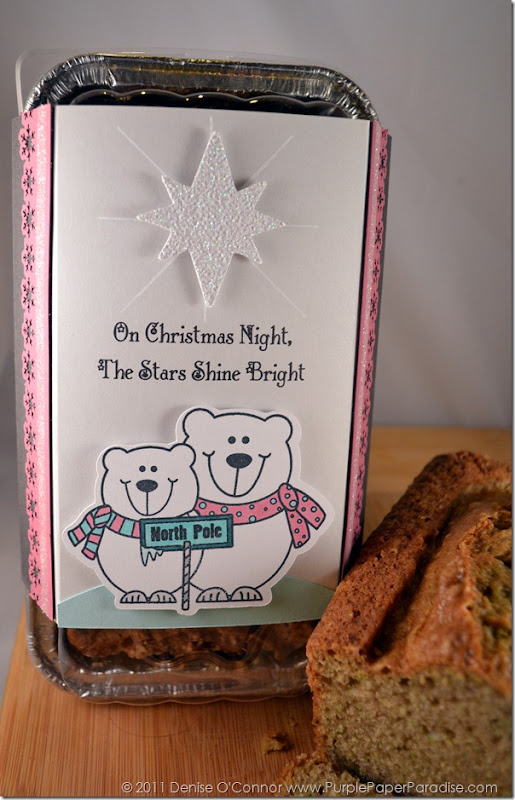
I printed my sentiment onto Papertrey Ink Soft Stone cardstock and used Lettering Delights Deck the Halls font for the sentiment.  Once I had it printed out I was ready to add my elements onto it.  The first thing that I did was use my eCraft to cut a large 7” circle out of Papertrey Ink Aqua Mist cardstock and then used my Xacto knife to cut a sliver off of it to create the ground on which my Polar Bears will stand.  These Polar Bears from the Pink by Design stamp set Beary Merry Christmas are just so cute that I had to use them again!


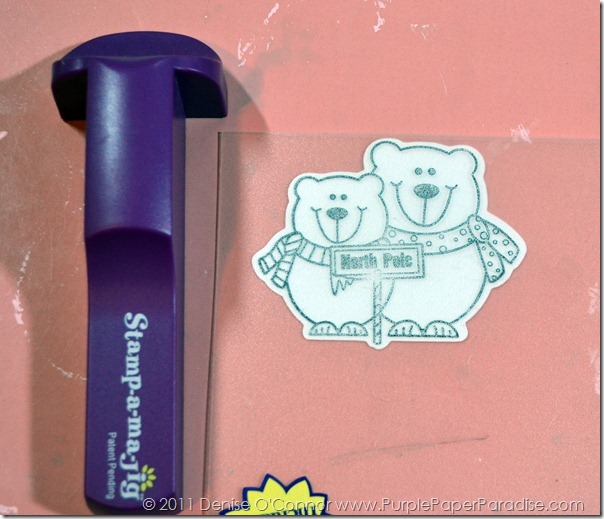
The next thing that I did was create the mat for my Polar Bears.  I actually did a video on how to do this that you can find HERE.  You will need Make the Cut and a scanner to do this.  Once I had my mat cut out, I used my Stamp a Ma Jig to line it up the stamp onto the mat.  Sometimes I skip this step and just eyeball it, but I made a small shadow on this mat and did not want to chance it.

DSC_0193 copy

The Stamp a ma jig really makes this easy to do.  To make sure that my mat did not move around on me, I used a little removable adhesive from 3L Adhesives to adhere it to my craft mat.  I then went to coloring in my bears with some Copics.


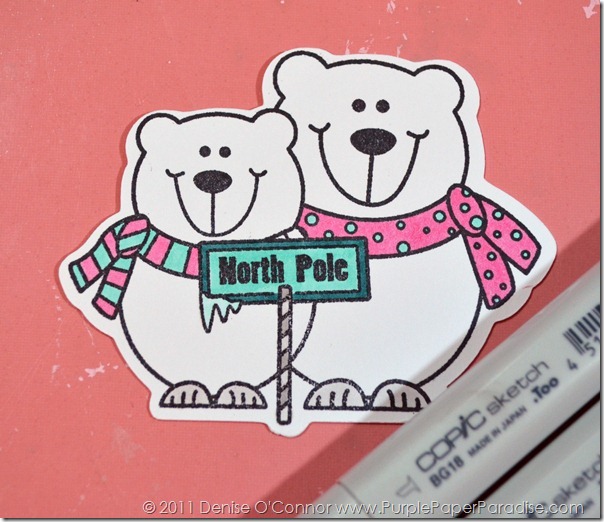
DSC_0195 copy

Nothing too fancy here, since I just needed a little color on the scarves and the sign.  The Copic colors that I used are RV34, BG11, BG13, BG18, T1 and T4.


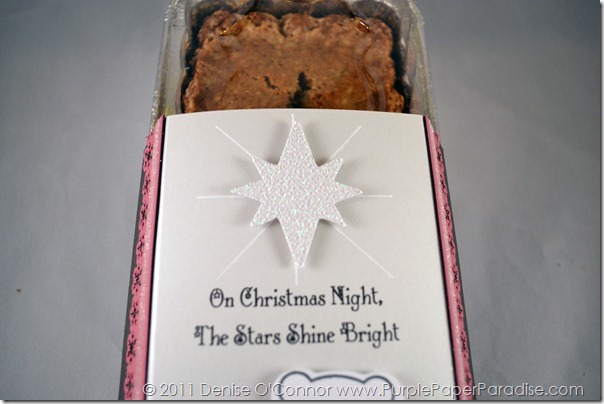
Next step was to create my sky element.  Wouldn’t you know that the very day that I was figuring out what to do, eCraftCentral.com came out with THIS star?  It was just perfect for my project, and so I cut it out of American Crafts white glitter paper.  To add a little more pizazz to the star, I used my white Signo gel pen to add some lines to reflect the shining star.  Since my cardstock is a very light gray color, the white shows up very nicely.

DSC_0209 copy

I used some Foam Squares from 3L Adhesives to adhere my star and the Polar Bears and then created the rest of my wrap.  I used Papertrey Ink Smokey Shadow for the rest of the wrap and Papertrey Ink Autumn Rose for the side accent pieces which were punched with a Martha Stewart border punch.

DSC_0196 copy

I also added some Crafty Power Tape from 3L Adhesives onto the accent pieces and added some Martha Stewart crystal fine glitter to add a little more shimmer.  As you can see in the picture above, my entire wrap was created before my bread was done!  I let my bread cool overnight and the next morning, I simply put the rest of it together.

DSC_0205 copy

Oh and in case you are wondering, the Zucchini Bread recipe that I used was from Paula Deen!  Can you tell that I love her recipes?


Are you following us on the eCraft by Craftwell blog?  If not, you really should be!!  Debi, Lisa and Raven have some more amazing projects this week and let’s not forget about our Friday video tutorials!  I’ll be back next Monday with another project for you and this is definitely a project you will not want to miss! 

Thursday, November 10, 2011

Make the Cut Video for November

Edited to fix link

Hi Everybody!  I am back today with a video on Make the Cut especially for us eCrafters!  If you have been following me for awhile, then you know that I love Lettering Delights! A little while ago they came out with a new product line called Cut Tiles.  These are specially formulated to work with the Texture feature in Make the Cut.  With these tiles, you can use their pattern and re-color them to work for your project.  It is kind of like have thousands of options of digital paper right at your finger tips.  I have been using these for awhile now and I just love them!  My video today is focusing on how to re-color these Cut Tiles and it is easy peasy!


As mentioned in the video, I am using the newest stable version of Make the Cut which is version 4.04 and you can download it HERE.

From one Lettering Delights customer to another, make sure you use a coupon!  Don’t have one?  Just “buy” a freebie and you will be sent an order receipt and a coupon code for 25% off your next order will be on that receipt.  Great way to get these Cut Tiles or any other Lettering Delights files you may want!

Monday, November 7, 2011

eCraft Monday Design Team Project


Before I get started with my project today, I have to send a BIG Happy birthday to my son Jared!  Happy Birthday Jared!  I love you and I cannot believe that you are already 7!  Yikes, I just realized that means that in 9 short years he will be driving!  Where does the time go? 


This week the eCraft Design was given quite a challenge!  I personally love to use non-traditional Christmas colors, but I usually go with bold darker colors.  We were challenged to use a hot new color combination for Christmas…Baby Pink, Baby Blue and Lime Green!  Well I love a good challenge and this one is definitely out of my comfort zone, but I have to say that I LOVE what I made!

DSC_0134_edited-1

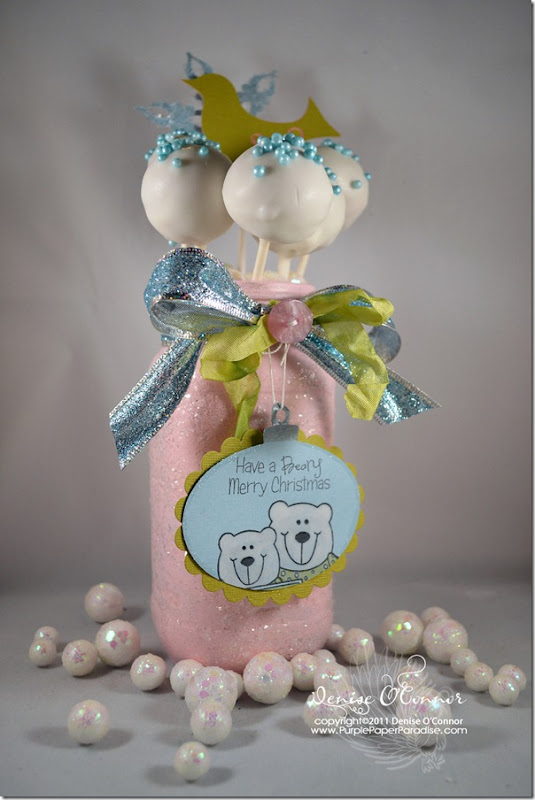
There is such a whimsy to these colors isn’t there?  Since I am also focusing on treat containers this month, I thought it would be fun to take something that all of us have at home, and use it for our treats (which even though they look complicated, are REALLY easy, keep reading and I will explain).


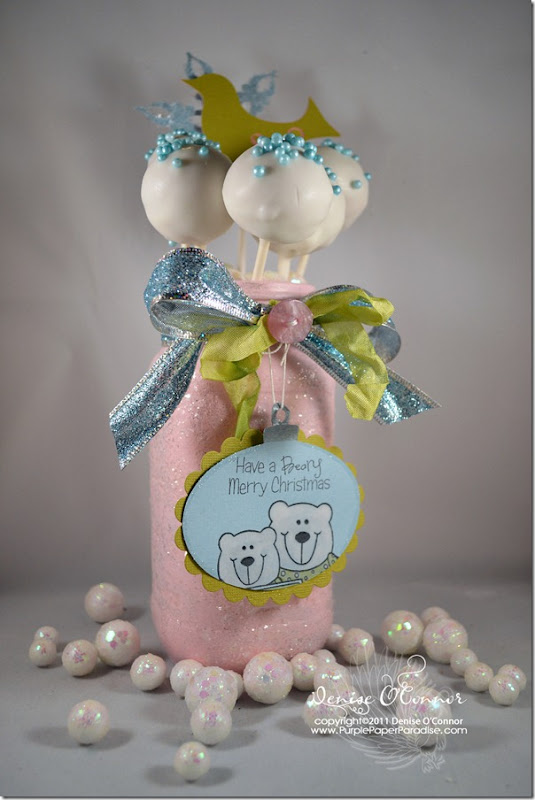
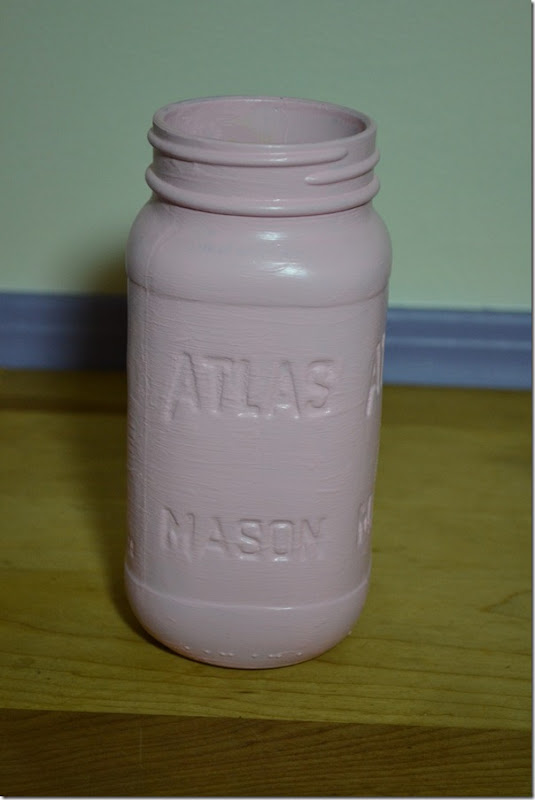
The first thing that I did was take a jar of Classico Spaghetti sauce and made spaghetti for dinner so that I could use the jar in my project! I love the details on the jar itself, so it was perfect for this project!  I used Martha Stewart’s line of acrylic paints (found at Michaels) and painted the jar.  These paints work on all sorts of things including glass, so this was easy as can be.  The paint that I used was the satin finish and the color is called Pink Carnation.  Oh and don’t worry about the paint job being perfect because the glitter will conceal a lot!


DSC_0125_edited-1


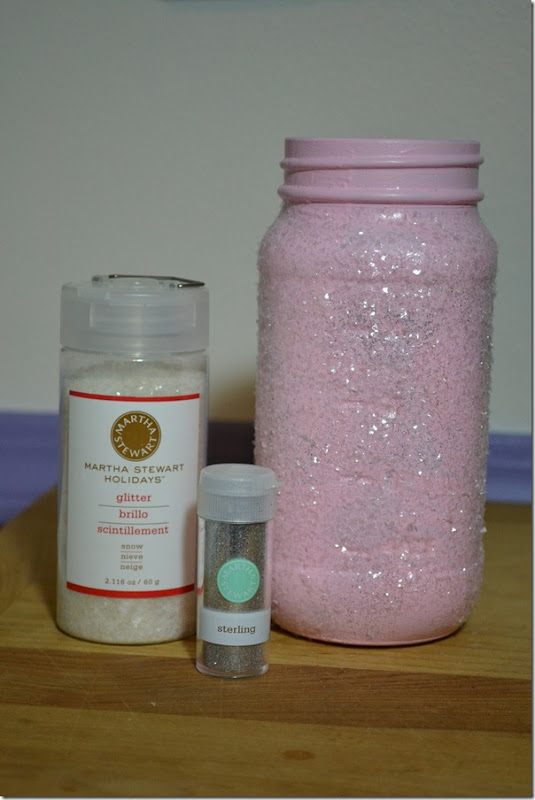
I then took some Mod Podge and covered the entire jar and then went a little glitter crazy!  I used Martha Stewart Snow Glitter and Sterling fine glitter.  I used the Sterling sparingly just to add a little touch of silver.


DSC_0127_edited-1


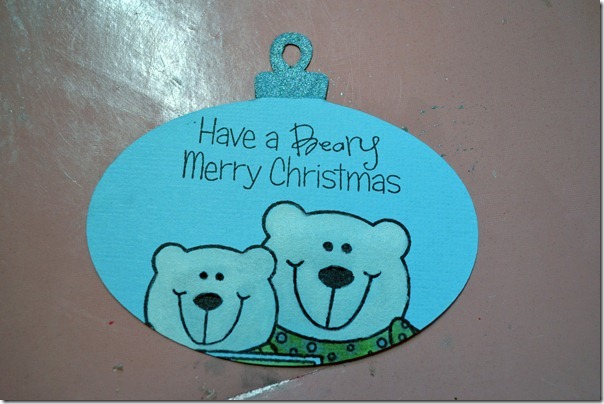
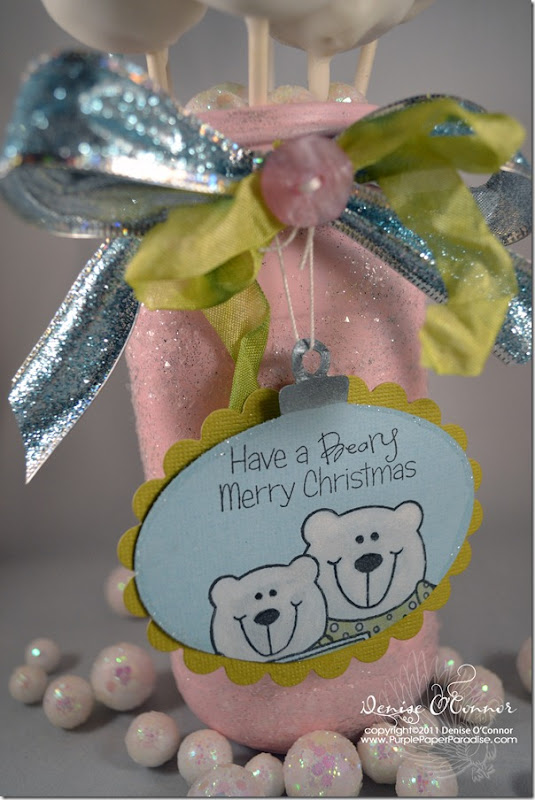
While I let the jar fully dry, I went to work on my tag. I used THIS ornament from eCraftCentral.com but also found on the Jen Allyson Celebrates SD Design card. I skewed it in eCraftshop Pro to form a more oval ornament and one that was big enough for my stamps.  I cut it out of Core’dinations cardstock using a veggie mat, pressure of 5.5, no tabs and blade cover on.  I then went to stamping.  My Pink by Design stamp set Beary Merry Christmas was perfect for this whimsical project.  I actually only stamped the bears heads on the tag along with the sentiment.  I then used some Picket Fence Distress Stain to color in the bears.  I love how it gives a chalky look to it!  To do this, I just put some of the Distress Stain directly on my non-stick craft mat and then used a paint brush to paint in the bears.  I did two coats of this.  I messed up in a couple of places and just went over the black stamp lines where the Distress Stain ran over them with a black marker.  I also used the same method with Shabby Shutters Distress Stain for the scarf and the little bit of the sign that is showing.  I then used Perfect Pearls and painted that onto the ornament hanger.


DSC_0120_edited-1


I added a scalloped oval behind the whole ornament and also if you look closely you will see that there is a small amount of glitter along the edges of the blue ornament to add a little more shimmer. I then set about creating the bow around the top of the jar.  I used some Christmas ribbon from my stash and then layered it with a bow out of handmade Crinkle ribbon and topped it off with the pink button.  The ornament is actually the same thread that is threaded through the button.  I used some amazing Crafty Power Tape adhesive from 3L Adhesives to adhere this bow onto the jar, and let me tell you….it is not going anywhere!


DSC_0138_edited-1


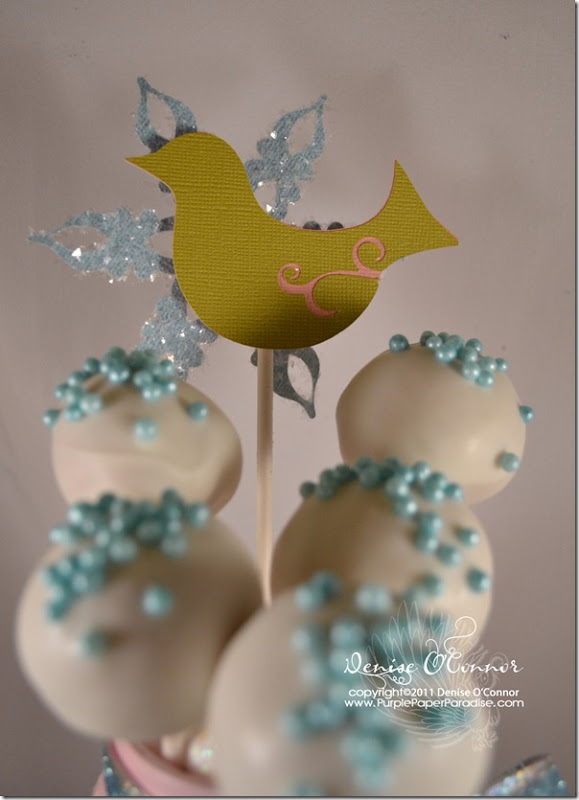
I added some floral foam inside the jar and started to add my “Cheater Cake Pops” (more on this in a bit, I promise) into the jar and decided that I wanted one more element in there, so I created this super simple decoration using the bird cuts and the snowflake cut from the Jen Allyson Celebrates SD Design card. The snowflake can also be found on eCraftCentral.com right HERE.  For the snowflake, I again doused it with the Martha Stewart snow glitter.  After I added this into the jar, I filled it up with some decorative filler.

DSC_0136_edited-1

Now it is time to talk about the “Cheater Cake Pops”.  I got this idea from the Frugal Crafter who did this for a birthday party and I decided that I absolutely had to do this.  You see, I have been seeing recipes for the cake pops for a while now, and they look wonderful.  The problem is that, I would rather spend my time eCrafting than in the kitchen.  Who can blame me right?  That is why I never made them, they always seemed like they would take more time to do than I was willing to give to it.  So here is my recipe and it seriously took me maybe 10 minutes to do, and they were good too!

CHEATER CAKE POPS

12-16 Donut Holes (I got mine from Dunkin Donuts, you want the cake donut holes)

1 (16 oz.) package of Candi-Quick (found at any major grocery store)

Sprinkles or any other type of edible decorations

Lollipop sticks and something to stand them up in (I think floral foam would work beautifully)


Put your donut holes in the freezer for a few hours or overnight.  After they are frozen, insert your lollipop sticks in using a twisting motion.  Follow the directions to melt the Candi-Quick and then dip each donut hole into the Candi-Quick and let the excess drip off.  Then place in your floral foam and add your sprinkles.  Let the Candi Quick set.  That’s it, you’re done! Oh and I should mention too, that I recommend that you wrap your cake pops in a small cellophane baggie.  They sell some in the major craft stores in the candy making aisle if you plan on giving this to someone.  That way they will be protected from all the glitter!  I didn’t do that on my project because I think I am going to use this for a small centerpiece on my table.


DSC_0134_edited-1


Have a great day everybody, and be sure to come back every day this week to see what the other ladies have in store for you with this hot new Christmas color combination!

Friday, November 4, 2011

eCraft Design Team Video


Hi everybody, I am back today with another eCraft Design Team video.  In today’s video, I show you how to use die cuts from your eCraft to emboss paper!  This adds a whole new element to the possibilities of what we can do with our eCraft.  Oh, and have you heard about the eBosser?  I cannot wait to get this machine!  Craftwell is going to be releasing this machine this winter!  The eBosser is a machine that is fully electric (no more turning a crank) and will take a full 8 1/2x 11 piece of paper!  Just awesome!  You can cut with it using your metal dies too!  For more information about the eBosser, make sure to check it out HERE!


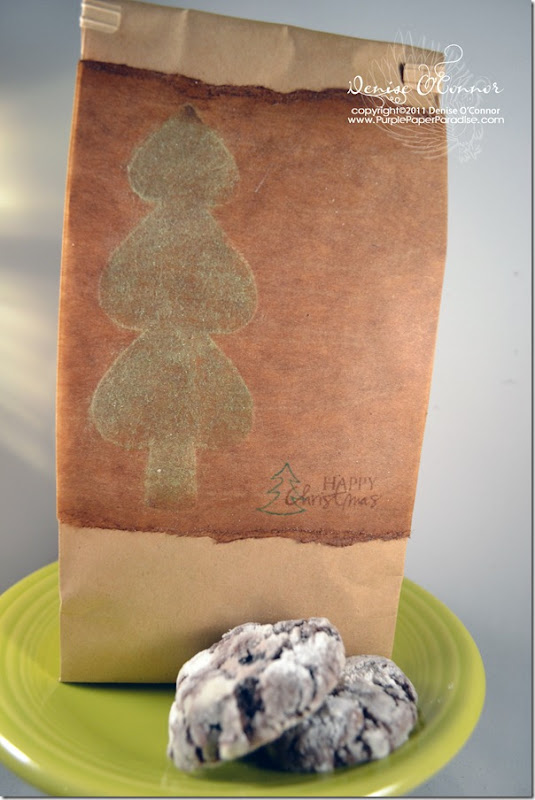
Today’s project is a quick and easy treat bag!  This is a great technique to do and great for mass producing since you only need to cut one image.

DSC_0113_edited-1

The cookies are a recipe from Paula Deen and they are called Chocolate Gooey Butter Cookies!  So easy to make and really yummy too!

Hope you enjoyed this tutorial!  Next week, the Design Team has a whole new challenge using the wonderful Pink by Design Stamps!

Thursday, November 3, 2011

SCAL 3 Video for eCraft users–November

Hi everybody!  I know I am very late on posting this video.  I have been dealing with a computer issue for the past few days…AARGGHH!  Hate it when that happens LOL!


Today’s video is one that I have been wanting to bring to all of you for awhile now and I finally took the time to figure it all out for you.  Today we are going to be using Sure Cuts A Lot 3 to do a Print & Cut with the eCraft.


If you have not seen my previous video on this where I used Make the Cut, make sure to watch that HERE because in that video I demonstrate how to set up the eCraft for this. 


Enjoy the video and I hope that this helps some of you!


Monday, October 31, 2011

eCraft Monday Design Team Project


HAPPY HALLOWEEN!!!


Before we start with today’s project, I want to wish you all a happy and safe Halloween!  I hope that all the kids have a wonderful time today!


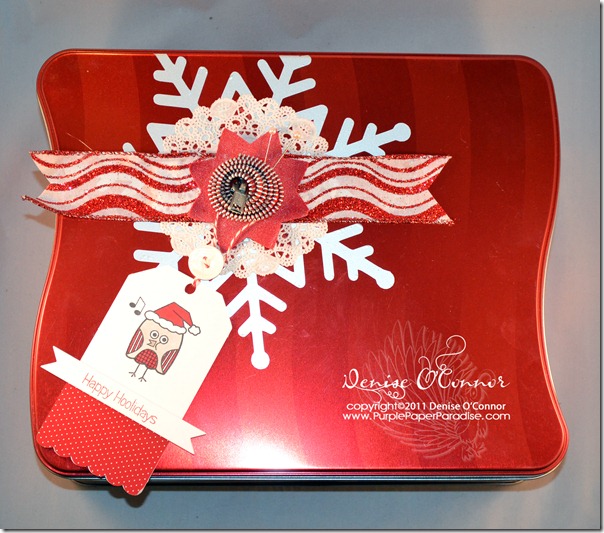
Now that Halloween is here, believe it or not, it is time to start thinking about another major crafting holiday that is coming!  It is less than 2 months away…that’s right I am talking about Christmas!  This month, the eCraft Design Team is focusing on Christmas.  We have another wonderful sponsor too!  Pink by Design Stamps!  This week all of us are going to be using Pink by Design Stamps to make a Christmas project using an image from eCraftCentral.com and fabric.  I have decided that for this month, I am going to focus my Design Team projects on one of my favorite parts of the Christmas season…gift giving!  Every year, I put together some food gifts to give to some of the people in my life to show how much I appreciate them.

DSC_0106_edited-1

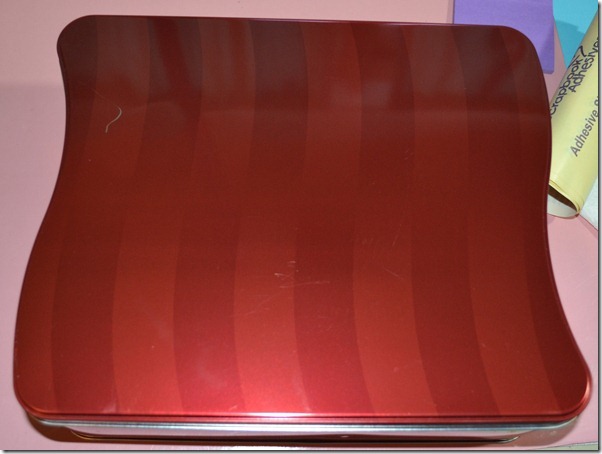
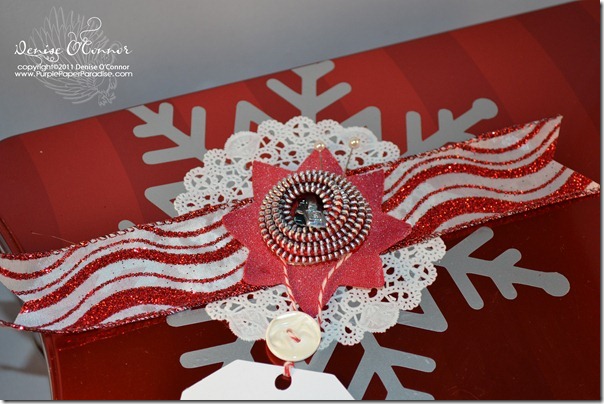
I started this project with a recycled cookie tin.  I love the shape of this tin and the red color is just gorgeous.  There is however a scratch in the lid, so I knew that I wanted to cover that up.

DSC_0069-3_edited-1


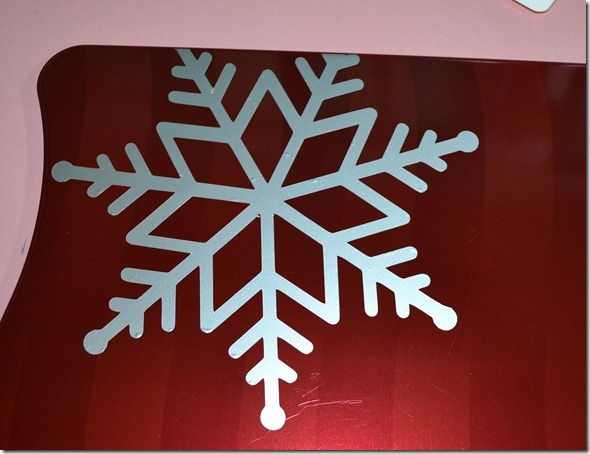
A snowflake from eCraftCentral.com found HERE cut in silver vinyl is just what is needed to cover that scratch!  The snowflake went over the top edge of the tin a little, but that is not a problem, I just trimmed off the excess.


DSC_0071-3_edited-1

Now to add more on top of the snowflake!  I added a doily that is from Wilton and can be found in the cake decorating aisle of any major craft store.  I then added a strip of ribbon on top of that.  Then I cut another image from eCraftCentral.com


DSC_0073-2_edited-1

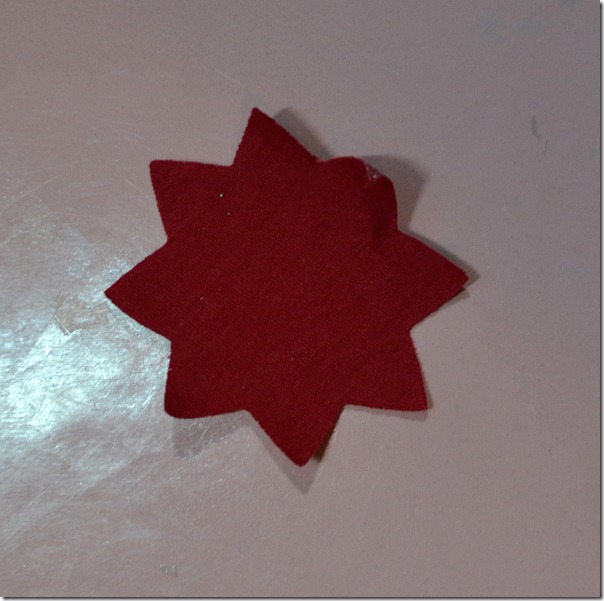
This shape is actually an outline of THIS flower.  I obviously did not draw any of the inset pieces.  This shape was cut out of an old t-shirt of my husband’s.  I love how even with the Heat n Bond on the back the edges still curl up a little to add a little more dimension.  I also spritzed this with some Perfect Pearls mist and since the fabric I used is a t-shirt, it really soaked up the mist well.


DSC_0104_edited-1

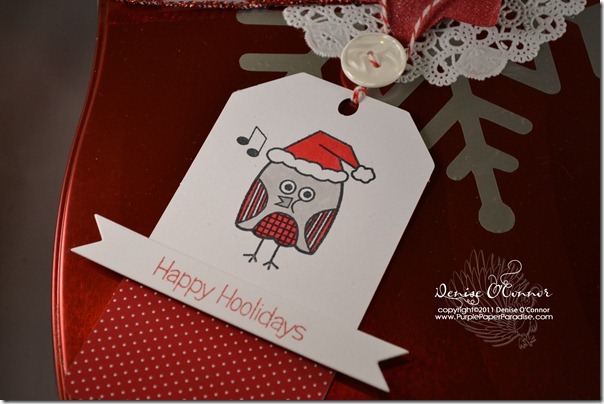
The zipper flower and the pearlized pins are the finishing touches.  Next step is the tag!  Every good gift needs a tag and this is where my Pink by Design Stamp Set came into play.  I love this little owl from the Beary Merry Christmas stamp set.


DSC_0105_edited-1

First off the tag is another cut from eCraftCentral.com found HERE and I cut the tag out twice.  Once in white cardstock and the next time in a red polka dot patterned paper.  I cut the patterned paper tag and adhered the bottom portion onto my tag and stamped the owl in the top half.  I just had to color in this cutie with some Copics!  To keep with my color theme, I made the owl a light gray, and colored in the red hat and some red accents on the wings and the belly.  The sentiment is also from the Pink by Design Beary Merry Christmas stamp set.  To attach the tag, I tied a bit of red baker’s twine to the zipper flower and added a white pearly button.

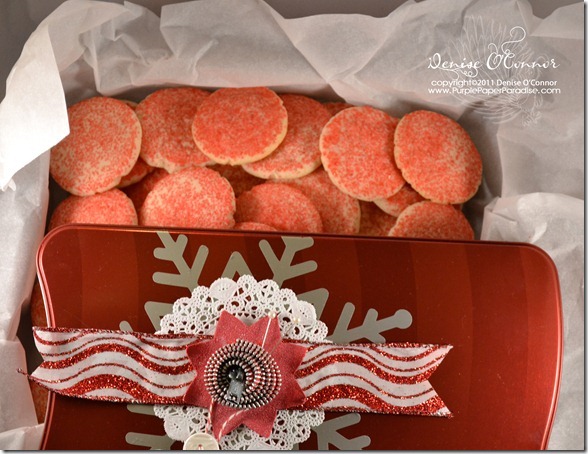
Now, what to put inside this box!  I chose to fill it up with some Sugar Cookies.  These are the easiest sugar cookies to make and a recipe that I grew up on.

DSC_0110_edited-1


Here is the recipe in case you would like to make them yourself!

AUNTIE BARB’S SUGAR COOKIES (No-Roll Sugar Cookies)

1 cup sugar

1 cup butter

1 egg

1 tsp. vanilla

2 cups flour

1 tsp. cream of tartar

1/4 tsp. salt

1/2 tsp. baking soda


Cream sugar and butter together.  Add egg and vanilla.  Blend in the remaining ingredients that have been sifted together. Roll dough into small balls and place on ungreased cookie sheet.  Flatten with the bottom of a glass that has been dipped in sugar (it helps if the glass is a little wet to pick up the sugar).  Bake in a preheated oven at 350 degrees for 10 minutes or until slightly browned around the edges.


Hope you enjoyed my project this week!  I will be back on Friday with a video tutorial for all of you!

Related Posts Plugin for WordPress, Blogger...