Tuesday, July 30, 2013

Loving Scraperfect!

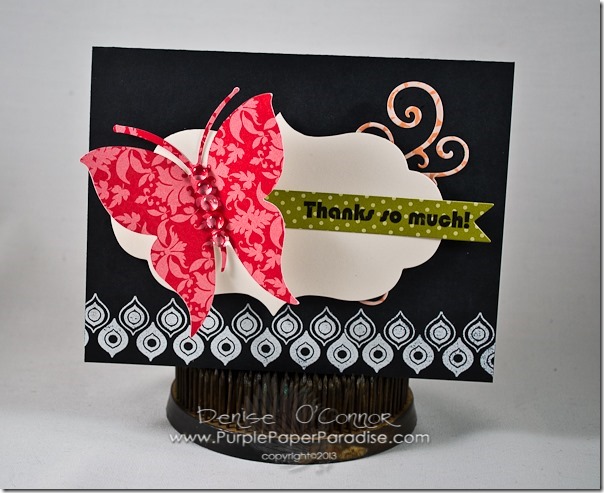
Scraperfect.com makes some awesome products and I have really enjoyed using them this month.  Today I decided to make a really quick and simple card using their Perfect Crafting Pouch and the Embellie Gellie.  This card came together very quickly!

20130726-DSC_0010

To really show off how well the Perfect Crafting Pouch eliminates those pesky rogue specks of embossing powder, I put it to the ultimate test.  White powder on black cardstock.  I can say that normally I avoid doing this because any white specks of powder in the wrong place always seem to ruin the illusion for me.  Not with the Perfect Crafting Pouch….no white specks!  Yippee!  Since I did this embossing right on the card base, I added some die cuts cut (with the eBosser of course!) using dies from Tim Holtz, Papertrey Ink and My Favorite Things.  I also added a butterfly cut using my eCraft and the Fundamentals 1 SD card.  I have used this butterfly image so much since getting my eCraft!  I bent the wings of the butterfly up a bit and then with the help of the Embellie Gellie, I glued the Pebbles onto the body.  This is so much easier to do with the Embellie Gellie.  With the Pebble flat on my worktable, I touch the Embellie Gellie to the rounded edge and lift it up, add a dot of liquid adhesive to the flat underside and then put directly into place on the butterfly.  Once I have it in place, I used a craft stick to hold it in place and then with a little twist on the Embellie Gellie, it releases the Pebble.  Easy Peasy!


If you have not used the products from Scraperfect.com, be sure to check them out! Great products and a Great company!

Tuesday, July 23, 2013

Vintage Embossing

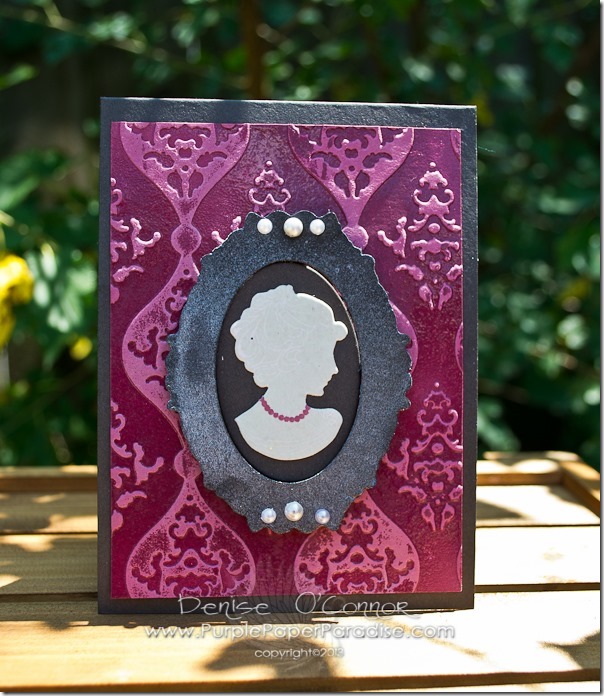
Last week I showed you a technique where I inked up an embossing folder and used that to create a layered grungy look.  This week I decided to show you the same method but achieving a much cleaner look.  Knowing that anytime you rub ink onto something, you can not get perfect precision, I decided to go for a vintage wallpaper look.

20130718-DSC_0018

I inked up the inside of Craftwell’s Regency embossing folder with Versamark ink.  I have loved this folder from the get go and it always made me think of elegance and sophistication so that was perfect for my vintage wallpaper. Before I could run a piece of Papertrey Ink Autumn Rose cardstock through the folder in my trusty eBosser, I rubbed Scraperfect.com’s Perfect Crafting Pouch all over the paper.  After running through the ebosser, I embossed it with some fine clean embossing powder.  Since I inked the folder so that the recessed portions would be inked, knowing that there would be some smudges of the ink on the embossed parts it leaves the impression that the entire wall was glossy and shiny originally, but over the course of time  those raised parts got worn and the shine wore off.  I again used Scraperfect.com’s Best Cleaner Ever to clean the embossing folder.


Turning to my stash of stamps, I knew that I had to use the Simply Jane stamp set with coordinating dies from Papertrey Ink.  I took the frame die and cut a piece of coaster chipboard as well as a piece of Smokey Shadow cardstock.  Then with the oval cut out from the chipboard die cut, I cut the bust. Using a light gray ink, I stamped the bust image onto the die cut and then stamped the necklace on top.  That bust got adhered to the the oval cut from my Smokey Shadow die cut.  I adhered that oval into the center of my wallpaper and then turned my attention to the frame.


I had cut the frame from the chipboard because I wanted the dimension, but I was not thrilled with the color so I grabbed my spray inks.  First I spritzed my chipboard frame with some water and then spritzed with some black spray ink.  This gave me a smoky gray color and then to dress it up a little more I spritzed some Perfect Pearls spray on top for that shimmer.  Using my Embellie Gellie from Scraperfect.com, I added some pearl accents to the frame and then with some foam adhesive lined that up with the oval on the wallpaper.  I decided to leave this card sentiment free so that it could be used for just about any occasion.

Be sure to come back everyday this week to see some more projects from the Design Team using the great products from Scraperfect.com!

Tuesday, July 16, 2013

A Crafty Experiment

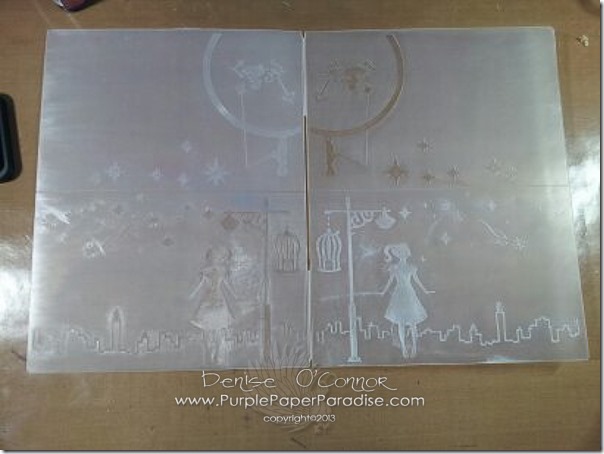
Today’s post is different than most of my posts.  If you have been following me for awhile then you know that I experiment a lot.  I am always willing to try new things.  I thought it might be kind of neat to show you one of my experiments…the good, the bad, and the ugly.  This month our sponsor Scraperfect.com sent each of us a few products to use and last week I focused on the Perfect Crafting Pouch and the Embellie Gellie.  This week I wanted to focus my post on one of their other products, the Best Ever Cleaner.  Why would I want to focus my entire post on a cleaning product? Well because it is awesome, that’s why!  It is a new staple in my crafting supplies, and I am about to show you why.  Warning…there are a lot of pics ahead!
20130711-1373572743612

To get started, I pulled out one of my Craftwell embossing folders (Whimsical Wishes).  I picked this one because there is a lot of blank space which works best for the technique.  I started out grabbing an Archival Ink Pad by Ranger.  This ink is waterproof.  Which means when I use it, I cannot clean it with water.  The advantage to this type of ink is that if you spraying anything on it (as you will see later) the ink will not bleed or wick.  It will stay in place and be as clean as it was to begin with.  The other cool thing about this ink is that when you apply it to an embossing folder, it will stay wet for awhile, so you don’t have to rush to do your embossing.  So to start, I used a brayer to apply the ink to the embossing folder.  I added ink to diagonal sides so that the ink is on the inside of the card as well.
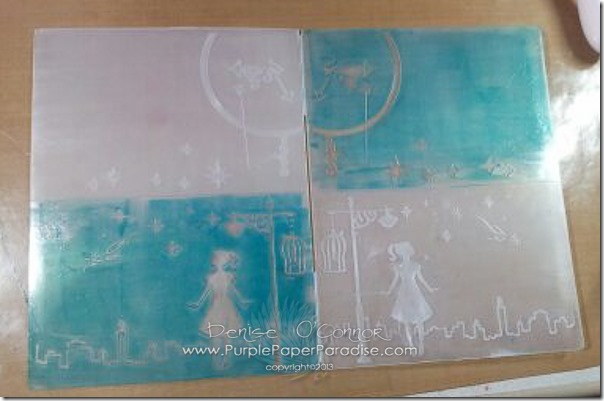
20130711-1373572946503

After that I grabbed another ink (this time a darker color) and using a stamp, I stamped directly on the folder.  This is where “the ugly” comes in.  I realized that this stamp is defective as I could not get a clean impression…uggghh!  But in spite of this the experiment continues.  Now when stamping on an already inked folder, you have to be VERY careful.  The folder is slick and if you lose your grip on the stamp block, the stamp will smudge.  I think that next time I will use a stamping press to see if that will make this process less nerve wracking.
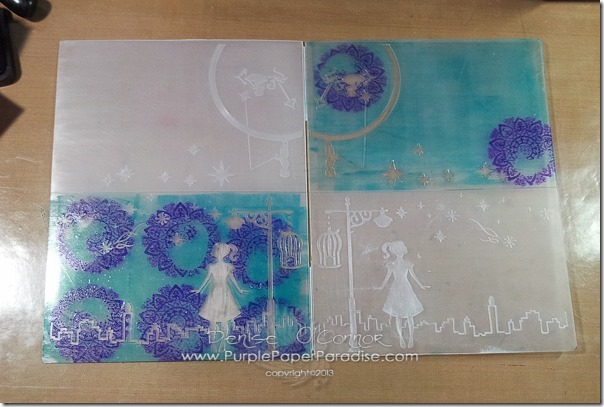
20130711-20130711_150235

Next I added a light colored cardstock into the folder and folded it over.  Here you will get an idea of what your card will look like.  Now it is eBosser time!
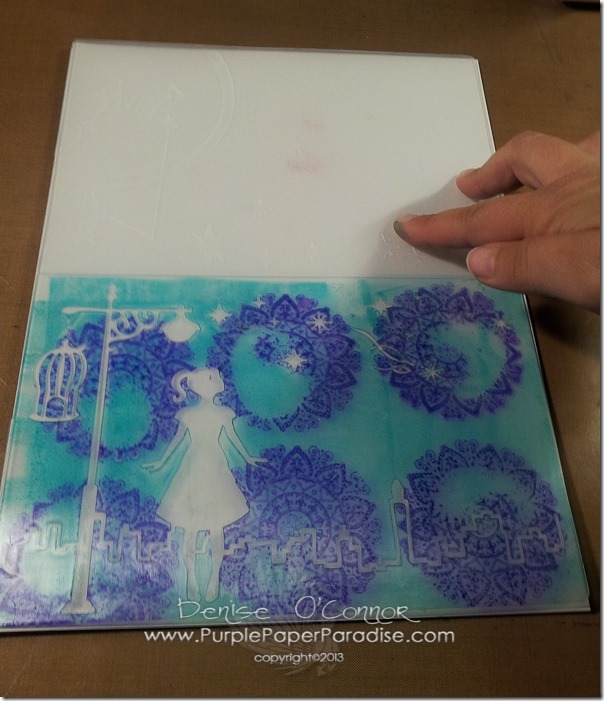
20130711-20130711_150310

And here we have the card after embossing…pretty cool look even with the bad stamp.  But I am not done with it.  Before I move on though, I need to turn my attention back to the folder.  Here is what it looks like after the embossing.
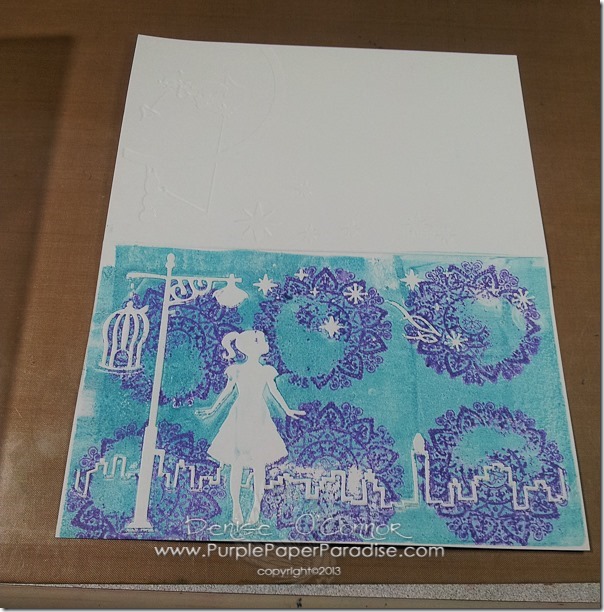
20130711-20130711_150429

Time to crack open the Best Ever Cleaner!  Spritz away right on the ink.  You can actually see the ink start to swirl around.
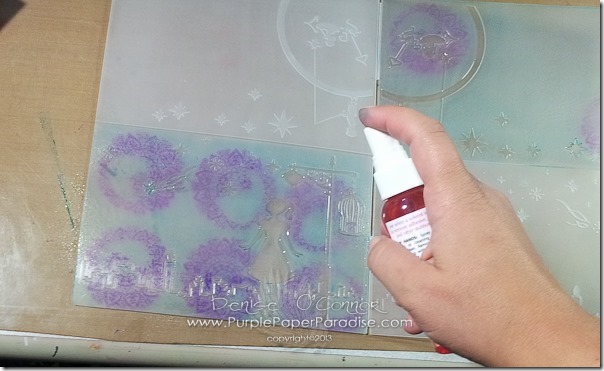
20130711-20130711_150531

Wipe the folder clean and then I also spritzed some water on it and wiped it down again.  You could also use a baby wipe.  And here we have a perfectly clean embossing folder….
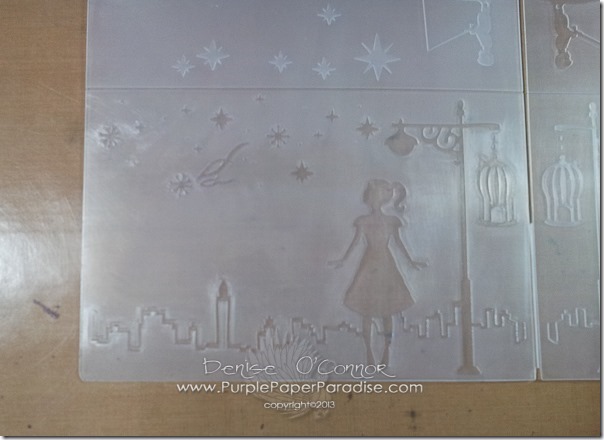
20130711-20130711_150706

If you have ever tried to clean any kind of waterproof ink off of an embossing folder before, then you know how difficult this can be.  On top of that, the odor of some cleaners is horrendous.  There is a smell to this cleaner, but it is not in any way offensive, so another big plus!


Moving back to the card, I decided to do a little more experimenting. (Disclaimer Alert…normally when I do something like this I will tape off the area that I want to make sure stay clean like the back of the card, since I already knew that this is not a card I am going to give someone, I didn’t bother.) I got out a Distress Ink pad and sponged on some ink especially focusing on those areas where there wasn’t enough coverage from the Archival Ink.  I wish on this step that I used a color that was more contrasting like a yellow because I don’t love how the dark blue ink detracted from the embossing.  Another lesson learned.  I also used my Black Archival Ink to stamp my sentiment in the non-embossed space.
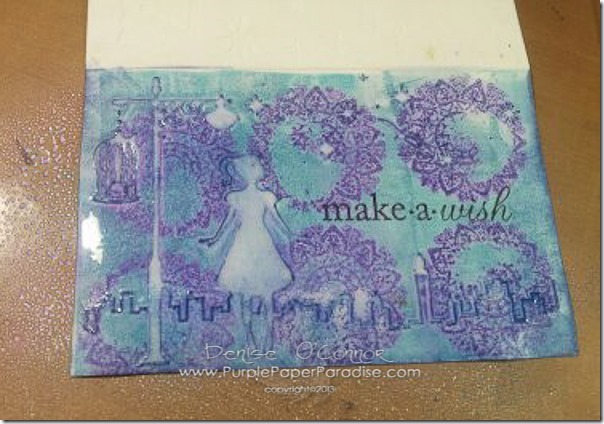
20130711-1373573924030-2

Next I decided to heavily spritz the card with three colors of Perfect Pearls Sprays to add a shimmer to the card and also to get that Distress Ink to blend in a little better.  Here is the card as it is wet and you can see how that Archival Ink completely holds up under all of the spray.
20130711-1373574672684

After drying the card, this is what I was left with….not the best I know, but I sure learned a lot.  Next week, I am going to do a project using this technique so you can see how this entire project would look like if I did it the right way!  I will also be incorporating the Perfect Crafting Pouch and the Embellie Gellie along with the Best Ever Cleaner.  Hope you all enjoyed my experimental post today!  Please let me know if you would like to see more posts like this.

Tuesday, July 9, 2013

A Happy Discovery


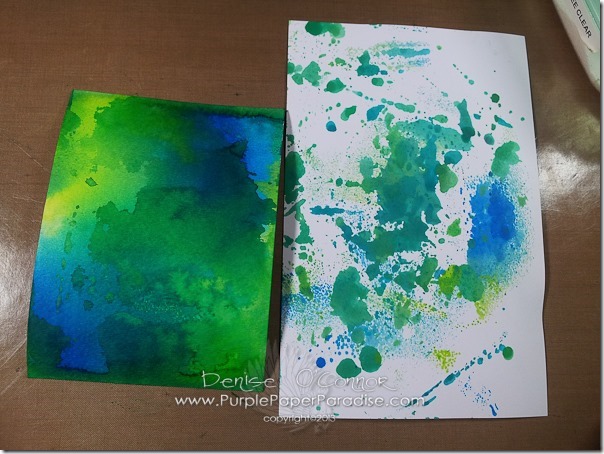
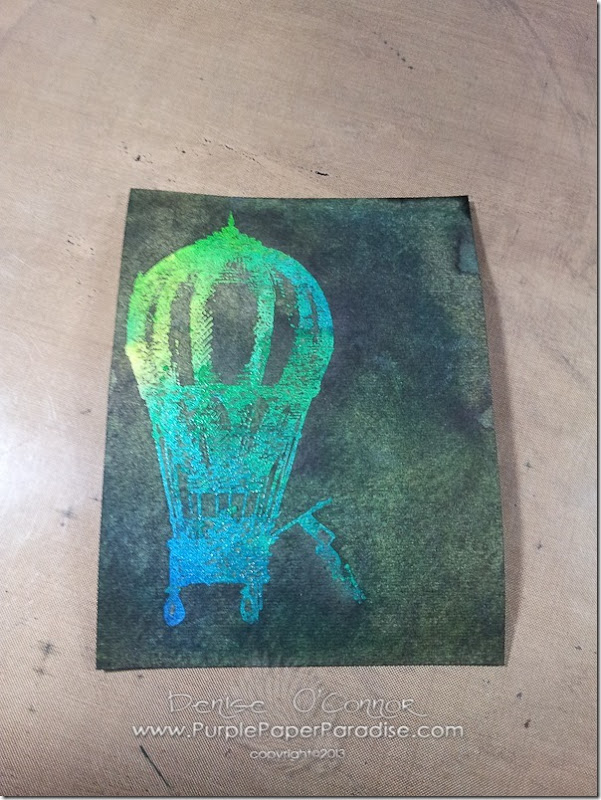
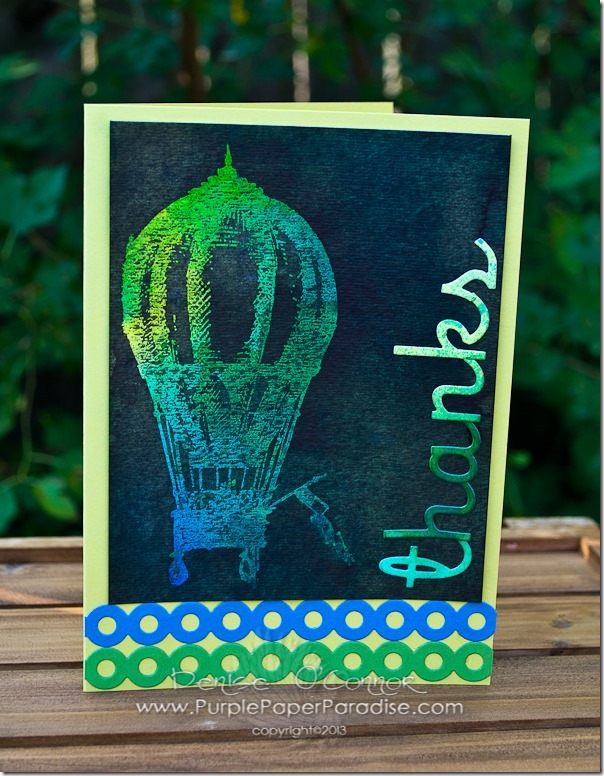
I’m sure that somewhere, someone has done this before, but I haven’t seen it before.  So I decided that I would explore and see if it would work.  It just so happened that since our sponsor this month is Scraperfect.com and they had sent me three products to try out and one of them is the Perfect Crafting Pouch which is just perfect for this technique which for lack of a better term I will call Spray Ink Emboss Resist.  If you love working with spray inks, then you will love this technique.  Let’s get started.  The first thing to do is create your background.  I used some spray inks on some watercolor paper.  Next to the background you will see my blotting paper.  This is simply a piece of paper that I blot excess ink up with.  I ended up using this later.

20130630-20130630_102757

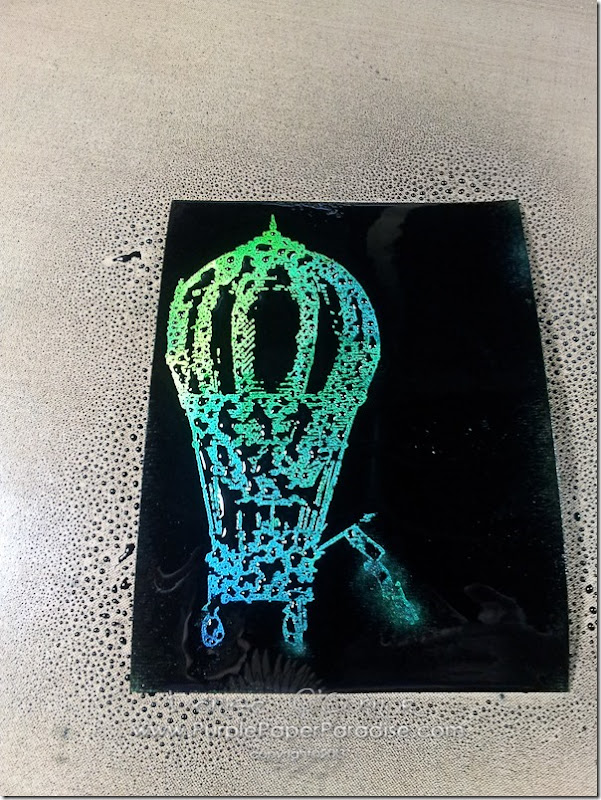
Next step was to rub the entire surface of the paper with the Perfect Crafting Pouch.  This is going to put a light film of anti-static powder on the surface.  Then I stamped my image (from Tim Holtz Remnants stamp set) with Versamark and applied clear embossing powder.  Then I heated the image until all of the embossing powder was melted.  I didn’t get any pictures of this process because time is an issue and I was using a large stamp.  This stamp was perfect to test the Perfect Crafting Pouch because it is very detailed and after the embossing, I truly cannot see any stray embossing powder anywhere.


Now, I added some black (you could use any dark color) spray ink…

20130630-20130630_103403

Pretty cool looking isn’t it?  I let the black ink sit and soak into the paper a bit and then blotted it off and this is what I had.

20130630-20130630_103527

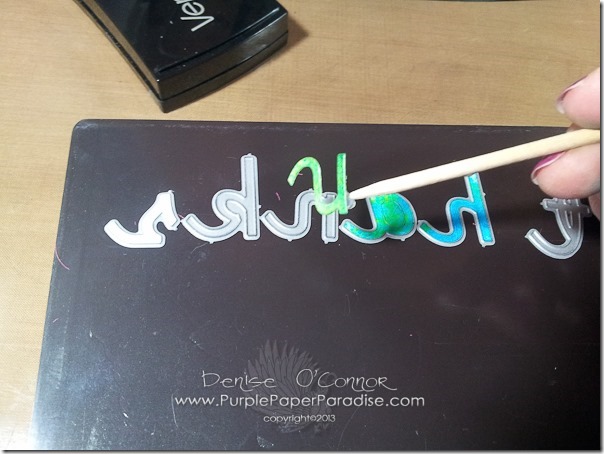
I loved that look, almost like a chalkboard.  I decided that I wanted to get it darker though so I added another coat of the black and again let it sit.  While that was sitting, I took my blotting paper from the background and added some more ink to it and used that paper to cut out my sentiment using some Papertrey Ink alphabet dies and of course the amazing eBosser. You have just got to love the magnetic shim when cutting letters like this! This was also the perfect time to try out another Scrapperfect.com’s Embellie Gellie.  This little wonder helped me remove the die cuts from the dies…love that!

20130630-20130630_104825

I also used it to help me apply some liquid adhesive and set it in place on my card.  By this time, I had blotted off that black ink from my background and had let it dry a little.  Here is the end result of the Spray Ink Emboss Resist.  I personally loved doing this and I think you will see me do it more and more in the future.

20130705-DSC_0137

Related Posts Plugin for WordPress, Blogger...