Friday, December 28, 2012

A Birthday Card


I apologize….this was supposed to be posted a few days ago.


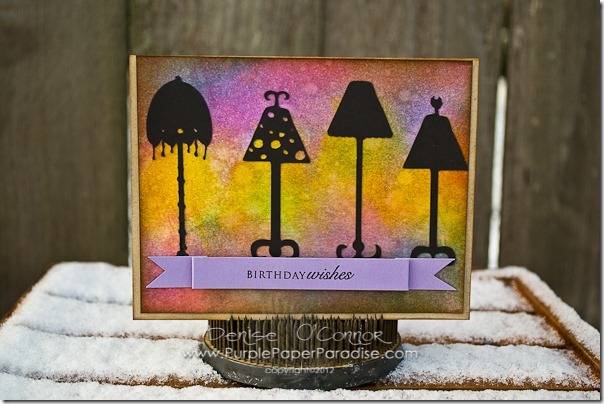
Merry Christmas to all of you!  Or Happy Hanukkah!  Or Happy Kwanzaa!  I wish health and happiness for all of you and your families this holiday season.  Since my family and I celebrate Christmas, I thought that for my post today, I would share with you a birthday card.  After all, Christmas is Jesus Christ’s birthday.  I chose to make a birthday card that could be used all times of the year.  This card is so versatile, it could really be used for anyone.  A good thing to keep in mind especially if you are tasked with making a birthday card for someone who you don’t know all that well.

20121221-DSC_0001

I used several colors of Distress Inks to ink up my background with my ink blending tool.  I then used THIS file from eCraftCentral.com 

image

Cutting this on the eCraft was quick and easy as always!  After cutting these lamps out, I placed them on my background paper and then marked with a pencil the angle of the shades so that I could add in some yellow ink to mimic the glow of the lamps.

Add the banner shape folded back and held in place with foam adhesive, and we are all set.

Happy Holidays!!

Monday, December 17, 2012

Simple Christmas Card


The rush is on!  At this point, most of us have our Christmas cards done and out the door.  However, some of us might not be quite done or maybe we forgot a few people.   Now is the time for simple, simple, and simple.  Today’s card is just that!  I put this baby together in about 5 minutes.

20121213-DSC_0001

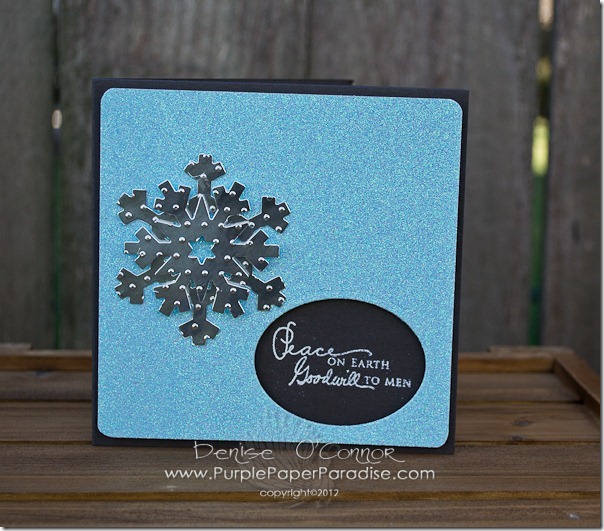
To start, I cut my card base from Papertrey Ink Smoky Shadow cardstock and then I cut a layer of American Crafts glitter paper.  I then rounded the corners and used a Spellbinders oval die to cut a window in the corner.  I then placed the layer on the card base and using heat embossed the sentiment from PTI’s Signature Christmas stamp set in the window.  Then I adhered the layer with foam adhesive and added the snowflakes that were cut with some Spellbinders dies out of Worldwin’s gorgeous foil paper.


That is it for me today…hope you get all of your crafty Christmas projects done in time!

Tuesday, December 11, 2012

Christmas Rustica


Hope all of you are enjoying the holiday season!  We are two weeks away from Christmas Eve which means that it is mad dash crafting time!  Today I am going to share with you my third card in my clean, simple, and easy Christmas cards.  For this card, I wanted to do something that was a bit rustic, so here is what I came up with.
20121128-DSC_0017
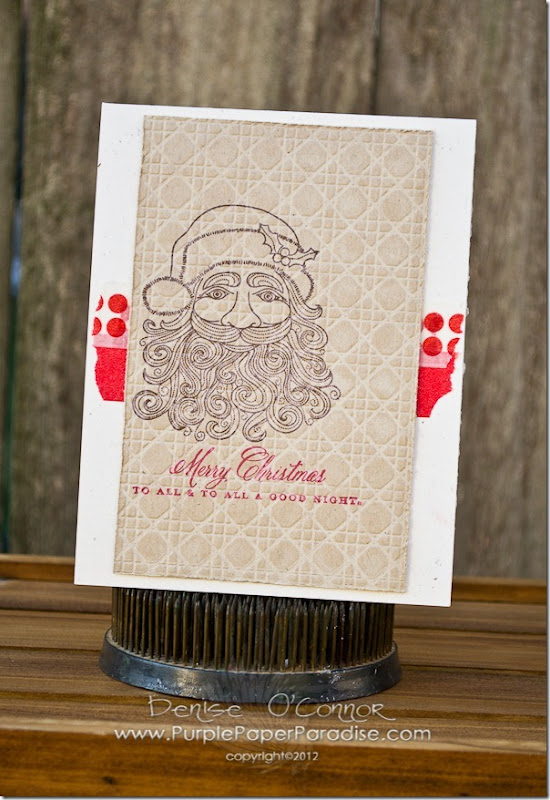
This card is probably the easiest one yet.  My eBosser helped me to achieve a very subtle yet effective look for this card.  I started with a piece of Kraft cardstock and then I stamped the Santa image from Papertrey Ink’s Santa Stationary stamp set in brown ink slightly off center.  I then stamped the sentiment from the same set in red.

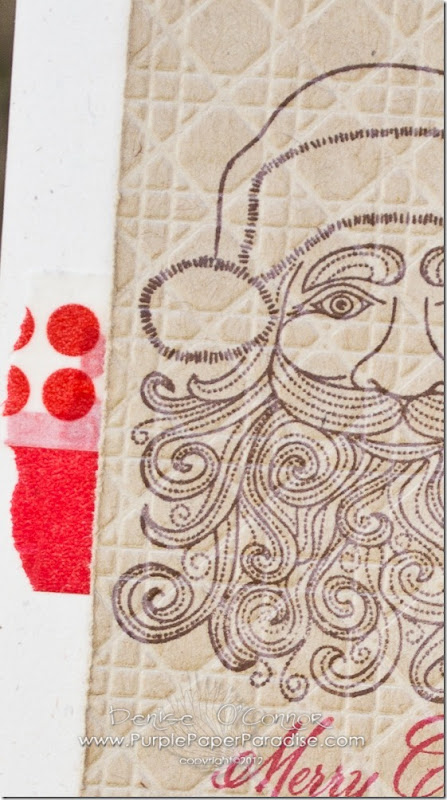
Now, it is eBosser time.  I took the Cane Print Impression Plate from PTI and I inked it up with some Vintage Cream ink and ran it through the eBosser.  If you want to learn how to work with this impression plate as well other various products, you can check out my video HERE.
20121128-DSC_0017-2
By inking the impression plate before running it through, it gives the kraft paper a nice chalky like finish to it and because I did all of my stamping before running it through, I still have nice clean stamped images. I also added to the rustic look by distressing the edges of this panel. To finish off the card, I adhered a few strips of washi tape from Target onto my Rustic Cream card base and then using the Thin 3D foam square from 3L Scrapbooking Adhesives.  By using this thinner foam adhesive, I still get some nice dimension to the card, but I can still fit it nicely into a standard envelope.  I have not weighed this card, but I am sure that I would not be charged any additional postage which is nice when you may have several of these to send out.

That’s it for me today!  Hope you all have a wonderful week!

Monday, December 3, 2012

This card was SO quick!


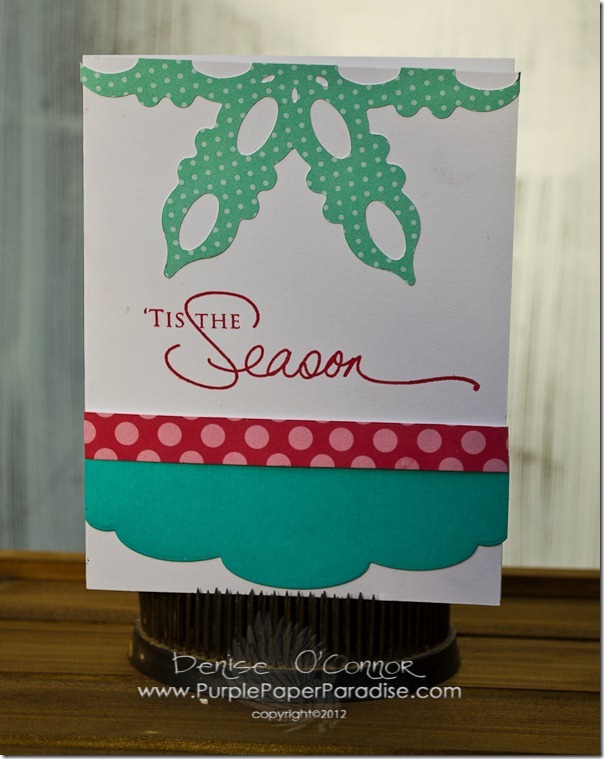
So in my quest to make clean, simple and fast cards, I could not resist using some of the great snowflakes that are included on the Jen Allyson Celebrates eCraft SD Design Card.  Of course, I have to do it a little different.

20121114-DSC_0091

First thing that I did was cut the snowflake at 5” in my eCraft using a pressure setting of 4 with a veggie mat stabilizer.  Then using my paper trimmer, I cut the snowflake in half.   I also cut some Papertrey Ink Hawaiian Shores cardstock with their Edgers #3 dies and then a simple strip of Pure Poppy Large Dot patterned paper.  The large sentiment from Think big Favorites stamped in red ink ties the whole card together.


This card came together so quickly, that you could make several of these in no time flat!  Hope all is going well with your Christmas crafts!  Please share what you are working on and what kinds of special crafts you do for the Christmas season!

Related Posts Plugin for WordPress, Blogger...