Monday, June 25, 2012

Sweetly Chic Birthday


Ever since my son got out of school for the summer, it seems like I have less and less time for crafting!  I’m sure all moms feel that way, and although I love my crafting, I so enjoy having my boys with me and doing all sorts of fun things with them.  Right before school let out, I realized that I was running low on birthday cards, so I have had birthdays on the brain lately and have been making some birthday cards to replenish my stash.


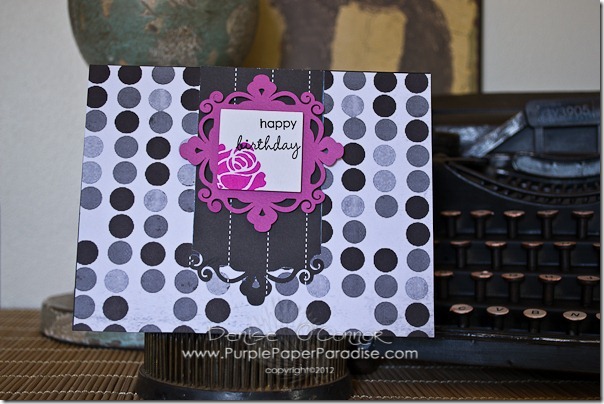
When I saw the Sweetly Chic collection from Glimpses by Signify Pink, I knew exactly what I wanted to do.  Now, this collection offers a lot of wedding and anniversary themed embellishments, but the paper is all in black, white and gray so that means you can do almost anything with it.  Since I don’t have any wedding or anniversary occasions coming up that require a card, I decided to make a birthday card with it to fill up my stash.  Since the papers are all black, white and gray, I knew that I wanted to add a pop of a a bright color.


20120612-DSC_0006-1


I decided to use an older collection of SVG files from Lettering Delights called Deliliah Tags.  The first thing I did was take “tag2” and place it on my mat in Make the Cut.  Then I created the part that I cut out of a black pinstripe by using the Boolean Join feature.  To create it all I needed was another”tag2” bottom layer only and a rectangle to get this pretty tag with the decorative bottom edge.  I cut that out of the Sweetly Chic paper and the original tag from eCraft Diecutable Cardstock in Bubble Gum and White Flour using my trusty purple eCraft of course.


Once all my cutting was done, I stamped the rose image on my white square in Archival Magenta Hue ink.  This stamp is from Papertrey Ink Rosie Posie stamp set and then I stamped the sentiment (from Papertrey Ink Tag-its #10) in black.


Before putting it all together, I added the polka dot paper so that it completely filled up my card front.  Love this paper!  Now, if you would like to get your hands on some Sweetly Chic (or any of the Glimpses by Signify Pink paper) RUN because they are selling out their stock of these collections and once they are gone….they are gone!!!!  If you are a wholesaler, you can purchase from HERE


I hope all of you have a great week, but before I go….I have a question for all of you.


Am I the only one that is busting out of my seams with excitement that the eBosser is almost here????  We are almost in July and that means the eBosser is right around the corner!!!  Can’t wait!  Be sure to check in at the Craftwell blog often to get more sneak peeks and info about the eBosser!

Monday, June 18, 2012

Americana Project for the eCraft Design Team!


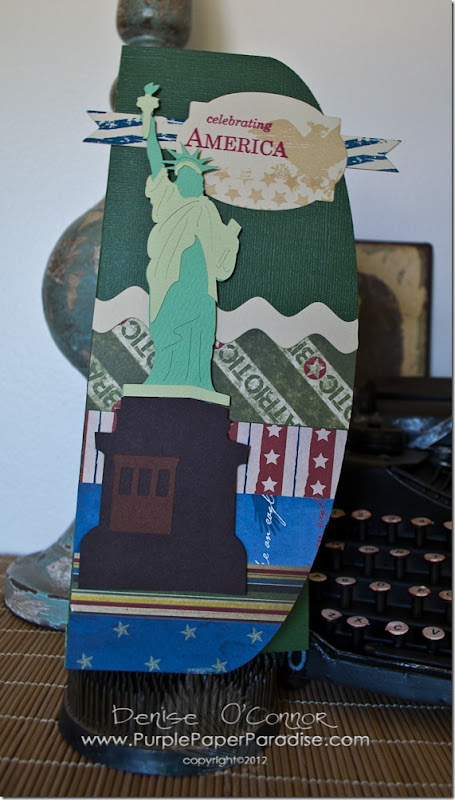
Well the 4th of July is right around the corner!  I love this holiday! When I saw the Pages of Honor collection from Glimpses by Signify Pink, I just knew that I had to make something inspired by America with it.  Somewhere deep in the recesses of my brain, I remembered seeing a Statue of Liberty SVG file so I went searching.


Sure enough, I came across it.  It was a freebie from SVGCuts.com from two years ago (you can find the file HERE)

20120612-DSC_0004-1

My first step in making this card was to cut out a card from Core’dinations cardstock.  I used the Card G set from Lettering Delights which gives me a final card size of 9 1/2” tall by 4 1/8” wide.  Perfect size so that I can really highlight the tall, stately look of Lady Liberty!  I added strips of the Pages of Honor collection to the curved front flap in various widths.  After adding those strips, I topped it off with a ric rac broder and added the Statue of Liberty on top of that.  I then remembered a stamp set that I bought over a year ago that was just perfect to add to this and that is from Papertrey Ink and it is called est. 1776.  I made a banner and stamped the distressed waves from that set in dark blue ink.  Then I die cut a Fillable Frames #10 die cut (from Papertrey Ink) and did some collage stamping.  Using a tone on tone look, I stamped some background images from the same stamp set (the eagle and the stars) and then topped it off with the sentiment in red ink.


I have to tell you that even though I had quite a few eCraft die cuts, they came together so quick.  Since I don’t have to adhere the paper to a sticky mat, I was able to get my cuts done quickly so that I could put the card together.  I love not wasting my crafty time, don’t you?


Now, I know that not all eCrafters are American, we have quite a few International friends and I would love to learn more about how you celebrate or honor your country in your paper crafting adventures, so please leave a comment and share with me!

If you are American and would like to get your hands on this Pages of Honor collection (which is gorgeous!), you better hurry up!  You can go to the Signify Pink website HERE because they are selling out their stock and once it is gone, it is gone!  If you are a wholesaler, you can purchase from HERE!

Friday, June 15, 2012

WooHoo! eBosser Sneak Peak!!


Well, finally we get to see the eBosser in action and now I am even more excited to get this baby!!!  Be sure to check back here for all the latest eBosser news!


Monday, June 11, 2012

Maximize your eCraft Cuts!


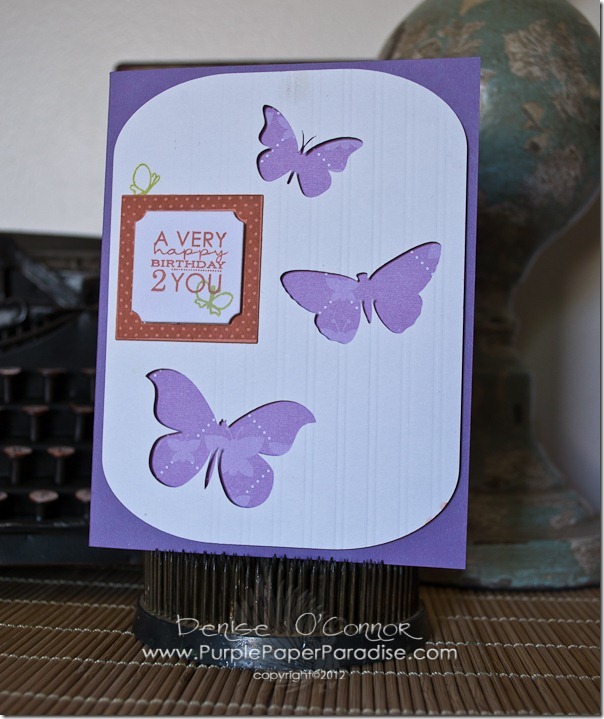
Today, I thought I would show you a quick and easy way to maximize your die cuts. As you all should know by now, the eCraft is eco-friendly.  There are no sticky mats that need to be replaced, so that not only saves you money, but it saves our landfills.  If you are a paper hoarder like me, you don’t like to waste any paper.  Using the Spring Fling collection from Glimpses by Signify Pink, I created 3 cards using the same cuts on two sheets of paper.


Using Make the Cut, I created the following using MTC’s basic shapes (Rounded Rectangle) and some butterflies from Lettering Delights (Oh Hello Flutter and Mother’s Day Album).  The butterflies were joined with the rounded rectangle and the plain rounded rectangle is an inset shadow of the other rounded rectangle to make it easier for layering.

image

I cut this out of a butterfly patterned paper from Spring Fling and also from a piece of White Flour eCraft Diecutable Cardstock.


20120605-DSC_0004-1

On my first card, I used the Simple Stripes impression plate from Papertrey Ink on the white layer after I stamped the little butterfly from PTI’s Sweet Spring Stamp Set.  The frame and the sentiments were from the Framed Out #1 stamp set from PTI with the coordinating dies.  By laying the white layer on top of the the patterned layer with dimensional foam adhesive, I created a really nice effect.

Other Supplies Used:

Melon Berry cardstock from Papertrey Ink (just a scrap to cut the frame)

Melon Berry Ink from Papertrey Ink

Spring Moss Ink from Papertrey Ink

Winter Wisteria Cardstock from Papertrey Ink (card base)

20120605-DSC_0006-1

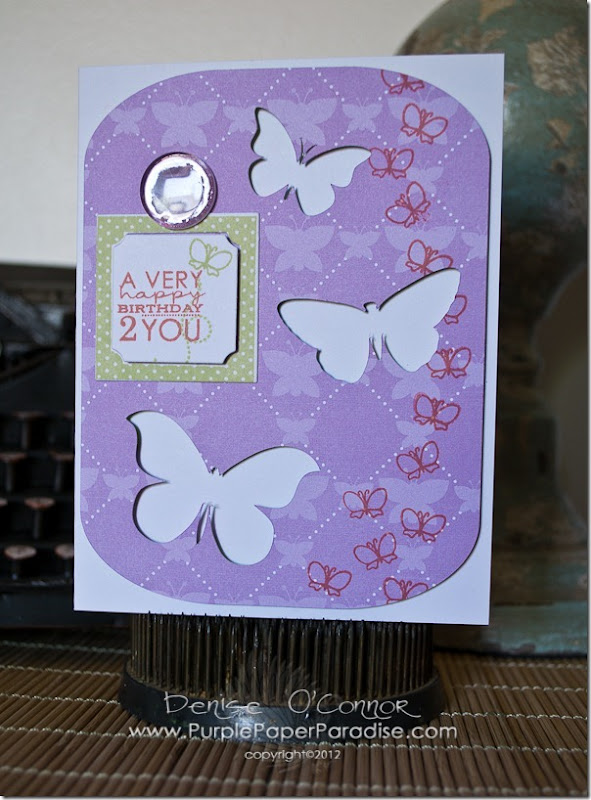
On the second card, I used many of the exact same stamps from the first card.  This time, I layered the patterned layer with the cut out butterflies on a white card base and stamped a trail of butterflies on top.  You might notice that there is a bit of glare (LOL!) on top of the sentiment frame.  That is actually a coordinating epoxy sticker from the Spring Fling collection from Glimpses by Signify Pink.  There is such a nice shine on these, that they just would not photograph well!


Other Supplies Used:

White cardstock (card base and some scraps for the frames)

Melon berry Ink from Papertrey Ink

Spring Moss Ink from Papertrey Ink


20120605-DSC_0008-1

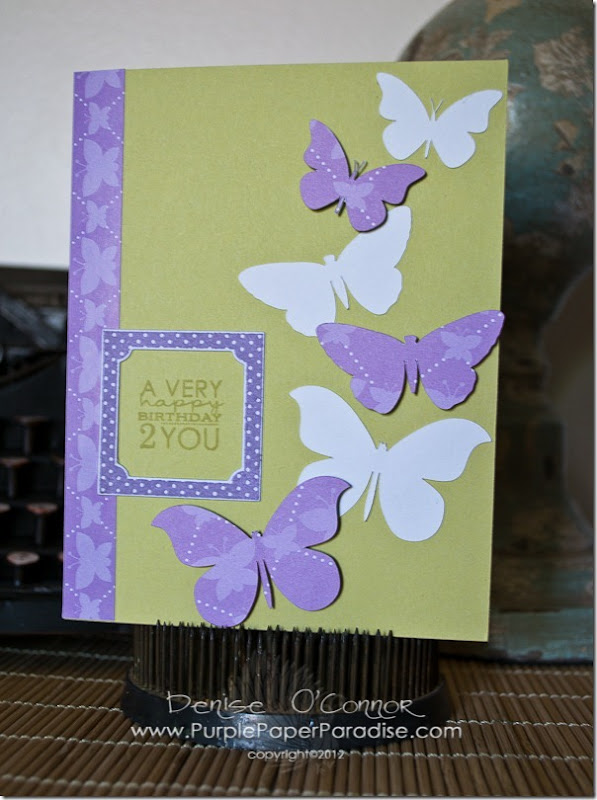
My last card, takes all those left over butterflies that were cut out and layers them directly on the card base.  I also added one of the Spring Fling border stickers going up the side along with some more frames using the same set from Papertrey Ink.


Other Supplies Used:

White Cardstock (scrap for frame)

Spring Moss Ink from Papertrey Ink

Winter Wisteria Ink from Papertrey Ink

Spring Moss cardstock from Papertrey Ink (card base)


Out of the eCraft cuts that I made, the only one that I did not use was the plain white rounded rectangle (which you know I have saved and will use it soon!).  I got great use out of the patterned paper because I really only used up half a sheet of 12x12 paper.  Easy peasy and very green too!

Monday, June 4, 2012

Summer Flowers that won’t Die!


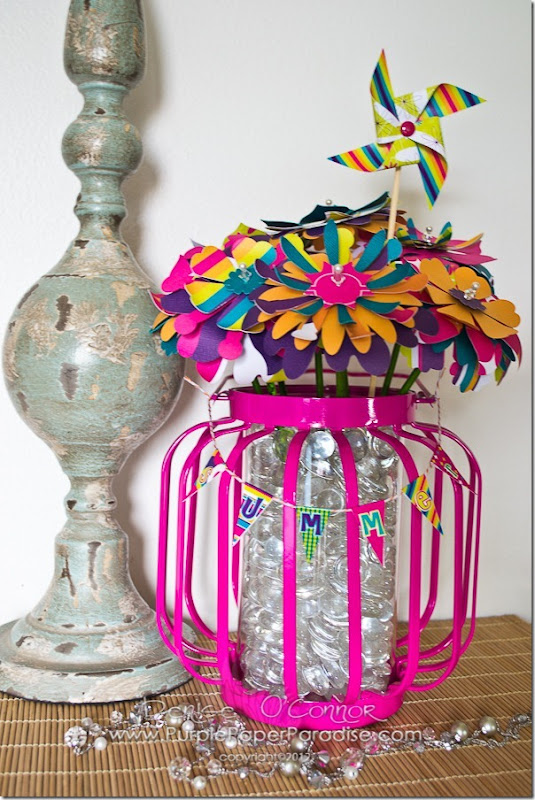
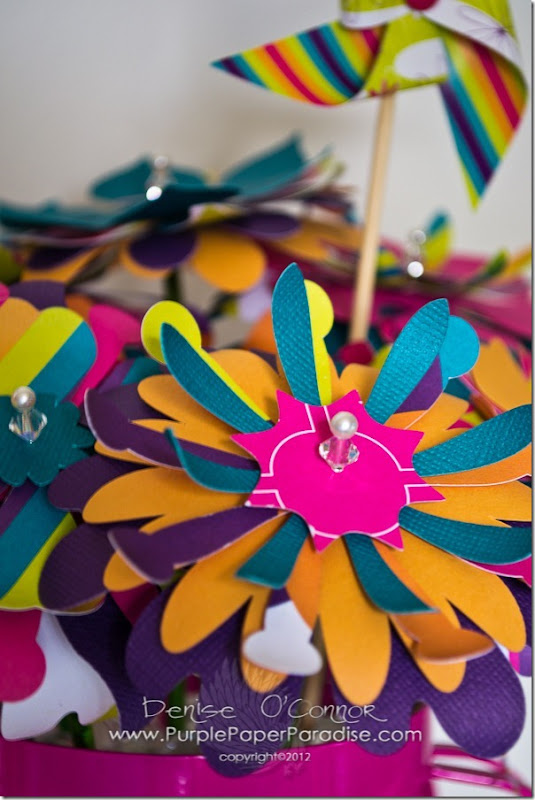
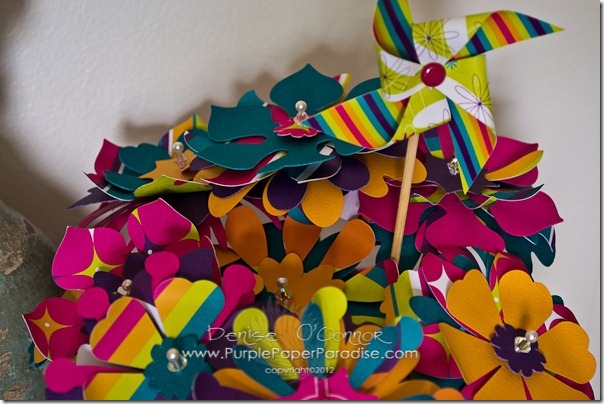
Summer is finally starting to show itself around here and that puts me in a really good mood!  Barbecues, swimming, vacations, and of course…flowers.  I just love to see those pops of color in nature especially after a long drab winter, so I decided to create a beautiful summer bouquet that I can enjoy all summer long as well as in dreary winter.

20120530-DSC_0139-1

My bouquet idea is one that I have been tossing around for awhile, but it finally came to life when Signify Pink sent us some collections from their Glimpses line.  The Life’s A Party collection was absolutely perfect for my idea with the bright beautiful summer colors.


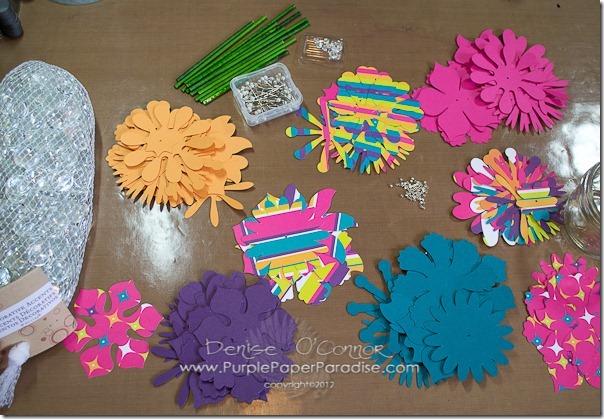
The first thing that I did was go through my cardstock and found colors that matched (or were really close) to the colors in the Glimpses paper.  Then I started to cut my flowers.  I used various petals from the Sherri Cut Flower Bundle from Lettering Delights. Cutting all of these flowers is a breeze with the eCraft using the tray feature.  Just love doing that for mass production!


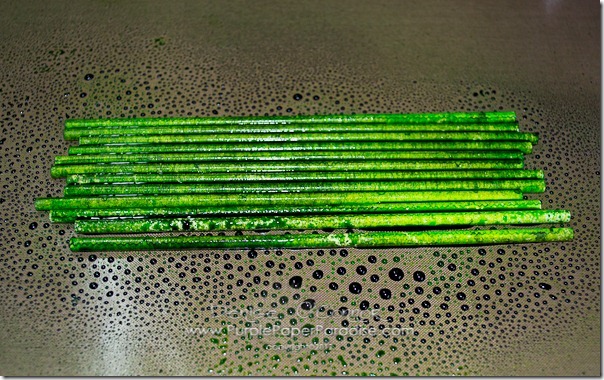
While my flowers were cutting, I had to figure out exactly how I was going to assemble my flowers.  Going through all my supplies, I came across some lollipop sticks that I had used last fall for my Cheater Cake Pops.  I pulled out some of them and some of my spray inks (Adirondack Color Wash in Meadow and Dylusions in Cut Grass and Fresh Lime) and sprayed them up.

20120528-DSC_0117-1

Since these lollipop sticks are paper, they soak up the ink easily and after I sprayed I just rolled each one through the ink that puddled up on my craft sheet and then set them off the side to dry.  I then gathered my other supplies (pearlized pins, small crystals beads, and small silver toned beads, and some liquid adhesive).

20120530-DSC_0129-1

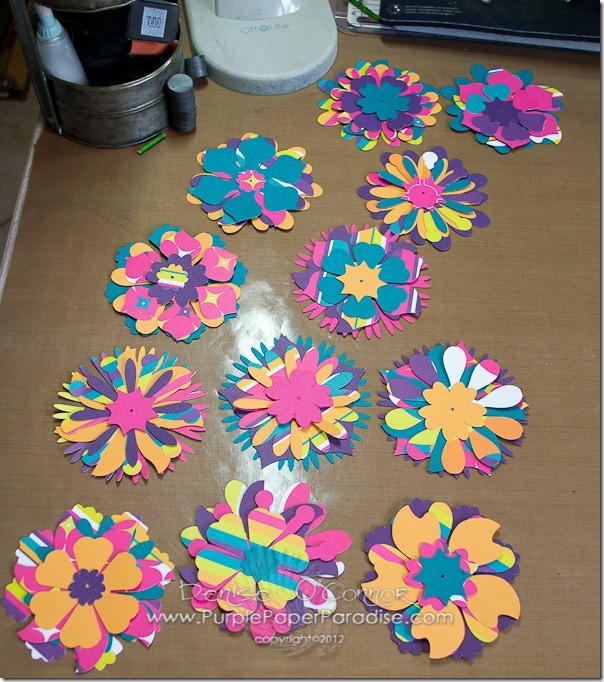
After all my cutting was done (with some done in the patterned paper and some in solid colored cardstock), I set about to pick out my combinations of petals.  After that, I started to bend my petals.  To do that I used a paintbrush handle and treated the petal like I was curling ribbon.  Some of the petals were bent up and some bent down.

20120530-DSC_0130-1

Then I started assembling each flower.  I threaded a crystal onto a pearlized pin and then added the smallest petal.  I then added a small silver bead and then another petal and kept repeating until I was done adding petals.  Then I added a bead of liquid glue to the top of the lollipop stick and then stuck the pin into the lollipop stick.


To complete it, I used a candle holder that I found at Michaels.  I filled it with some glass gems.  I then started to arrange the flowers to my liking.  The gems hold everything in place nicely.  I then added the banner on the front using the coordinating Penant Stickers and Alphabet Stickers from Glimpses by Signify Pink.  Such a nice touch.

20120530-DSC_0142-1

I also added this really cute pinwheel that also coordinates with the Life’s A Party collection from Glimpses by Signify Pink.

20120530-DSC_0145-1


Interested in some Signify Pink goodies?  Better hurry because they are running close out prices right now at (Glimpses by Signify Pink) and if you are a wholesaler there are great deals for you too! (Signify Pink Wholesale)


This is one of those projects that just makes me happy to see everyday!  Happy Summer!

Related Posts Plugin for WordPress, Blogger...